
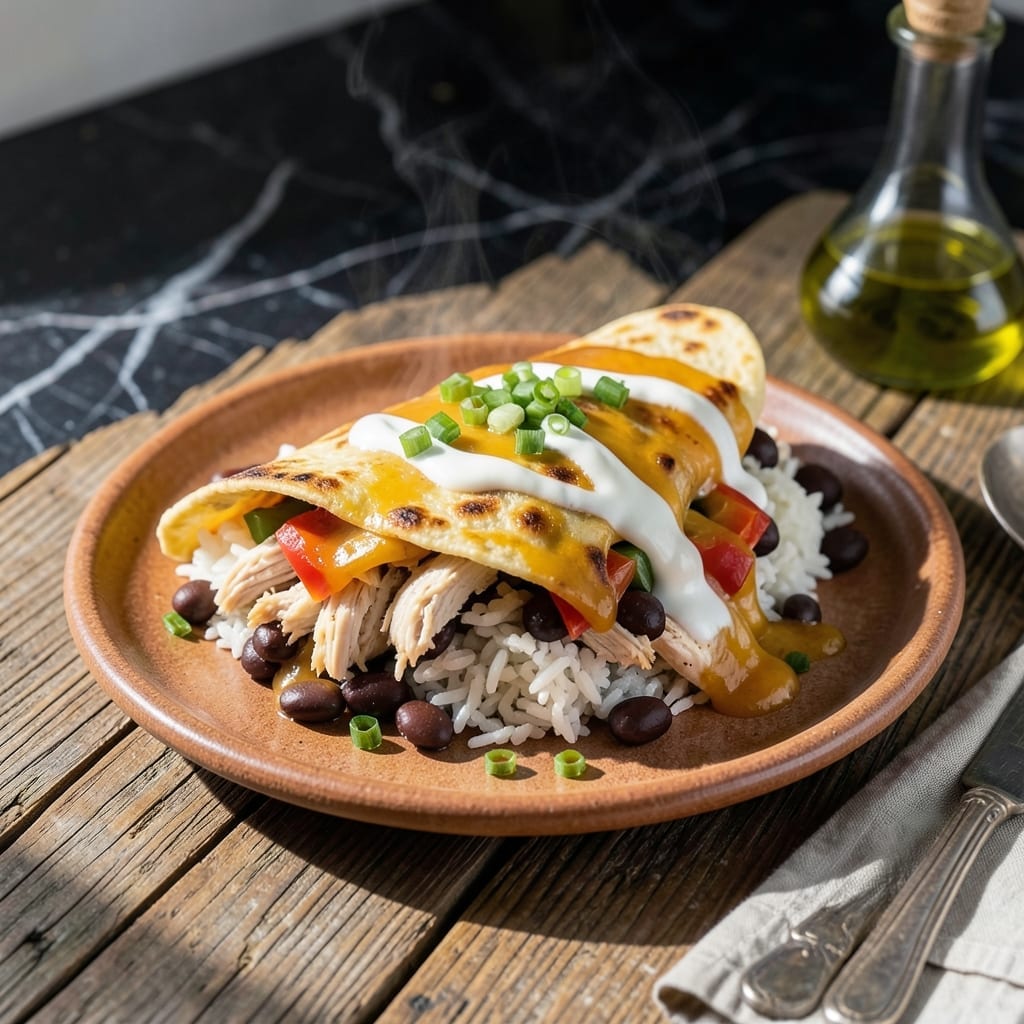
There’s something deeply satisfying about a crispy baked burrito with a gooey, cheesy center that holds together perfectly. I developed this method after too many soggy attempts, and the oven is the secret to achieving that golden exterior.
This approach transforms simple ingredients into a restaurant-quality meal with minimal effort. The filling stays moist while the tortilla becomes beautifully crispy, creating the ideal texture contrast in every bite.
What you get is a handheld meal that’s portable, filling, and packed with flavor. The baking process seals everything together, so there’s no risk of the burrito falling apart as you eat it.
Perfect for meal prep or feeding a crowd. Here’s how to make these burritos right.
Ingredients for Baked Chicken Burrito
Pantry staples plus a few fresh items make these burritos sing with flavor.
| Ingredient | Amount | Notes |
|---|---|---|
| Chicken Breast 🍗 | 1 ½ lb | Boneless, skinless, cooked and shredded |
| Black Beans 🫘 | 1 can | 15 oz, drained and rinsed |
| Cooked White Rice 🍚 | 2 cups | Long-grain or basmati |
| Shredded Cheddar Cheese 🧀 | 2 cups | Sharp or mild variety |
| Flour Tortillas 🌯 | 4 whole | Burrito-size, 10-inch diameter |
| Bell Pepper 🌶️ | 1 whole | Any color, finely diced |
| Yellow Onion 🧅 | 1 whole | Medium-sized, finely diced |
| Garlic Cloves 🧄 | 3 cloves | Minced for filling |
| Taco Seasoning 🌿 | 2 tbsp | Store-bought or homemade blend |
| Salsa 🍅 | ¾ cup | Mild or medium heat |
| Sour Cream 🥛 | ½ cup | Full-fat for creaminess |
| Olive Oil 🫒 | 2 tbsp | For cooking vegetables |
| Salt 🧂 | 1 tsp | Kosher or sea salt |
| Black Pepper 🌶️ | ½ tsp | Freshly ground preferred |
| Fresh Cilantro 🌿 | ¼ cup | Chopped, for garnish |
The tortillas are non-negotiable here. Burrito-size flour tortillas (10-inch) hold everything together without tearing. Mission or Old El Paso brands are reliable—just check the date, stale ones crack. For the chicken, rotisserie chicken from the store saves time (I grab mine from Costco when I’m in a rush), but poaching your own keeps it juicy. The cheddar should be shredded from a block—pre-shredded has anti-caking stuff that makes it melt weird.
Out of black beans? Pinto beans work just as well. No fresh bell pepper? Frozen diced peppers (thawed and drained) get the job done. The taco seasoning can be homemade at one-third the sodium if you’re watching salt. For extra creaminess, swap the sour cream for Greek yogurt. Want heat? Add diced jalapeños or a pinch of cayenne to the filling.
These burritos freeze like a dream. Wrap individually in foil, then bag—good for 3 months. Reheat from frozen in the oven at 375°F for 25-30 minutes. Fresh ones keep 4-5 days in the fridge, but they’re best the first two days when the tortilla’s still crisp.
Why You’ll Love This Recipe
- One Pan Wonder: I just toss the chicken, rice, beans, and cheese in tortillas, bake, and boom—dinner’s ready with barely any cleanup.
- Melted Magic: That gooey cheddar wrapping around the chicken and black beans? It’s the reason my picky nephew finally ate his veggies.
- Weeknight Hero: I prep these Sunday, freeze them, and pop in the oven after work—hot dinner in 25 minutes flat.
- Stretches Far: A pound of chicken, a can of beans, and a bag of rice feeds my whole family for two nights. Honestly, my wallet thanks me.
Step-by-Step Instructions for Baked Chicken Burritos
Here’s the method for achieving that perfectly crispy exterior with a gooey, flavorful center.
Step 1: Sauté Vegetables and Season the Filling
Heat the 2 tablespoons olive oil in a large skillet over medium-high heat. Add the finely diced bell pepper and finely diced yellow onion, cooking for 5-6 minutes until they soften and the edges begin to brown.
Stir in the 3 cloves minced garlic cloves and cook for 30 seconds until fragrant. Add the 1.5 lb cooked and shredded chicken breast, 1 can drained and rinsed black beans, 2 cups cooked white rice, and 2 tablespoons taco seasoning. Cook for 2 minutes, stirring to evenly distribute the spices.
Real talk: this is where the flavor foundation is built. Don’t rush the vegetables—they need to caramelize slightly to develop depth. The chicken should absorb all that seasoning, so mix it thoroughly.
Step 2: Add Moisture and Bind the Filling
Reduce heat to medium and stir in the 0.75 cup salsa and 0.5 cup sour cream. Cook for an additional 2-3 minutes until the mixture is heated through and slightly thickened.
The salsa adds a bright, tangy element while the sour cream creates richness and binds everything together. You want the filling moist but not soupy—it should hold its shape when scooped. Taste and adjust seasoning with the 1 teaspoon salt and 0.5 teaspoon black pepper if needed.
Step 3: Assemble the Burritos
Lay out the 4 burrito-size flour tortillas on a clean surface. Divide the filling evenly among them, placing it slightly below the center of each tortilla. Sprinkle ½ cup shredded cheddar cheese over the filling in each tortilla—this ensures melty goodness in every bite.
Fold the sides of each tortilla inward, then roll tightly from the bottom up, tucking in the filling as you go. Place them seam-side down in a greased baking dish. The tight roll prevents leaks and helps them hold their shape during baking.
Step 4: Bake Until Crispy and Golden
Preheat your oven to 400°F. Once hot, bake the burritos for 15-20 minutes until the tortillas are golden brown and crispy. Halfway through baking, sprinkle the remaining 1 cup shredded cheddar cheese evenly over the top for a beautiful, bubbly finish.
This high heat is critical for achieving that promised crispy exterior. You’ll know they’re done when the tortillas have a firm texture and the cheese is fully melted with some light browning. Let them rest for 5 minutes before serving to set the fillings.
Step 5: Garnish and Serve
Sprinkle the 0.25 cup chopped fresh cilantro over the top just before serving. The fresh herb cuts through the richness and adds a pop of color. Serve immediately while the tortillas are still crispy.
Each bite should deliver that contrast of textures—crispy outside, creamy inside—with layers of savory chicken, smoky beans, and cheesy goodness. The cilantro garnish ties it all together with a bright finish.
Pro Tips For Making Baked Chicken Burrito
- Warm the Tortillas: I learned this the hard way—cold tortillas crack when you fold them. Heat them for 10-15 seconds per side in a dry pan or microwave covered with a damp towel.
- Shred Chicken Hot: After poaching or baking the chicken breast, shred it immediately while warm. It separates easier and absorbs any seasoning or sauce better than when cold.
- Drain the Beans: Skip the rinse if you’re rushed, but always drain the black beans well. Extra liquid makes the filling soggy and can turn your burrito into a mess.
- Seal the Edges: Fold the sides of the tortilla in first, then roll tightly, pressing the final edge down with a little water or egg wash to glue it shut. This keeps them from unraveling in the oven.
Dietary Considerations for This baked chicken burrito
Gluten-Free Option
Swap the flour tortillas for certified gluten-free burrito wraps. I recommend Mission Gluten-Free or Siete almond flour tortillas—they hold up well to baking. Just check they’re labeled 10-inch to match the filling volume.
Dairy-Free Adaptation
Use dairy-free cheddar shreds like Violife or Daiya in the filling and topping. Replace the sour cream with coconut yogurt or a dairy-free alternative. The cheese may not melt as dramatically, but the flavor will still shine. 💛
Lower-Carb Version
For a lighter option, replace the white rice with cauliflower rice. Use low-carb tortillas like La Tortilla Factory—they have 4g net carbs each. The texture will differ slightly, but the flavors remain bold.
Vegetarian Twist
Skip the chicken and double the black beans or add 1.5 cups cooked quinoa for protein. Consider 1 cup sautéed mushrooms for a meaty texture. The taco seasoning and cheese keep it satisfying.
Sodium-Reduced
Use low-sodium taco seasoning or make your own blend. Rinse the black beans thoroughly and opt for no-salt-added salsa. Boost flavor with extra garlic and cilantro instead. 🌿
Allergen Notes
This recipe contains dairy and wheat. For nut allergies, check tortilla labels—some brands use almond flour. The filling itself is nut-free, but always verify ingredient sources to be safe.
Nutrition Facts
Frequently Asked Questions
Can I use rotisserie chicken instead of cooking my own?
Rotisserie chicken saves time and works perfectly. Just shred 1.5 lb of it and mix into the filling as directed. It’s already seasoned, so taste before adding extra salt.
How do I keep the tortillas from tearing when rolling?
Warm the flour tortillas for 10-15 seconds in the microwave first to make them pliable. Don’t overfill—use about 1 cup of filling per burrito. Roll tightly but gently.
Can I make these ahead and refrigerate before baking?
Yes! Assemble the burritos, cover tightly, and refrigerate for up to 24 hours. Add 5-10 minutes to the baking time if cooking straight from the fridge.
What’s the best way to reheat leftovers?
Reheat in the oven at 350°F for 10-12 minutes to restore crispiness. Microwaving works but makes the tortilla soft. Avoid sogginess by skipping extra toppings until serving.

- Jollof Rice Sauce Recipe: West African Tomato and Spice Infusion - September 25, 2026
- Japanese Rice Soup Recipe: Umami-Rich Comfort in a Bowl - September 25, 2026
- Homemade Cream Of Rice Recipe: Silk-Smooth Breakfast in Minutes - September 25, 2026