
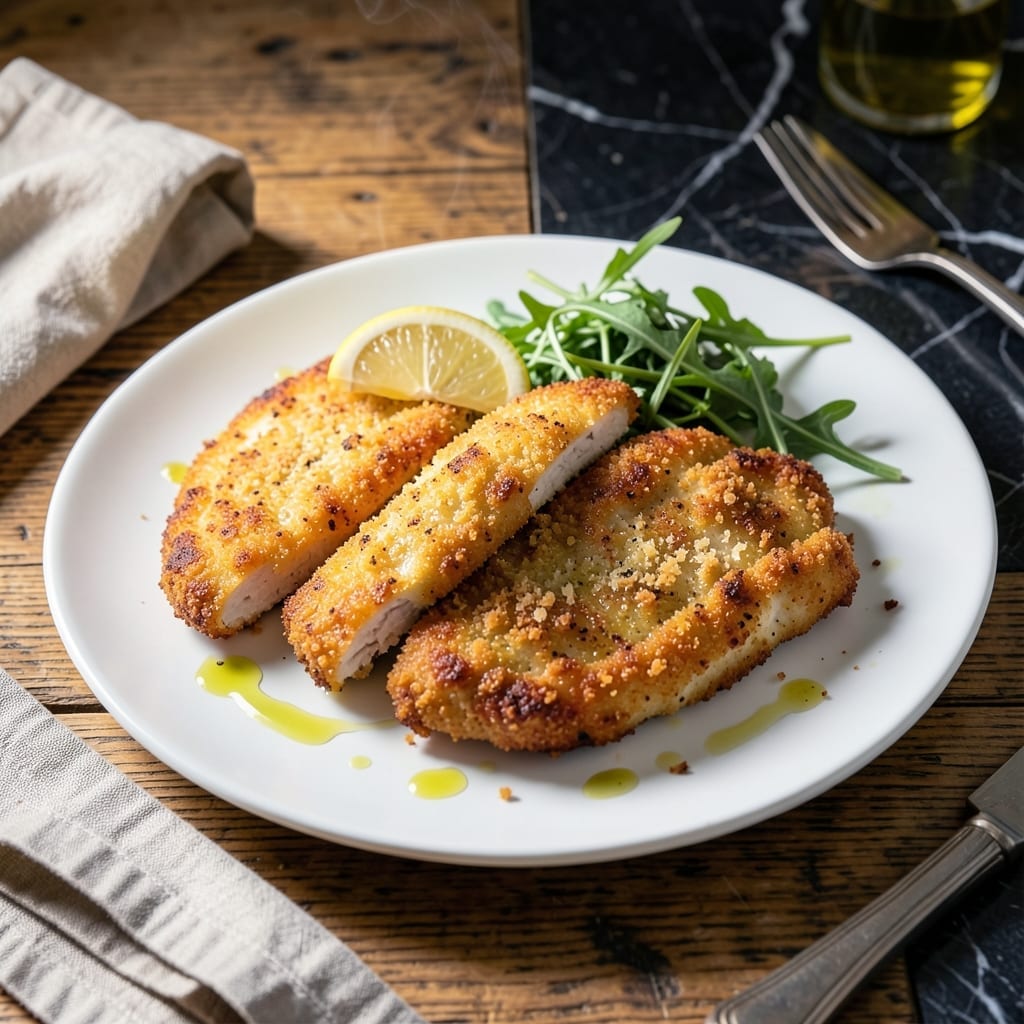
There’s a simple way to achieve perfectly crispy chicken cutlets without frying—just your oven and a smart breading technique. This method guarantees golden, crunchy results every time with minimal effort.
I’ve refined this approach to use a parmesan-infused coating that bakes to a golden brown finish. The secret is pressing the breading firmly onto each cutlet before baking at high heat for maximum crispiness.
What you’ll get is juicy chicken with a shatteringly crisp exterior, all made with basic pantry staples. The parmesan adds depth while keeping the texture light and airy.
Serve with lemon wedges or a fresh salad for a meal that feels restaurant-worthy but comes together in under an hour.
Ingredients for Baked Chicken Cutlets
Pantry staples plus chicken and cheese. Nothing fancy, just crispy perfection.
| Ingredient | Amount | Notes |
|---|---|---|
| Chicken Breast 🍗 | 1 ½ lb | Boneless, skinless, pounded to 1/4-inch thickness |
| All-Purpose Flour 🌾 | ½ cup | For initial dredging |
| Large Eggs 🥚 | 2 whole | Lightly beaten for binding |
| Panko Breadcrumbs 🍞 | 1 ½ cups | Japanese-style for extra crispiness |
| Parmesan Cheese 🧀 | ¾ cup | Freshly grated from block |
| Garlic Powder 🧄 | 1 tsp | For savory depth in coating |
| Onion Powder 🧅 | 1 tsp | Complements the garlic flavor |
| Dried Oregano 🌿 | 1 tsp | Adds Italian herb notes |
| Salt 🧂 | 1 tsp | Kosher or sea salt preferred |
| Black Pepper 🌶️ | ½ tsp | Freshly ground for best flavor |
| Olive Oil 🫒 | 3 tbsp | Divided for greasing and drizzling |
| Paprika 🌶️ | ½ tsp | For color and subtle smokiness |
| Lemon Wedges 🍋 | 4 pieces | For serving and brightness |
The chicken is the foundation here. Boneless, skinless breasts work best—pound them to an even thickness so they cook evenly. I grab mine from Whole Foods or Costco for quality and price. The Parmesan needs to be freshly grated (pre-shredded gets gummy and doesn’t melt right). For the breadcrumbs, Panko is non-negotiable—it gives that restaurant-level crunch.
No Panko? Regular breadcrumbs in a pinch, but the texture won’t be as crisp. Out of Parmesan? Pecorino Romano works too (it’s saltier, so go light). The spices can be swapped—smoked paprika adds a nice depth. Eggs can be replaced with buttermilk or Greek yogurt for binding, but eggs give the best crust. Whatever you do, don’t skip the pounding step—even thickness is key.
Prep everything before you start breading—the process moves fast. Store raw chicken in the fridge for up to 2 days, or freeze for 9 months. Leftovers keep 3-4 days refrigerated and reheat well in the oven (microwave makes them soggy).
Why You’ll Love This Recipe
- One Pan Wonder: I just toss the breaded cutlets on a sheet pan and let the oven do the work—no splattering, no mess.
- Crispy Perfection: That panko-parmesan crust gives it a crunch that’ll make you forget it’s baked, not fried.
- Weeknight Hero: Between us, this is my go-to for busy Tuesdays and lazy Sundays alike.
- Leftovers Win: Honestly, these reheat so well I pack them for lunch the next day without hesitation.
Step-by-Step Instructions for Baked Chicken Cutlets
Simple method, perfect results. Crispy outside, juicy inside every time.
Step 1: Prep and Season the Chicken Breast
Pat the 1.5 lb chicken breast completely dry with paper towels—this is crucial for a crispy coating. Place each piece between plastic wrap and pound to an even ¼-inch thickness using a meat mallet. This ensures even cooking and maximum crispiness.
Season both sides generously with the 1 tsp salt, 0.5 tsp black pepper, 1 tsp garlic powder, 1 tsp onion powder, 1 tsp dried oregano, and 0.5 tsp paprika. I rub the spices in with my fingers so they really stick to the meat.
Step 2: Set Up the Breading Station
Create a breading station with three shallow dishes. Place the 0.5 cup all-purpose flour in the first dish. In the second, lightly beat the 2 whole large eggs until smooth. For the third dish, mix the 1.5 cups panko breadcrumbs with the 0.75 cup parmesan cheese—this combo gives you that perfect crunch and cheesy flavor.
I like to use one hand for wet ingredients and one for dry to keep things clean. The parmesan should be freshly grated from a block—pre-shredded won’t melt as nicely and has additives that affect texture.
Step 3: Coat the Chicken Cutlets Thoroughly
Dredge each piece of chicken in the flour, shaking off any excess. Then dip it into the beaten eggs, letting any excess drip off. Finally, press the chicken into the panko-parmesan mixture, making sure it’s fully coated on all sides. I press down firmly to help the coating adhere.
Place the breaded cutlets on a wire rack set over a baking sheet. This allows air to circulate underneath, preventing soggy bottoms. Let them rest for 5 minutes—this helps the coating set before baking.
Step 4: Bake to Golden Perfection
Preheat your oven to 400°F. Drizzle 2 tbsp of the olive oil over the cutlets—this helps them crisp up in the oven. Bake on the middle rack for 15-18 minutes, flipping halfway through, until the coating is golden brown and the internal temperature reaches 165°F.
You’ll know they’re done when the coating is crispy and the chicken feels firm to the touch. If you’re unsure, use an instant-read thermometer to check. The panko should be a deep golden color, not pale.
Step 5: Rest and Serve with Lemon Wedges
Let the cutlets rest for 3-5 minutes after baking—this keeps them juicy. While they’re resting, I like to warm the remaining 1 tbsp olive oil and drizzle it over the cutlets for extra shine and flavor.
Serve immediately with the 4 pieces lemon wedges on the side. A squeeze of fresh lemon brightens up the rich, cheesy coating. These cutlets are best enjoyed fresh from the oven when they’re at their crispiest.
Pro Tips For Making Baked Chicken Cutlets
- Pound Evenly: Use a meat mallet to pound the chicken breasts to an even 1/2-inch thickness—this guarantees even cooking and prevents dry, overdone edges.
- Grate Fresh Parmesan: Skip the pre-grated stuff; freshly grated Parmesan melts better and clings to the panko for a crispier, more flavorful crust.
- Skip the Overcrowding: Leave space between cutlets on the baking sheet—crowding traps steam and makes the coating soggy instead of crisp.
- Use a Wire Rack: Place a wire rack over the baking sheet so air circulates underneath, ensuring the bottoms get just as golden as the tops.
Make-Ahead Tips for baked chicken cutlets
Prep Ahead Strategy
You can bread these cutlets up to 24 hours in advance. After coating, arrange them on a wire rack and refrigerate uncovered. This actually helps the coating adhere better. Cover with plastic wrap only after they’ve chilled completely to prevent sogginess.
Oven-Ready Storage
For maximum crispiness, place breaded cutlets on a parchment-lined baking sheet and freeze for 1-2 hours before transferring to a freezer bag. They’ll keep for 3 months. No need to thaw—just add 5-7 minutes to the baking time. 💡
Fridge Reheating
Store cooked cutlets in an airtight container in the fridge for up to 4 days. To revive, place on a wire rack in a 375°F oven for 10-12 minutes. This restores the crispiness better than a microwave.
Freezer to Table
Freeze baked cutlets between parchment paper in a freezer-safe container. When ready to eat, reheat from frozen at 400°F for 15-20 minutes. The parmesan coating reheats surprisingly well, maintaining its flavor and texture.
Pro Tip for Meal Prep
Double the recipe and freeze half for busy nights. I like to portion them with sides for complete meals. The breading stays crisp if you reheat properly. This method has saved me on countless weeknights when I need dinner fast. ✨
Nutrition Facts
Frequently Asked Questions
What’s the ideal oven temperature?
Bake at 400°F for the best results. This high heat ensures the coating gets crispy while cooking the chicken through evenly.
Can I use regular breadcrumbs instead of panko?
Yes, but panko gives superior crunch. Regular breadcrumbs work in a pinch, though the texture will be slightly less crisp.
How do I prevent soggy bottoms?
Use a wire rack on your baking sheet. This allows air to circulate underneath, keeping the coating crisp on all sides.
What’s the best way to reheat leftovers?
Place in a 375°F oven for 10-12 minutes. Avoid the microwave, as it will make the coating soggy.

- Jollof Rice Sauce Recipe: West African Tomato and Spice Infusion - September 25, 2026
- Japanese Rice Soup Recipe: Umami-Rich Comfort in a Bowl - September 25, 2026
- Homemade Cream Of Rice Recipe: Silk-Smooth Breakfast in Minutes - September 25, 2026