
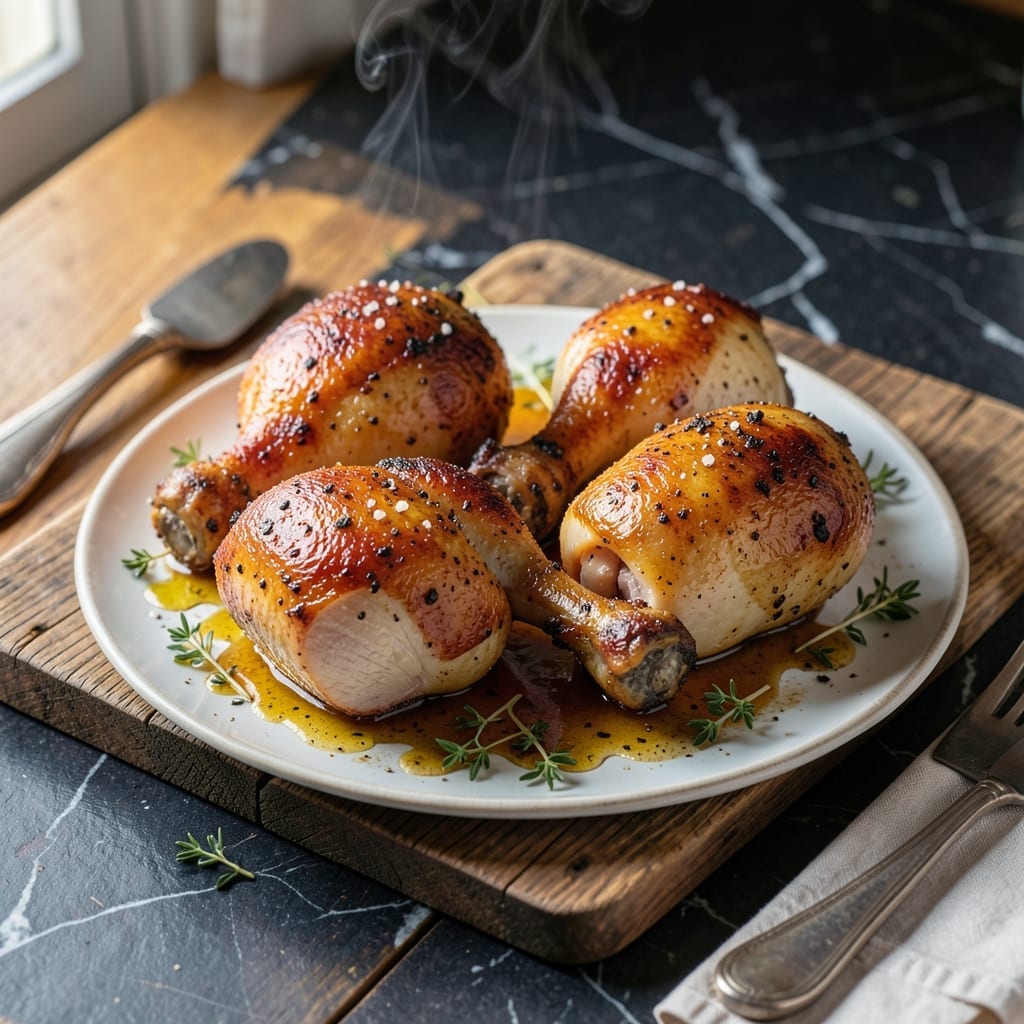
This oven-roasted method transforms chicken hindquarters into juicy, perfectly crisped main course magic with minimal effort.
I’ve tested countless variations, and the key is a hot oven and strategic seasoning that builds a golden crust while keeping the meat tender. No fancy techniques—just reliable results every time.
The high heat renders the skin shatteringly crisp while the dark meat stays moist and flavorful. A simple dry rub or marinade elevates the dish without overpowering the natural richness.
You’ll end up with a dish that’s impressive enough for guests but simple enough for a weeknight. Serve with roasted vegetables or a fresh salad for a complete meal.
Ingredients for Baked Chicken Hindquarters
Pantry staples meet chicken for that crispy, golden main course everyone raves about.
| Ingredient | Amount | Notes |
|---|---|---|
| Chicken Hindquarters 🍗 | 4 whole | Thighs and drumsticks attached, skin-on |
| Olive Oil 🫒 | 2 tbsp | Extra-virgin preferred for richness |
| Kosher Salt 🧂 | 1 ½ tsp | Diamond Crystal or Morton brand |
| Black Pepper 🌶️ | 1 tsp | Freshly ground for best flavor |
| Garlic Powder 🧄 | 1 tsp | Not garlic salt, for even coating |
| Onion Powder 🧅 | 1 tsp | Granulated for consistent texture |
| Smoked Paprika 🌶️ | 1 tsp | Adds depth and color to crust |
| Dried Thyme 🌿 | 1 tsp | Crushed between fingers to release oils |
| Dried Rosemary 🌿 | 1 tsp | Finely crushed for even distribution |
| Cayenne Pepper 🔥 | ¼ tsp | Optional for subtle heat |
| Lemon Juice 🍋 | 1 tbsp | Freshly squeezed for brightness |
| Fresh Parsley 🌿 | ¼ cup | Chopped, for garnish |
The chicken matters most here. Look for skin-on, bone-in hindquarters—they’re cheaper and way more flavorful than boneless. Costco often has them in bulk, but regular grocery stores carry them too (sometimes labeled as leg quarters). If you’re buying fresh, use within 2 days or freeze for up to 9 months. Thaw overnight in the fridge for even cooking.
No smoked paprika? Regular paprika plus a pinch of ground cumin works. Fresh herbs can swap in for dried—use three times the amount since they’re less concentrated. Out of chicken hindquarters? Thighs or drumsticks alone still turn out great (adjust cooking time slightly). The lemon juice adds brightness, but apple cider vinegar at half the amount does the trick too.
Leftovers keep 4 days in the fridge—perfect for quick lunches. Freeze cooked chicken for up to 3 months in airtight containers. Reheat in the oven to keep the skin crispy (microwave makes it soggy). Always let the chicken rest 5-10 minutes before serving—worth the wait.
Why You’ll Love This Recipe
- One Pan Magic: I toss the hindquarters with olive oil, salt, pepper, and garlic powder, then let the oven do the rest.
- Crispy & Juicy: That garlic powder crust with tender meat underneath? Ridiculously good every time.
- Feeds My Crew: Four hindquarters, one pan, and suddenly I’ve got dinner for my family of four with zero stress.
Step-by-Step Instructions for Baked Chicken Hindquarters
Here’s how I get perfectly crispy skin and fall-off-the-bone tenderness every single time.
Step 1: Pat Dry and Season Generously
I start by patting all 4 whole chicken hindquarters completely dry with paper towels. This is non-negotiable—moisture is the enemy of crispy skin. Pay special attention to the skin and any crevices where water might hide.
Place the chicken in a large bowl and drizzle with all the 2 tbsp olive oil. Toss to coat evenly. Then sprinkle with the 1.5 tsp kosher salt, 1 tsp black pepper, 1 tsp garlic powder, 1 tsp onion powder, 1 tsp smoked paprika, 1 tsp dried thyme, 1 tsp dried rosemary, and 0.25 tsp cayenne pepper. I crush the dried thyme and rosemary between my fingers to release their oils. Massage the seasoning into every nook and cranny of the chicken.
Let it sit at room temperature for 20 minutes while the oven preheats. This allows the seasoning to penetrate and the meat to cook more evenly.
Step 2: Arrange for Maximum Crispiness
Preheat your oven to 425°F. Position a rack in the center of the oven. I use a wire rack set inside a rimmed baking sheet for this—it allows hot air to circulate underneath the chicken, crisping the skin all around.
Arrange the chicken hindquarters skin-side up on the rack, spacing them evenly apart. The skin should be taut and dry to the touch. If any pieces are curled, press them gently to flatten. This ensures even cooking and maximum skin contact with the hot air.
Real talk: if you crowd the pan, the chicken will steam instead of roast. The pieces need space to crisp up properly.
Step 3: Roast to Golden Perfection
Slide the baking sheet into the preheated oven. Roast for 35-40 minutes without opening the door. I know it’s tempting to peek, but every time you do, you lose heat and steam the skin.
At the 35-minute mark, start checking for doneness. The skin should be deep golden brown and crispy, and the internal temperature should reach 175°F when measured in the thickest part of the thigh (not touching bone). If the skin is browning too quickly, tent loosely with foil.
Here’s the thing—the thigh meat is more forgiving than breast, so don’t pull it out until it’s fully cooked through. The juices should run clear when pierced with a knife.
Step 4: Rest and Finish with Brightness
Transfer the chicken to a serving platter. Drizzle with the 1 tbsp lemon juice—this adds a bright contrast to the rich, smoky flavors. Let the chicken rest for 10 minutes before serving. This allows the juices to redistribute throughout the meat.
Sprinkle with the 0.25 cup fresh parsley just before serving. The parsley adds a pop of color and freshness that cuts through the richness. I like to serve this with the pan juices spooned over the top—every bit of that flavor is worth saving.
Each piece should have skin that cracks when you cut into it and meat that’s juicy and tender. The spices will have formed a beautiful, flavorful crust that’s packed with smoky, herby goodness.
Pro Tips For Making Baked Chicken Hindquarters
- Dry the Skin: Pat the hindquarters completely dry with paper towels before seasoning—I learned this the hard way after ending up with steamed instead of crispy skin more times than I’d like to admit.
- Hot Oven Start: Crank the oven to 425°F and let it preheat fully. A screaming hot start gives you that golden crust while keeping the dark meat juicy.
- Season Under Skin: Slide your fingers under the skin to rub the olive oil, salt, and garlic powder directly onto the meat. Sounds weird, but it actually changes the outcome.
- Rest Before Serving: Give the chicken a solid 10 minutes under loose foil after baking. Skipping this means all those delicious juices will end up on the cutting board instead of in the meat.
Troubleshooting This Recipe
Skin Not Crispy
If your skin turns out rubbery instead of crackling, the chicken likely needed more drying time before roasting. I always pat the pieces extremely dry with paper towels and let them sit uncovered in the fridge for 1 hour to dry the skin further. 💡
Uneven Cooking
When some pieces cook faster than others, it usually means they were different sizes to start. I weigh my hindquarters and group similar sizes together. Also, rotating the pan halfway through ensures even browning in all spots.
Dry Meat
Overcooked chicken happens when left too long at high heat. I pull mine when the thickest part hits 175°F. Dark meat can handle this temp without drying out. Let it rest 10 minutes before serving to lock in juices.
Seasoning Falls Off
If your rub slides off during cooking, mix it with the 2 tbsp olive oil first to create a paste. This helps it adhere better. I also press the seasoning into the meat so it sticks throughout the roasting process.
Smoke in Oven
Excess smoke often comes from drippings burning on the pan. I place a shallow pan of water on the lower rack to catch drippings. Clean your oven regularly too—built-up grease is a major smoke culprit.
Underseasoned Flavor
Bland results usually mean not enough salt. I use the full 1.5 tsp kosher salt as a baseline. Don’t be shy with the seasoning—dark meat can handle bold flavors. Taste your rub mix before applying to adjust.
Nutrition Facts
Frequently Asked Questions
Can I use chicken thighs instead of hindquarters?
Yes! Bone-in, skin-on thighs work perfectly. Adjust cooking time to 25-30 minutes at 425°F since they’re smaller. The method and seasoning remain the same for delicious results.
Why rest the chicken before serving?
Resting for 10 minutes lets juices redistribute throughout the meat. Cutting too soon causes them to spill out, leaving the chicken dry. This step guarantees moist, flavorful meat.
How do I know when it’s fully cooked?
Use a meat thermometer—the internal temp should hit 175°F in the thickest part. The skin will be deep golden brown and juices should run clear when pierced.
Can I make this ahead of time?
Cook and cool completely, then store in the fridge for up to 4 days. Reheat in the oven at 375°F for 15 minutes to revive crispiness. Avoid microwaving.

- Jollof Rice Sauce Recipe: West African Tomato and Spice Infusion - September 25, 2026
- Japanese Rice Soup Recipe: Umami-Rich Comfort in a Bowl - September 25, 2026
- Homemade Cream Of Rice Recipe: Silk-Smooth Breakfast in Minutes - September 25, 2026