
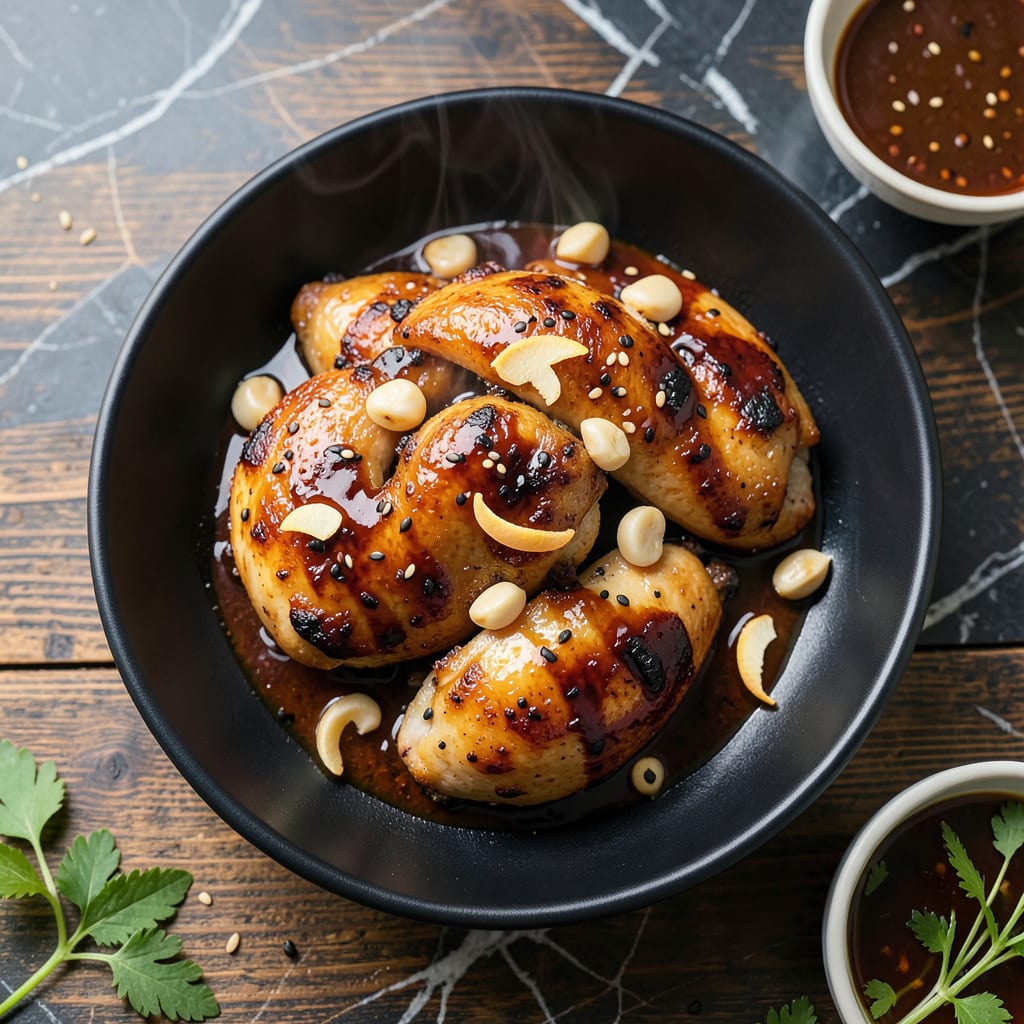
This baked chicken delivers umami-packed flavor with minimal effort. The soy sauce marinade infuses every bite with rich, savory depth.
With just a few ingredients and 30 minutes in the oven, you’ll achieve tender, juicy chicken with a glossy, caramelized glaze. Simple, precise, and consistently delicious.
Ingredients for Baked Chicken Soy Sauce
Short list of pantry staples transforms chicken into something extraordinary. Simple enough.
| Ingredient | Amount | Notes |
|---|---|---|
| Chicken Thighs 🍗 | 2 lb | Boneless, skinless preferred |
| Soy Sauce 🥢 | ½ cup | Low-sodium for balance |
| Honey 🍯 | ¼ cup | Balances soy saltiness |
| Garlic Cloves 🧄 | 4 cloves | Minced for marinade |
| Fresh Ginger Root 🌿 | 1 tbsp | Grated, peeled first |
| Sesame Oil 🫒 | 1 tbsp | Toasted for depth |
| Rice Vinegar 🍚 | 2 tbsp | Brightens the glaze |
| Olive Oil 🫒 | 1 tbsp | For greasing pan |
| Green Onions 🧅 | 4 whole | Sliced for garnish |
| Sesame Seeds 🌰 | 1 tsp | Toasted for topping |
| Ground Black Pepper 🌶️ | ½ tsp | Freshly cracked preferred |
| Red Pepper Flakes 🔥 | ¼ tsp | Optional for heat |
[recipeingredientscaler]
The chicken thighs are key here. Boneless, skinless stay juicy and soak up that marinade best. I grab mine from Whole Foods—their organic ones have great flavor and size consistency. The soy sauce? Kikkoman low-sodium is my go-to (no weird additives, just clean flavor). Fresh ginger makes a difference, but those jarred minced kinds work in a pinch.
No honey? Maple syrup or brown sugar at the same amount gets you close. Swap rice vinegar for apple cider vinegar if that’s what’s in the cupboard. The sesame oil is worth hunting down at an Asian market—Kadoya brand is great. Skip the sesame seeds if you don’t have them (but they add that little crunch that makes it feel fancy).
Marinate the chicken for up to 24 hours if you want to prep ahead. Leftovers keep 4-5 days in the fridge—reheat in the oven to keep the skin crisp. Glaze thickens as it cools, so let it sit a minute before serving.
Why You’ll Love This Recipe
- One Pan Wonder: I toss everything on a single sheet pan—chicken, soy sauce, honey, garlic, ginger—and let the oven do the work.
- Sticky Sweet Glaze: The honey caramelizes with the soy sauce, creating this irresistible glossy coating on the chicken thighs.
- Meal Prep Hero: I make a big batch on Sunday and it reheats beautifully for lunches all week.
- Budget Friendly: Chicken thighs are so affordable, and the sauce is just pantry staples I always have on hand.
Step-by-Step Instructions for Baked Chicken Soy Sauce
This method delivers sticky, caramelized results with minimal effort.
Step 1: Create the Umami-Packed Marinade
In a large bowl, whisk together the 0.5 cup Soy Sauce, 0.25 cup Honey, 4 cloves Garlic Cloves (minced), 1 tbsp Fresh Ginger Root (grated), 1 tbsp Sesame Oil, 2 tbsp Rice Vinegar, 0.5 tsp Ground Black Pepper, and 0.25 tsp Red Pepper Flakes until fully combined.
The honey will dissolve into the soy sauce, creating a glossy, aromatic base. I like to let this sit for 5 minutes before adding the chicken to allow the flavors to meld—this ensures every bite is packed with depth.
Step 2: Coat and Marinate the Chicken
Add the 2 lb Chicken Thighs to the marinade, turning to coat each piece thoroughly. I use my hands for this—it’s the best way to ensure every surface is covered. Let it marinate at room temperature for 15 minutes, or up to 2 hours in the refrigerator for deeper flavor penetration.
Don’t skip the marinating time. Even 15 minutes makes a noticeable difference in tenderness and taste. If you’re short on time, pierce the chicken thighs lightly with a fork to help the marinade absorb faster.
Step 3: Bake to Sticky, Glazed Perfection
Preheat your oven to 400°F. Lightly grease a baking dish with the 1 tbsp Olive Oil to prevent sticking. Arrange the marinated chicken thighs in a single layer, skin-side up if using skin-on thighs.
Bake for 25 minutes, then flip each piece and bake for another 15-20 minutes until the chicken reaches an internal temperature of 165°F and the glaze has thickened and caramelized. You’ll see the edges of the chicken start to darken and crisp—that’s when you know it’s ready.
Step 4: Garnish and Rest Before Serving
Remove the chicken from the oven and let it rest for 5 minutes. This allows the juices to redistribute, keeping the meat moist. While it rests, slice the 4 whole Green Onions thinly and sprinkle them over the top along with the 1 tsp Sesame Seeds.
The residual heat from the chicken will slightly wilt the green onions, softening their bite. Spoon any remaining pan juices over the chicken before serving to maximize flavor in every bite.
Pro Tips For Making Baked Chicken Soy Sauce
- Preheat the Pan: I learned this the hard way—sear the chicken thighs in a hot pan for 2-3 minutes per side before baking to lock in juices and get that deep caramelization with the soy-honey glaze.
- Grate the Ginger: Fresh ginger root releases way more flavor when grated fine rather than minced, and it blends seamlessly into the soy sauce marinade without chewy bits.
- Don’t Drown It: Resist the urge to pour all the soy-honey marinade over the chicken at once—use just enough to coat, then baste halfway through baking to prevent a soggy, steamed texture.
- Rest Before Serving: Give the baked chicken a solid 5 minutes under foil after pulling it from the oven—this keeps the thighs juicy while the residual heat finishes cooking them through.
Common Mistakes When Making Perfect Results
Over-Marinating Disaster
Marinating chicken in soy sauce for too long can turn it mushy. I learned this the hard way when I left it overnight—the acid in rice vinegar and salt in soy sauce started breaking down the meat. Stick to 2 hours max in the fridge or 15 minutes at room temp. 💡
Skipping the Flip
Not flipping the chicken halfway through baking leads to uneven cooking. The top will caramelize beautifully while the bottom stays pale. Flip at 25 minutes to ensure both sides get that sticky, glossy finish you’re after.
Wrong Oven Temp
Baking at too low a temperature (350°F or below) prevents the glaze from caramelizing properly. Crank it to 400°F for that perfect balance of cooked-through meat and crispy edges. Trust me, the higher heat makes all the difference.
Crowded Pan Problems
Overcrowding the baking dish causes the chicken to steam rather than bake. Leave 1 inch between pieces so air circulates properly. If needed, use two pans—your chicken will thank you with better texture.
Ignoring Internal Temp
Never guess doneness by color alone. Dark meat like thighs needs to hit 165°F internally. I use a ThermoWorks instant-read thermometer for accuracy. Undercooked chicken is dangerous, while overcooked becomes dry. 🌡️
Immediate Slicing
Cutting into chicken right out of the oven sends all those precious juices onto the cutting board. Always rest for 5 minutes first. This simple pause keeps every bite moist and flavorful.
Nutrition Facts
Frequently Asked Questions
Can I use chicken breasts instead of thighs?
Yes, but reduce baking time to 20-25 minutes total. Breasts dry out faster than thighs. For best results, brine them first or baste with extra marinade during baking.
What can I substitute for honey?
Maple syrup or brown sugar work perfectly at the same amount. Agave nectar is another great option, though it’s slightly less sweet.
How do I make the glaze thicker?
Simmer leftover pan juices on the stove for 3-5 minutes until syrupy. For extra shine, add 1 tsp cornstarch mixed with water before baking.
Can I prepare this ahead of time?
Marinate the chicken up to 2 hours ahead and refrigerate. Bake as directed when ready. Leftovers keep well for 4-5 days in the fridge.

- Jollof Rice Sauce Recipe: West African Tomato and Spice Infusion - September 25, 2026
- Japanese Rice Soup Recipe: Umami-Rich Comfort in a Bowl - September 25, 2026
- Homemade Cream Of Rice Recipe: Silk-Smooth Breakfast in Minutes - September 25, 2026