
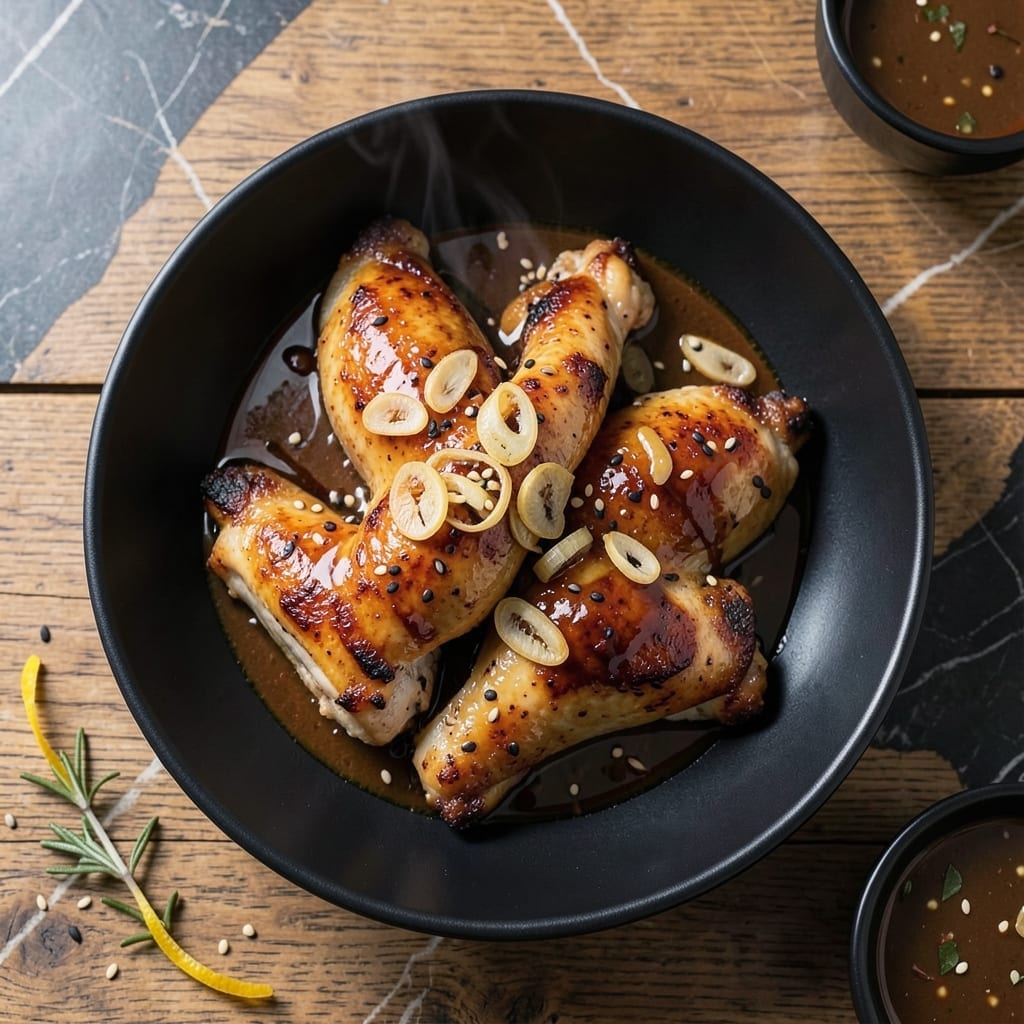
This baked miso chicken delivers an unforgettable balance of sweet and savory with a crispy skin that cracks with every bite. The umami-rich glaze transforms simple chicken thighs into a restaurant-worthy dish.
I perfected this recipe by marinating the chicken in white miso paste, honey, and soy sauce for at least 2 hours. This ensures deep flavor penetration before baking at 425°F until golden and blistered.
What emerges is juicy meat beneath a lacquered, caramelized crust. The miso glaze reduces to a sticky, glossy finish that clings to each piece without overwhelming the natural chicken flavor.
The method is straightforward yet yields professional results. Serve with steamed rice and steamed vegetables to soak up every drop of that addictive sauce.
Ingredients for Baked Miso Chicken
Transform chicken thighs into restaurant-worthy dish with these flavor-packed staples and a few key specialty items.
| Ingredient | Amount | Notes |
|---|---|---|
| Boneless Chicken Thighs 🍗 | 2 lb | Skin-on for crispy texture |
| White Miso Paste 🥣 | ½ cup | Fermented soybean paste, essential |
| Honey 🍯 | ⅓ cup | For sweetness and caramelization |
| Soy Sauce 🫒 | ⅓ cup | Low-sodium preferred for balance |
| Rice Vinegar 💧 | 2 tbsp | Adds tangy brightness to glaze |
| Garlic Cloves 🧄 | 4 cloves | Minced for aromatic depth |
| Fresh Ginger 🌿 | 1 tbsp | Grated, for zesty warmth |
| Sesame Oil 🫒 | 1 tbsp | Toasted variety for nutty aroma |
| Cornstarch 🌾 | 1 tbsp | Thickens glaze slightly |
| Red Pepper Flakes 🌶️ | ½ tsp | Optional for subtle heat |
| Toasted Sesame Seeds 🌰 | 1 tbsp | Garnish for visual appeal |
| Scallions 🧅 | 3 whole | Thinly sliced for fresh finish |
| Neutral Oil 🫒 | 1 tbsp | For greasing baking dish |
The chicken thighs are non-negotiable—bone-in, skin-on yields the crispiest results (look for air-chilled at Whole Foods or Trader Joe’s). White miso paste is critical; Miso Master or South River brands offer superior depth. Fresh ginger and garlic should be plump and firm, avoiding any sprouting or softness. The soy sauce should be low-sodium to control seasoning precisely.
Need a honey substitute? Maple syrup or agave works at a 1:1 ratio. No white miso? Yellow miso is acceptable, though slightly saltier. Skip the rice vinegar? Apple cider vinegar adds similar acidity. For gluten-free, use tamari instead of soy sauce. The red pepper flakes can be omitted entirely if heat isn’t desired.
Marinate the chicken in a sealed container for up to 24 hours. The miso paste and honey mixture keeps for 1 week refrigerated. Baked chicken stays fresh for 3-4 days; reheat in a 350°F oven to maintain crispiness. Freeze cooked chicken for up to 3 months.
Why You’ll Love This Recipe
- One Pan Magic: I mix the miso, honey, and soy right in the baking dish—no extra bowls, no fuss.
- Umami Bomb: The white miso and rice vinegar create this deep, tangy-sweet flavor that clings to every bite of chicken.
- Meal Prep Hero: Honestly, it reheats beautifully for lunches all week without drying out.
- Budget Friendly: Chicken thighs stay juicy and cheap, and a little miso goes a long way.
Step-by-Step Instructions for Baked Miso Chicken
This method ensures maximum flavor development with that promised crispy skin texture.
Step 1: Prepare the Umami-Rich Miso Glaze
In a medium bowl, whisk together the 0.5 cup white miso paste, 0.33 cup honey, 0.33 cup soy sauce, 2 tbsp rice vinegar, 1 tbsp sesame oil, and 0.5 tsp red pepper flakes until completely smooth. The miso may clump initially, but keep whisking until it dissolves into the liquids.
Add the 4 cloves minced garlic and 1 tbsp grated fresh ginger, stirring to distribute evenly. Set aside 10 minutes to allow the flavors to meld while you prepare the chicken. This resting time intensifies the glaze’s complexity significantly.
Step 2: Coat and Marinate the Chicken
Pat the 2 lb boneless chicken thighs dry with paper towels, ensuring the skin is completely moisture-free for optimal crisping. Place them skin-side up in a large mixing bowl.
Pour ¾ of the glaze over the chicken, reserving the rest for basting. Use your hands to thoroughly coat each piece, making sure to get the glaze under the skin and into all the crevices. Marinate for 15-20 minutes at room temperature while the oven preheats.
Step 3: Bake Until Crispy and Caramelized
Preheat your oven to 400°F. Lightly grease a baking dish with the 1 tbsp neutral oil to prevent sticking. Arrange the chicken pieces skin-side up in a single layer, leaving space between each for proper browning.
Bake on the middle rack for 25 minutes, then baste with the reserved glaze. Return to the oven and bake for another 10-15 minutes until the skin is deep golden brown and crispy and the internal temperature reaches 175°F.
Step 4: Finish with Cornstarch Slurry and Garnish
Carefully transfer the chicken to a serving platter. Pour the pan juices into a small saucepan and bring to a simmer. In a small bowl, mix the 1 tbsp cornstarch with 1 tbsp water to create a slurry, then whisk it into the pan juices.
Simmer for 1-2 minutes until the sauce thickens slightly into a glossy glaze. Drizzle this over the chicken and immediately sprinkle with the 1 tbsp toasted sesame seeds and 3 thinly sliced scallions for fresh contrast against the rich, caramelized exterior.
Pro Tips For Making Baked Miso Chicken
- Preheat the Pan: I learned this the hard way—searing the chicken thighs in a screaming-hot pan for 2-3 minutes per side locks in juices before baking, so the miso glaze doesn’t turn the meat dry.
- Thin the Miso: Mix the white miso paste with 1 tablespoon of warm water before combining with honey and soy sauce—this prevents clumping and helps it coat the chicken evenly.
- Skip the Overcrowding: After burning three batches, I finally figured out that leaving space between thighs on the baking sheet ensures they crisp up instead of steam in their own juices.
- Rest Before Serving: Give the chicken a solid 5 minutes under foil after baking—it keeps the juices inside where they belong, not all over your cutting board.
Essential Equipment for Perfect Results
Mixing Bowls
I always start with a large, sturdy mixing bowl for the miso glaze—stainless steel or glass works best. The 3-quart size from OXO gives me plenty of room to whisk without splashing. A second medium bowl is perfect for coating the chicken evenly.
Whisk and Measuring Tools
A balloon whisk is essential for dissolving the miso paste completely into the liquids. I use a 1-tablespoon and ¼-cup set from Cuisinox for precise measurements. These tools prevent clumping and ensure the glaze is silky smooth. 💡
Baking Dish
For even browning and easy cleanup, a rimmed baking sheet with a wire rack is my go-to. The half-sheet pan from Nordic Ware fits perfectly in my oven. The rack elevates the chicken, allowing air to circulate for crispier skin.
Oven Thermometer
Accuracy matters for that perfect 400°F bake. I rely on a Taylor oven thermometer to confirm my oven’s true temperature—many run 25°F hot or cold. This small investment prevents undercooked or burnt results.
Pastry Brush
A silicone pastry brush is ideal for basting the reserved glaze onto the chicken. I prefer OXO’s heat-resistant version, which handles thick glazes without bristles falling out. It also makes cleanup a breeze.
Instant-Read Thermometer
To hit that perfect 175°F internal temperature, a ThermoWorks Thermapen is my secret weapon. It gives accurate readings in 2-3 seconds, ensuring juicy meat every time. 🌡️
Nutrition Facts
Frequently Asked Questions
Can I use boneless, skinless thighs instead?
Yes, but the skin is key for crispy texture. Boneless, skinless will still taste great but won’t develop that signature blistered exterior. Bake for 5-10 minutes less to prevent drying out.
What can I substitute for white miso?
Yellow miso works in a pinch, though it’s saltier—reduce added soy sauce by 1 tablespoon. Avoid red miso as its strong flavor overpowers. For a non-miso option, try 1:1 tahini + soy sauce with extra honey.
How do I prevent the glaze from burning?
Baste only during the last 10 minutes of baking. If the edges darken too quickly, tent loosely with foil. The 400°F temperature caramelizes without scorching when monitored closely.
Can I make this ahead of time?
Marinate the chicken for up to 24 hours refrigerated. For best texture, bake just before serving—reheated skin loses crispness. Leftovers keep 3-4 days in the fridge.

- Jollof Rice Sauce Recipe: West African Tomato and Spice Infusion - September 25, 2026
- Japanese Rice Soup Recipe: Umami-Rich Comfort in a Bowl - September 25, 2026
- Homemade Cream Of Rice Recipe: Silk-Smooth Breakfast in Minutes - September 25, 2026