
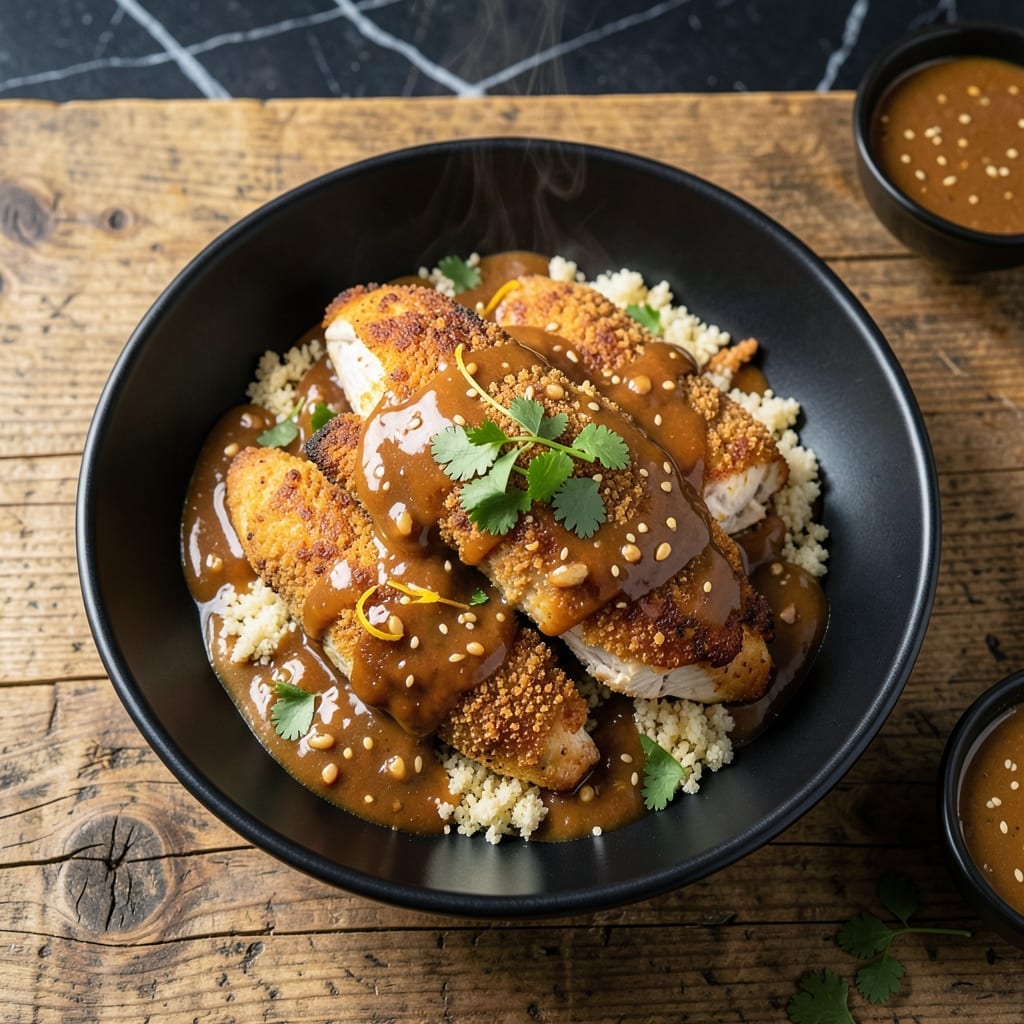
This baked peanut chicken delivers a crispy coating with a sweet-savory glaze that’s impossible to resist. The oven does most of the work, transforming simple ingredients into a dish with restaurant-quality appeal.
I’ve perfected the balance of salty peanuts, tangy sauce, and tender chicken for a meal that’s both satisfying and easy to prepare. A quick marinade ensures every bite is packed with flavor.
The result is juicy chicken with a golden, crunchy exterior and a glaze that caramelizes beautifully. It’s a crowd-pleaser that comes together with minimal effort.
Serve it with rice or steamed vegetables to complete the meal. Here’s how to make it.
Ingredients for Baked Peanut Chicken
Transform simple proteins and pantry staples into a restaurant-quality dish with this flavor-packed lineup.
| Ingredient | Amount | Notes |
|---|---|---|
| Boneless, Skinless Chicken Thighs 🍗 | 1 ½ lb | Patted dry for crispiness |
| Creamy Peanut Butter 🥜 | ½ cup | Unsweetened, smooth variety |
| Soy Sauce 🫙 | 3 tbsp | Low-sodium preferred |
| Honey 🍯 | ¼ cup | For glaze sweetness |
| Rice Vinegar 🫗 | 2 tbsp | Adds tangy brightness |
| Fresh Garlic Cloves 🧄 | 3 cloves | Minced finely |
| Fresh Ginger 🌿 | 1 tbsp | Peeled and grated |
| Sesame Oil 🫒 | 1 tsp | Toasted for depth |
| Roasted Peanuts 🥜 | ¾ cup | Unsalted, roughly chopped |
| Panko Breadcrumbs 🍞 | 1 cup | For extra crunch |
| Large Egg 🥚 | 1 whole | Beaten for coating |
| Cornstarch 🌾 | 2 tbsp | Thickens the glaze |
| Kosher Salt 🧂 | ½ tsp | Adjust to taste |
| Freshly Ground Black Pepper 🌶️ | ½ tsp | For seasoning |
The chicken is the foundation. Boneless, skinless thighs stay juicier than breasts—Costco or Whole Foods have reliable options. For the peanut butter, natural, unsweetened (like Smucker’s Organic) avoids added sugars that can burn. Fresh ginger and garlic are non-negotiable; pre-minced jars lack the punch. The peanuts? Dry-roasted, unsalted from the baking aisle work perfectly.
No honey? Maple syrup or agave at a 1:1 ratio. Swap soy sauce for tamari for gluten-free or coconut aminos for a milder flavor. If you’re out of rice vinegar, apple cider vinegar works, though it’s slightly sharper. For extra crunch without peanuts, crushed almonds or cashews are great. The egg can be skipped (dredge in cornstarch slurry instead), but the coating won’t be as crisp.
The glaze thickens as it cools, so let it sit 5 minutes before serving. Store leftovers in an airtight container for up to 4 days—reheat in the oven to revive the crunch. Peanuts soften over time, so add extra on top when reheating.
Why You’ll Love This Recipe
- One Pan Dinner: I just toss the chicken thighs with peanut butter, soy sauce, and honey, then bake—no stove, no fuss.
- Sweet-Savory Magic: The peanut butter and honey caramelize into this sticky, crave-worthy glaze that clings to every bite.
- Weeknight Hero: Honestly, it’s my go-to for busy Tuesdays when I need something hearty and fast.
- Leftovers? Yes Please: The flavors deepen overnight, so lunch the next day tastes even better.
Step-by-Step Instructions for Baked Peanut Chicken
Here’s the method. Straightforward, tested, works every time.
Step 1: Prepare the Sweet-Savory Peanut Glaze
In a small saucepan, combine the 0.5 cup creamy peanut butter, 3 tbsp soy sauce, 0.25 cup honey, 2 tbsp rice vinegar, minced 3 cloves fresh garlic cloves, grated 1 tbsp fresh ginger, and 1 tsp sesame oil. Place over medium heat and whisk constantly.
Cook for 3-4 minutes until the mixture comes together and thickens slightly. The glaze should coat the back of a spoon and have a glossy appearance. Remove from heat and stir in the 2 tbsp cornstarch until fully dissolved. Set aside to cool and thicken further.
Step 2: Create the Crunchy Peanut Coating
In a shallow bowl, combine the 1 cup panko breadcrumbs and roughly chopped 0.75 cup roasted peanuts. In a separate bowl, beat the 1 whole large egg with 0.5 tsp kosher salt and 0.5 tsp freshly ground black pepper.
Pat the 1.5 lb boneless, skinless chicken thighs completely dry with paper towels. This ensures the coating adheres properly and promotes even browning. Dip each piece into the egg mixture, allowing excess to drip off, then press firmly into the panko-peanut mixture to create an even, thick coating.
Step 3: Bake to Golden Perfection
Preheat your oven to 400°F and line a baking sheet with parchment paper. Arrange the coated chicken thighs on the prepared sheet, leaving space between each piece to ensure even crisping.
Bake for 20-25 minutes, flipping halfway through, until the coating is deep golden brown and the chicken reaches an internal temperature of 165°F. The panko should be crisp and the peanuts lightly toasted. Watch closely during the last 5 minutes to prevent over-browning.
Step 4: Glaze and Finish
Once the chicken is cooked, brush each piece generously with the reserved peanut glaze. Return to the oven for 2-3 minutes to set the glaze, creating a beautiful sheen.
Let rest for 5 minutes before serving. The glaze should be slightly sticky with a perfect balance of sweet and savory flavors, while the coating remains wonderfully crisp. Serve immediately while the contrast of textures is at its peak.
Pro Tips For Making Baked Peanut Chicken
- Preheat the Oven: Crank it to 375°F and let it fully heat—baking the chicken at the right temp from the start prevents dry meat and helps the peanut sauce caramelize properly.
- Trim the Fat: Pat the chicken thighs dry and trim any excess fat before baking; it keeps the peanut sauce from sliding off and makes the skin (if left on) crispier.
- Thin the Peanut Butter: Warm the peanut butter slightly and whisk in the soy sauce and honey first—this prevents clumping and ensures the sauce coats the chicken evenly.
- Check Early: Start testing doneness at 20 minutes; overbaking dries out thighs, and the honey in the sauce can burn if left too long.
Best Sauces and Condiments for This Dish
Peanut Sauce Drizzle
For extra richness, whisk 2 tbsp of leftover glaze with 1 tbsp warm water to thin it. Drizzle this over the chicken just before serving for a glossy finish. I love how it pools around the crispy coating. 💛
Sweet Chili Sauce
Pair with Mae Ploy sweet chili sauce for a Thai-inspired twist. Its bright, tangy sweetness complements the nutty flavors beautifully. Serve 1 tbsp per piece on the side for dipping.
Spicy Sriracha Mayo
Mix ¼ cup mayo with 1 tbsp sriracha and 1 tsp lime juice for a creamy dip with heat. This contrasts perfectly with the sweetness of the glaze. I always keep a batch in my fridge.
Cucumber Salad
A quick Asian-style cucumber salad cuts through the richness. Thinly slice 1 cucumber, toss with 1 tbsp rice vinegar, ½ tsp sugar, and a pinch of salt. Serve chilled. 🥗
Lime Wedges
Serve with fresh lime wedges for a bright, citrusy pop. A squeeze just before eating enhances all the flavors. I add a sprinkle of lime zest to the glaze for extra zing.
Sesame Seeds
Toast 1 tbsp white sesame seeds in a dry pan for 1-2 minutes until golden. Sprinkle over the finished dish for added crunch and visual appeal. It’s a small touch with big impact.
Nutrition Facts
Frequently Asked Questions
Can I use chicken breasts instead of thighs?
Yes, but adjust the baking time. Breasts cook faster—check at 15-18 minutes to avoid dryness. Thighs stay juicier, but breasts work if that’s your preference.
How do I prevent the coating from burning?
Bake at 400°F and flip halfway. If the peanuts darken too quickly, tent with foil for the last 5-10 minutes. Always watch closely near the end.
What’s the best way to reheat leftovers?
Use the oven at 350°F for 10-12 minutes to revive crispiness. Microwaving makes the coating soggy, so avoid it if possible.
Can I make this gluten-free?
Swap soy sauce for tamari and use gluten-free panko. All other ingredients are naturally gluten-free. Double-check peanut butter labels for additives.

- Jollof Rice Sauce Recipe: West African Tomato and Spice Infusion - September 25, 2026
- Japanese Rice Soup Recipe: Umami-Rich Comfort in a Bowl - September 25, 2026
- Homemade Cream Of Rice Recipe: Silk-Smooth Breakfast in Minutes - September 25, 2026