
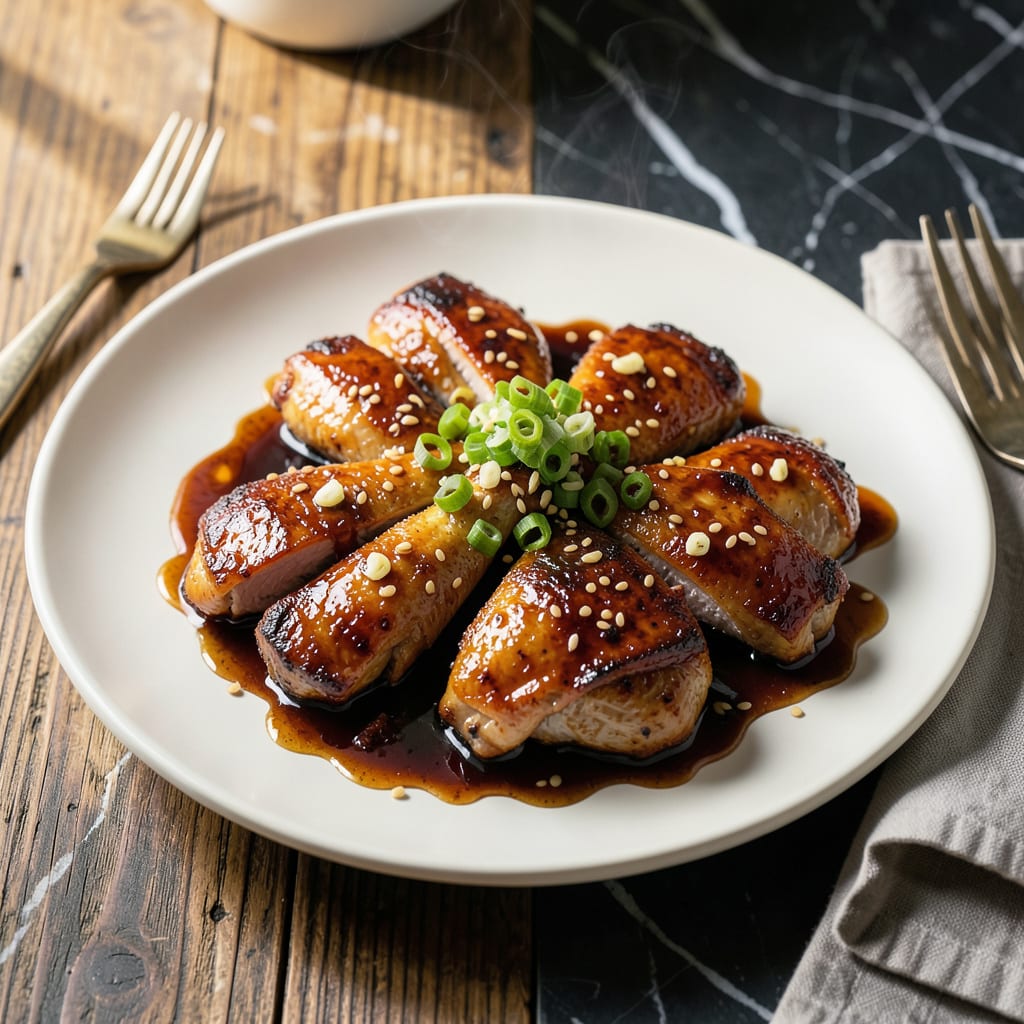
This baked teriyaki chicken delivers restaurant-quality flavor with minimal effort using bottled sauce. The oven transforms simple chicken into a dish with a glossy, sweet-savory glaze that caramelizes beautifully.
With just 30 minutes of baking time, you’ll have tender, juicy chicken coated in a rich sauce. Serve with rice and steamed vegetables for a complete meal that’s as easy as it is delicious.
Ingredients for Baked Teriyaki Chicken Recipe Using Bottled Sauce
Simple ingredients transform into a glossy, sweet-savory dish with minimal effort.
| Ingredient | Amount | Notes |
|---|---|---|
| Boneless Skinless Chicken Thighs 🍗 | 1 ½ lb | Or substitute chicken breasts |
| Bottled Teriyaki Sauce 🥫 | 1 cup | High-quality brand preferred |
| Soy Sauce 🫒 | 2 tbsp | Low-sodium if available |
| Honey 🍯 | 1 tbsp | For extra sweetness |
| Minced Garlic 🧄 | 2 tsp | Fresh or jarred |
| Fresh Ginger 🌿 | 1 tsp | Finely grated for best flavor |
| Olive Oil 🫒 | 1 tbsp | For greasing baking dish |
| Cornstarch 🌾 | 1 tbsp | Optional for thicker glaze |
| Sesame Seeds 🌰 | 1 tsp | For garnish, toasted |
| Green Onions 🧅 | 2 whole | Thinly sliced for garnish |
| Kosher Salt 🧂 | ½ tsp | Adjust to taste |
| Ground Black Pepper 🌶️ | ¼ tsp | Freshly ground preferred |
[recipeingredientscaler]
The chicken thighs are key here—they stay juicier than breasts during baking (though breasts work in a pinch). Look for boneless, skinless thighs at any major grocery store. Costco has great bulk options if you’re making this often. The teriyaki sauce makes all the difference—Kikkoman or Soy Vay are my go-tos for that perfect balance of sweet and salty.
No fresh ginger? Ground ginger at half the amount works fine. Out of honey? Brown sugar dissolved in a bit of warm water does the trick. If you want extra richness, swap the olive oil for toasted sesame oil—just use half as much. The cornstarch is optional but worth it for that restaurant-style thick, glossy glaze.
Leftovers taste even better the next day once the flavors meld. Store in the fridge for up to 4 days or freeze for 3 months. Reheats beautifully in the microwave (cover with a damp paper towel to prevent drying).
Why You’ll Love This Recipe
- 5-Minute Prep: I just toss the chicken thighs with bottled teriyaki, a drizzle of honey, and garlic—no chopping, no fuss.
- Sticky Sweet Bite: The honey caramelizes in the oven, turning the sauce into this glossy, finger-licking glaze on every piece.
- Feeds the Week: I make a big batch on Sunday and it reheats beautifully for lunches or a quick dinner.
- Cheap Thrills: Boneless thighs stay juicy and cost half what breasts do, so I feel smart and full.
Step-by-Step Instructions for Baked Teriyaki Chicken Using Bottled Sauce
Here’s the method. Straightforward, tested, works every time.
Step 1: Season and Prepare the Chicken
Pat the 1.5 lb boneless skinless chicken thighs dry with paper towels. This ensures the seasoning sticks and promotes even browning. Season both sides generously with 0.5 tsp kosher salt and 0.25 tsp ground black pepper. I always use my hands for this—it gives better coverage than a spoon.
Place the chicken in a olive oil-greased baking dish, arranging the pieces in a single layer without crowding. This spacing allows the heat to circulate properly so everything cooks evenly and develops that beautiful caramelized glaze we’re after.
Step 2: Create the Teriyaki Glaze
In a mixing bowl, whisk together the 1 cup bottled teriyaki sauce, 2 tbsp soy sauce, 1 tbsp honey, 2 tsp minced garlic, and 1 tsp fresh ginger. The honey adds depth and helps the sauce cling to the chicken, while the garlic and ginger provide that aromatic backbone.
For a thicker glaze, sprinkle in the 1 tbsp cornstarch and whisk vigorously until fully dissolved. I’ve found that cornstarch works better than flour here because it creates a glossy, transparent finish rather than a cloudy one. Let the mixture sit for 2 minutes to allow the cornstarch to fully hydrate.
Step 3: Bake to Caramelized Perfection
Pour the teriyaki glaze evenly over the chicken, making sure each piece is well coated. Bake in a preheated 400°F oven for 25 minutes. You’ll start to see the sauce bubble and thicken around the edges—that’s exactly what we want.
After 25 minutes, flip each piece of chicken to ensure even cooking and glazing. Return to the oven for another 15-20 minutes, or until the internal temperature reaches 165°F and the sauce has reduced to a thick, sticky glaze. The chicken should be deep golden brown with some charred bits at the edges.
Step 4: Garnish and Serve
Remove the chicken from the oven and let it rest for 5 minutes. This allows the juices to redistribute so every bite is moist and flavorful. While it rests, sprinkle the 1 tsp sesame seeds over the top—they’ll toast slightly from the residual heat and add a nutty crunch.
Thinly slice the 2 whole green onions and scatter them over the chicken just before serving. The fresh, sharp bite of the green onions cuts through the richness of the teriyaki glaze perfectly. Serve immediately while hot, with the extra sauce from the pan spooned over the top.
Pro Tips For Making Baked Teriyaki Chicken Recipe Using Bottled Sauce
- Preheat the Pan: Sear the chicken thighs for 2-3 minutes per side in a hot pan before baking—this locks in juices and prevents that sad, pale look bottled sauce can give.
- Thin the Sauce: Mix your bottled teriyaki with 1-2 tablespoons of water or pineapple juice; it spreads better and doesn’t turn into a sticky, burnt mess on the thighs.
- Skip the Overcrowding: Leave at least an inch between thighs on the baking sheet, or they’ll steam instead of caramelize—I learned this the hard way with soggy edges.
- Baste Twice: Brush on sauce halfway through baking, then again 5 minutes before pulling it out; this builds layers of flavor without drying out the meat.
Pro Cooking Tips for Perfect Results
Sauce Reduction Trick
For a thicker, more concentrated glaze, I pour the baking dish juices into a small saucepan after removing the chicken. Simmer over medium heat for 3-5 minutes until reduced by half, then pour back over the chicken before serving. 🔥
Even Coating Method
Before baking, I brush the sauce mixture directly onto each piece of chicken with a pastry brush. This ensures every surface gets coated, preventing dry spots. I use a silicone brush—it handles the sticky sauce better than natural bristles.
Oven Position Matters
Place your baking dish on the middle rack of the oven. This provides the most even heat distribution. If your oven runs hot, try the lower third rack to prevent the sauce from burning before the chicken cooks through.
Double Glaze Technique
Halfway through baking, I like to baste the chicken with the pan juices using a spoon. This builds layers of flavor and ensures a glossy finish. The second glaze application is what gives this dish its signature restaurant-style appearance.
Resting is Key
Let the chicken rest for 5-10 minutes after baking. This allows the muscles to relax and reabsorb the juices. Skipping this step means you’ll lose much of that beautiful teriyaki sauce to the cutting board instead of your plate.
Temperature Check
Use an instant-read thermometer to check doneness—I aim for 165°F in the thickest part. The sauce will continue to cook the chicken slightly after removal, so pulling at 160°F is acceptable and prevents overcooking. 💡
Nutrition Facts
Frequently Asked Questions
Can I use chicken breasts instead of thighs?
Yes, but adjust the baking time. Chicken breasts cook faster, so reduce total time to 25-30 minutes total. They may be less juicy, so brining for 30 minutes beforehand helps.
Why is my sauce too thin?
Simmer the pan juices on the stovetop for 3-5 minutes after baking. For next time, add 1 tbsp cornstarch to the sauce before baking to create a thicker glaze.
How do I prevent the sauce from burning?
Bake on the middle rack and cover with foil if it browns too quickly. Stir the sauce halfway through and ensure oven temperature is exactly 400°F.

- Jollof Rice Sauce Recipe: West African Tomato and Spice Infusion - September 25, 2026
- Japanese Rice Soup Recipe: Umami-Rich Comfort in a Bowl - September 25, 2026
- Homemade Cream Of Rice Recipe: Silk-Smooth Breakfast in Minutes - September 25, 2026