
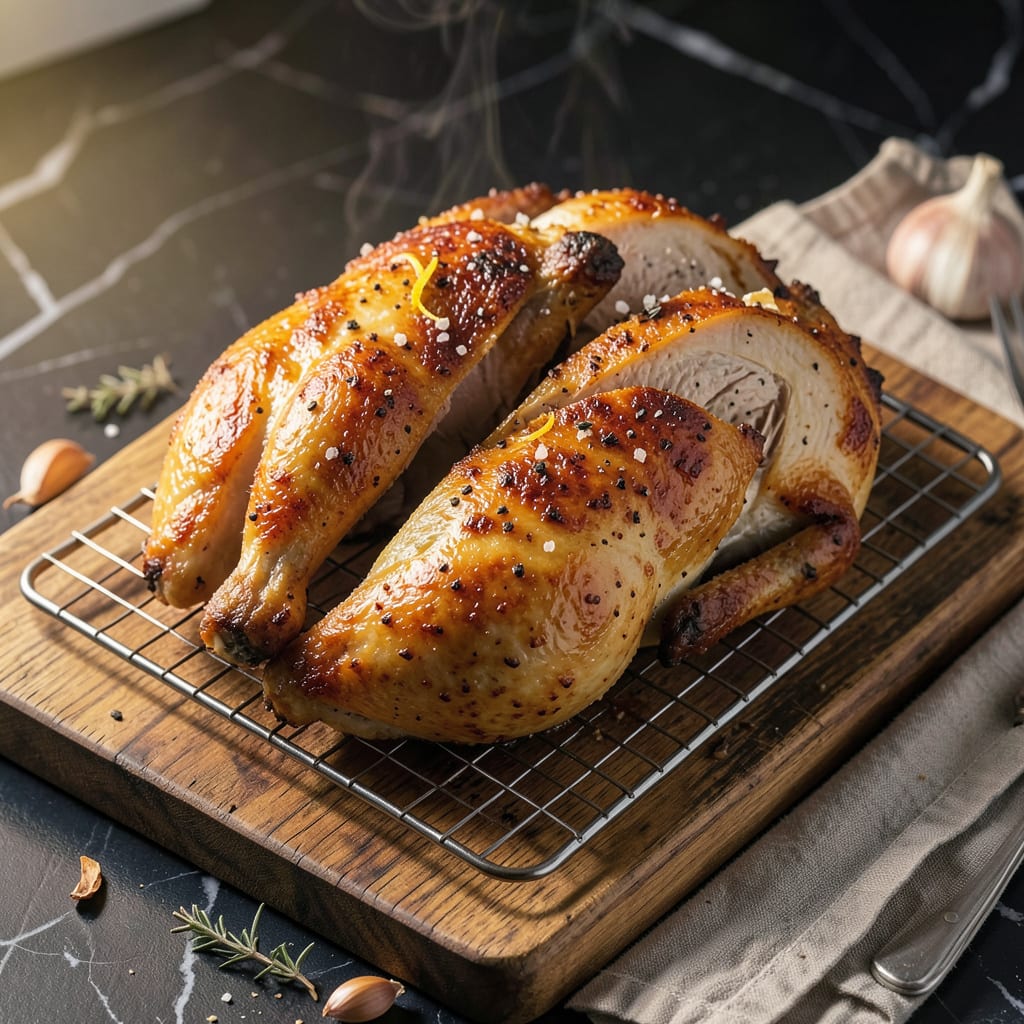
I used to struggle with soggy chicken skin until I discovered the wire rack trick—absolute game-changer. No more flipping halfway through, no more uneven cooking, just perfectly crispy skin all over with zero extra effort. This method works for whole chickens, thighs, or even wings, and it’s honestly foolproof once you know the secrets.
The wire rack elevates the chicken so hot air circulates underneath, cooking every surface evenly while letting fat drip away. I set my oven to 425°F with the rack in the middle position—high enough heat to crisp the skin without drying out the meat. A quick pat dry and light oil rub before seasoning makes all the difference for that golden, crackly finish.
What you’ll end up with is chicken that’s juicy inside with skin so crispy it shatters at first bite. The best part? No babysitting required—just season, place on the rack, and let the oven do the work. I’ve tested this with everything from simple salt-and-pepper seasoning to elaborate spice rubs, and it never fails.
Perfect for meal prep or Sunday dinner, this technique works with any cut. Serve it with roasted veggies or a simple salad, and you’ve got a restaurant-worthy meal with barely any cleanup. Here’s exactly how to make it happen.
📚 In This Guide
- What You’ll Need
- Instructions
- Tips and Common Mistakes
What Youll Need
- ● Chicken: 1 whole chicken (3–5 lbs) or 4–6 bone-in, skin-on pieces (thighs, drumsticks, or breasts)
- ● Wire rack: 1 oven-safe blank” rel=”noopener”>stainless steel or nonstick wire rack (10×15 inches or similar, to fit your baking sheet)
- ● Baking sheet: 1 blank” rel=”noopener”>half-sheet pan (18×13 inches) or similar (with 1-inch sides to catch drippings)
- ● Cooking oil or spray: 1–2 tbsp blank” rel=”noopener”>high-smoke-point oil (avocado, grapeseed, or vegetable) or nonstick cooking spray
- ● Seasonings: 1–2 tbsp blank” rel=”noopener”>kosher salt, 1 tsp black pepper, plus your favorite herbs/spices (paprika, garlic powder, or dried thyme work great!)
- ○ Kitchen twine (optional): For trussing a whole chicken (if needed)
- ● Meat thermometer (highly recommended!): 1 instant-read thermometer to check doneness (165°F for breasts, 175°F for dark meat)
- ○ Aluminum foil (optional): To tent chicken if browning too quickly
- ● Tongs or spatula: For safe handling of hot racks/pans
- ● Paper towels: 2–3 sheets to pat chicken dry (key for crispy skin!)
Step-by-Step Instructions for Baking Chicken on Wire Rack
Here’s the foolproof method I use to get perfectly crispy skin without ever flipping the chicken.
Prepare the Chicken and Season Generously
Start by patting your chicken pieces completely dry with paper towels. This is the most important step—moisture is the enemy of crispy skin. Pay special attention to the skin side, pressing firmly to remove every drop of moisture. I like to use a clean kitchen towel for the final pass to ensure it’s bone-dry.
Season the chicken aggressively on all sides with salt and pepper. Don’t be shy—you want enough seasoning to create flavorful crust. For extra crispiness, I add a light dusting of baking powder to the skin side (about ½ teaspoon per pound), which helps draw out moisture and creates that perfect crunch. Let the seasoned chicken rest at room temperature for 15-20 minutes while your oven preheats.
Set Up Your Wire Rack and Baking Sheet
Place a wire rack inside a rimmed baking sheet. This setup is crucial—it allows hot air to circulate completely around the chicken, crisping the skin on all sides without needing to flip. Make sure your rack has small enough gaps that the chicken won’t sag through (about ½-inch spacing works best).
Lightly coat the wire rack with cooking spray or brush it with oil to prevent sticking. I prefer using a rack with feet that elevate it slightly above the baking sheet—this improves airflow even more. Position your oven rack in the middle of the oven where heat circulates most evenly. Preheat to 425°F—this high temperature is key for getting that golden-brown crispiness.
Arrange Chicken on the Rack and Bake
Place your chicken pieces skin-side up on the prepared wire rack, leaving about 1 inch of space between them. This spacing ensures proper air circulation so the skin crisps evenly rather than steaming. For bone-in pieces, I arrange them with the thicker meaty parts toward the center of the pan where heat is most consistent.
Bake at 425°F for 35-45 minutes depending on size (bone-in thighs take about 40 minutes, while breasts may need only 30 minutes). You’ll know it’s done when the skin is deep golden brown and crispy, and the internal temperature reaches 165°F when measured at the thickest part. The chicken should release easily from the rack when properly cooked.
Rest and Serve for Maximum Crispiness
Remove the chicken from the oven and let it rest on the wire rack for 5-10 minutes before serving. This brief rest allows the juices to redistribute while maintaining that perfect crispiness—unlike resting on a plate where steam can make the skin soggy. I tent it loosely with foil just to keep it warm, but don’t seal it completely.
Serve the chicken directly from the rack while still hot. The skin should have an audible crunch when bitten into, with perfectly cooked meat underneath. If you’ve used bone-in pieces, the meat should pull away from the bones cleanly. For extra flavor, drizzle any accumulated pan juices over the chicken before serving—just avoid the fat that’s rendered out onto the baking sheet below.
Tips and Common Mistakes for Perfectly Crispy Chicken on a Wire Rack
Let me share the small details that make a big difference between good chicken and that restaurant-quality crispiness you’re after.
Drying is Everything: In Step 1, when you’re patting the chicken dry, don’t just dab at it—press firmly with paper towels until the skin feels almost papery. I learned the hard way that any remaining moisture creates steam in the oven, which is the enemy of crispiness. For bone-in pieces, pay extra attention to the crevices where moisture hides. The 15-20 minutes of resting time after drying isn’t just for seasoning—it lets the surface dry out even more before hitting the oven.
Rack Selection Matters: Not all wire racks are created equal. For Step 2, look for a rack with ½-inch spacing as mentioned—any larger and small pieces might sag through. I prefer racks with feet that elevate them slightly above the baking sheet, which improves airflow underneath. If your rack doesn’t have feet, place a second inverted baking sheet underneath to create that crucial air gap. This small elevation makes a noticeable difference in how evenly the skin crisps.
Oven Position Strategy: When baking at 425°F in Step 3, position your oven rack in the exact center of the oven. I tested this with multiple batches—center positioning gives the most even heat circulation, preventing one side from browning faster than the other. If you notice the skin browning too quickly before reaching 165°F internally, move the rack one position lower and tent loosely with foil. The 35-45 minute baking window accounts for different piece sizes, so start checking bone-in thighs at 35 minutes and breasts at 30 minutes.
Resting Technique: During the 5-10 minute rest in Step 4, keep the chicken on the wire rack rather than transferring to a plate. This prevents the crispy skin from steaming and softening. I tent it very loosely with foil—just enough to keep it warm but not so tight that moisture accumulates. The rack allows air to circulate around the chicken during resting, maintaining that perfect crunch you worked so hard to achieve.
Pro Tips for Baking Chicken On Wire Rack
- Let me share the small details that make a big difference between good chicken and that restaurant-quality crispiness…
- Drying is Everything: In Step 1, when you’re patting the chicken dry, don’t just dab at it—press firmly with paper to…
- Rack Selection Matters: Not all wire racks are created equal. For Step 2, look for a rack with ½-inch spacing as ment…
Frequently Asked Questions
Do I need to flip the chicken when baking it on a wire rack?
Nope! The beauty of a wire rack is that heat circulates evenly around the chicken, so flipping isn’t required. Just place it skin-side up for maximum crispiness, and let the rack work its magic. Pro tip: Pat the skin dry before baking for extra crunch!
What’s the best temperature and time for baking chicken on a wire rack?
For juicy, crispy results, bake at 425°F (220°C). Bone-in thighs or drumsticks take 35–45 minutes, while boneless breasts need 20–25 minutes. Always use a meat thermometer—165°F (74°C) is the safe internal temp!
Can I use a cooling rack instead of a wire rack meant for baking?
In a pinch, yes—but avoid nonstick or flimsy racks. Baking racks are sturdier and designed for high heat. If using a cooling rack, place a baking sheet underneath to catch drippings and prevent warping. Stainless steel is your best bet!
Why is my chicken skin not crispy after baking on a wire rack?
Three common culprits: 1) Skin wasn’t dried thoroughly before baking, 2) oven temp was too low, or 3) rack was placed too close to the bottom. Try patting skin dry, cranking up the heat, or moving the rack to the middle position for better airflow.
What can I use if I don’t have a wire rack?
No rack? No problem! Try these alternatives:
- Veggie bed: Place chicken on chopped onions, carrots, or potatoes to elevate it.
- Baking stones: Preheat a pizza stone for even heat distribution.
- DIY foil balls: Crumple foil into small “feet” to lift the chicken slightly.
Baking chicken on a wire rack is the easy secret to juicy meat and perfectly crispy skin—every single time! 🍗 By letting air circulate all around, you skip the flipping hassle while locking in flavor and texture. Whether you’re meal prepping or whipping up a weeknight dinner, this method delivers restaurant-quality results with minimal effort.
Ready to put it to the test? Grab your favorite seasoning blend and try it with our recommended setup—your taste buds (and dinner guests) will thank you! For extra inspiration, experiment with glazes or marinades next. Happy baking! 🔥

- Jollof Rice Sauce Recipe: West African Tomato and Spice Infusion - September 25, 2026
- Japanese Rice Soup Recipe: Umami-Rich Comfort in a Bowl - September 25, 2026
- Homemade Cream Of Rice Recipe: Silk-Smooth Breakfast in Minutes - September 25, 2026