
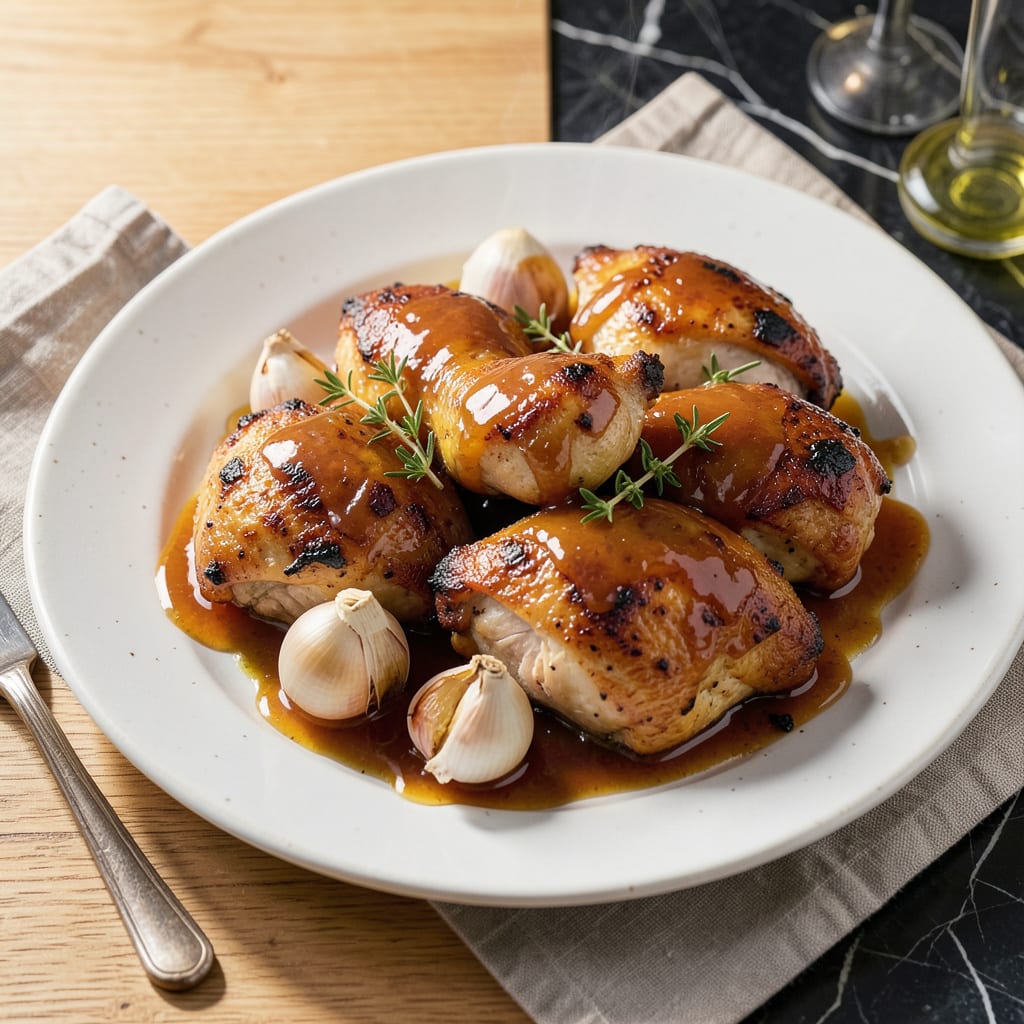
This apricot glazed chicken delivers the perfect balance of sweet and savory, with a sticky, caramelized finish that elevates it above other recipes. The oven-baked method ensures juicy meat with minimal effort.
What sets this dish apart is the glossy glaze that clings to every bite, creating restaurant-quality results at home. Simple ingredients and precise timing make it both impressive and approachable.
Ingredients for Best Apricot Glazed Chicken
Eleven quality ingredients create this sweet and sticky oven-baked delight with ease.
| Ingredient | Amount | Notes |
|---|---|---|
| Chicken Thighs 🍗 | 2 lb | Boneless, skinless preferred |
| Apricot Preserves 🍑 | ¾ cup | High-quality for best flavor |
| Dijon Mustard 🟡 | 2 tbsp | Smooth, not whole grain |
| Soy Sauce 🫕 | 2 tbsp | Low-sodium preferred |
| Honey 🍯 | 2 tbsp | Pure, not processed |
| Garlic Cloves 🧄 | 3 cloves | Minced finely |
| Fresh Ginger 🌿 | 1 tbsp | Peeled and grated |
| Olive Oil 🫒 | 2 tbsp | Extra-virgin for richness |
| Apple Cider Vinegar 🍏 | 1 tbsp | Balances sweetness |
| Kosher Salt 🧂 | 1 tsp | Diamond Crystal preferred |
| Black Pepper 🌶️ | ½ tsp | Freshly ground |
| Dried Thyme 🍃 | ½ tsp | Crushed for better release |
| Fresh Parsley 🌿 | 2 tbsp | Chopped, for garnish |
[recipeingredientscaler]
The chicken is the foundation—boneless, skinless thighs stay juicier than breasts during baking. For the apricot preserves, Bonne Maman or Smucker’s deliver consistent quality and texture. Fresh ginger and garlic are non-negotiable for that restaurant-quality depth of flavor. Find these at any well-stocked supermarket, or Whole Foods for the organic versions.
No apricot preserves? Strawberry or peach jam works in a pinch, though the flavor shifts slightly. Substitute maple syrup for honey if needed. Low-sodium tamari can replace soy sauce, but reduce by half to avoid over-salting. The Dijon mustard can be swapped with whole-grain mustard for texture, though it will be less smooth.
Store unused apricot preserves in the fridge for up to 1 month. Fresh parsley stays vibrant wrapped in damp paper towels for 5-7 days. The glaze can be prepped ahead and refrigerated for 3 days—just reheat gently before using.
Why You’ll Love This Recipe
- One Pan Magic: I toss everything in a single skillet—chicken, apricot preserves, and that tangy Dijon—and let the oven do the rest.
- Sweet-Savory Perfection: The honey and apricot preserves caramelize into this sticky, finger-licking glaze that clings to every bite.
- Meal Prep Dream: It reheats beautifully, and I love packing the leftovers for lunch the next day. (Yes, even on a Tuesday night)
- Budget-Friendly Winner: Chicken thighs stay juicy and cheap, and a jar of preserves goes a long way.
Step-by-Step Instructions for Apricot Glazed Chicken
Here is the proven method for achieving perfectly caramelized, fall-off-the-bone chicken with a glossy glaze.
Step 1: Season and Sear the Chicken Thighs
Pat the 2 lb Chicken Thighs dry with paper towels to ensure optimal browning. Season both sides evenly with 1 tsp Kosher Salt, 0.5 tsp Black Pepper, and 0.5 tsp Dried Thyme, pressing the spices into the meat so they adhere.
Heat 2 tbsp Olive Oil in a large oven-safe skillet over medium-high heat until shimmering. Add the chicken thighs skin-side down and sear undisturbed for 5-6 minutes until the skin is deep golden brown and releases easily from the pan. Flip and sear the other side for 3-4 minutes.
Step 2: Prepare the Apricot Glaze
While the chicken sears, combine 0.75 cup Apricot Preserves, 2 tbsp Dijon Mustard, 2 tbsp Soy Sauce, 2 tbsp Honey, 3 cloves Garlic Cloves (minced), 1 tbsp Fresh Ginger (grated), and 1 tbsp Apple Cider Vinegar in a bowl. Whisk until smooth and the honey is fully incorporated.
This balance of sweet, tangy, and savory elements creates the signature sticky glaze. The vinegar cuts through the sweetness, while the ginger and garlic add depth. Set the mixture aside until ready to use.
Step 3: Glaze and Bake the Chicken
Preheat the oven to 375°F. Once the chicken is seared, reduce the heat to medium and pour the apricot glaze evenly over the thighs. Use a spoon to coat each piece thoroughly, ensuring the tops are fully covered.
Transfer the skillet to the preheated oven and bake uncovered for 20-25 minutes, basting the chicken with the pan juices halfway through. The glaze should thicken and caramelize into a glossy, sticky coating, and the chicken should reach an internal temperature of 165°F.
Step 4: Rest and Garnish
Remove the skillet from the oven and let the chicken rest in the pan for 5 minutes. This allows the juices to redistribute and the glaze to set slightly. The internal temperature will rise a few degrees during this time.
Transfer the chicken to a serving platter and spoon any remaining glaze from the pan over the top. Garnish with 2 tbsp Fresh Parsley for a pop of color and freshness. The parsley adds a bright contrast to the rich, sweet glaze.
Pro Tips For Making Best Apricot Glazed Chicken
- Sear Skin First: Start the chicken thighs skin-side down in a hot pan for 5-6 minutes—I learned this the hard way after ending up with pale, flabby skin. That crispy base keeps the glaze from making it soggy.
- Thin the Preserves: Apricot preserves can be stubbornly thick, so warm them with a splash of water or chicken broth before mixing with the other glaze ingredients. It coats the chicken evenly instead of sitting in globs.
- Skip the Overcrowding: Resist the urge to fit all the thighs in one pan—give them space or they’ll steam instead of sear. I used to rush this and wondered why my chicken boiled in its own juices.
- Glaze at the End: Brush the apricot mixture on only in the last 5-10 minutes of baking to prevent the honey and preserves from burning. After ruining two batches with bitter, charred glaze, I finally figured out the timing.
Essential Equipment for This Recipe
Oven-Safe Skillet
An oven-safe skillet is non-negotiable for this recipe—I swear by my Lodge 12-inch cast iron. It transitions seamlessly from stovetop searing to oven baking. A stainless steel skillet with an oven-safe handle works too. 🔥
Tongs for Flipping
Use 12-inch locking tongs for easy flipping of the chicken thighs. Brands like OXO Good Grips or TongMaster provide the perfect balance of grip and control. Avoid forks—they pierce the meat, causing juices to escape.
Whisk for Glaze
A small silicone whisk ensures your apricot glaze is smooth and lump-free. I love my Cuisinox whisk because it’s heat-resistant and won’t scratch your skillet. Whisk vigorously to fully incorporate the honey and preserves.
Instant-Read Thermometer
Precise temperature control is key for juicy chicken. I use the ThermoWorks ThermoPop to check the internal temp reaches 165°F. It’s affordable, accurate, and gives readings in 3-4 seconds. 🌡️
Basting Spoon
A heat-resistant basting spoon helps coat the chicken evenly with glaze. Look for one with a long handle to keep your hands safe. I prefer silicone-tipped spoons because they won’t scratch your cookware.
Serving Platter
Use a large, shallow platter to showcase the chicken. A white ceramic platter makes the glossy glaze pop visually. I often drizzle extra glaze on the platter before adding the chicken for extra shine.
Nutrition Facts
Frequently Asked Questions
Can I use chicken breasts instead of thighs?
Yes, but reduce baking time to 15-20 minutes as breasts cook faster. Thighs are preferred for their juiciness and ability to stay tender during the longer cooking process.
How do I make the glaze thicker?
Simmer the glaze on the stovetop for 3-5 minutes before adding it to the chicken. This reduces the liquid and intensifies the flavor, creating a more syrupy consistency.
Can I prepare this dish ahead of time?
Make the glaze up to 2 days in advance and store it in the fridge. Sear the chicken as directed, then refrigerate it (uncoated) for up to 1 day before baking.
What should I serve with this chicken?
Pair it with roasted vegetables or fluffy rice to soak up the extra glaze. A simple green salad with a light vinaigrette balances the sweetness perfectly.

- Jollof Rice Sauce Recipe: West African Tomato and Spice Infusion - September 25, 2026
- Japanese Rice Soup Recipe: Umami-Rich Comfort in a Bowl - September 25, 2026
- Homemade Cream Of Rice Recipe: Silk-Smooth Breakfast in Minutes - September 25, 2026