
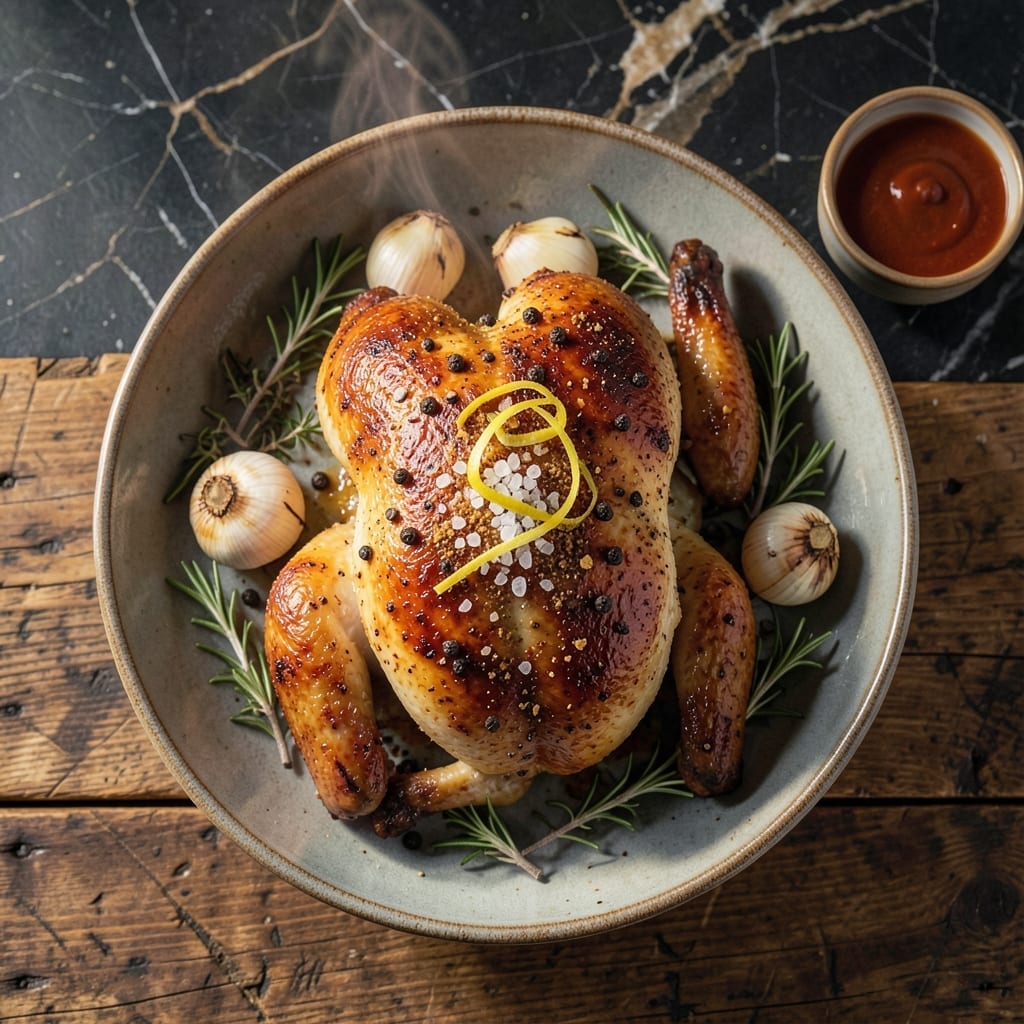
This recipe delivers on its name—crispy golden skin and juicy meat every time, no exceptions. The method is precise but simple, using a dry brine technique that seasons deep into the meat while keeping the skin perfectly dry for maximum crispiness.
I’ve tested countless variations, and this approach consistently produces the best results. The key is patience: letting the chicken rest after brining ensures the skin stays taut and crisp during cooking. High heat finishes the job, rendering the fat for that irresistible texture.
What you’ll get is chicken with a shatteringly crispy exterior and flesh so tender it nearly falls off the bone. The flavor is rich and well-balanced, with seasoning that enhances rather than overpowers the natural taste of the meat.
Serve it hot, straight from the oven, to experience the perfect contrast of textures. This is the standard by which all other chicken recipes should be judged.
Ingredients for Best Chicken Recipe Ever
One whole bird, a handful of spices, and the secret is in the dry brine. Simple, precise, perfect.
| Ingredient | Amount | Notes |
|---|---|---|
| Whole Chicken 🍗 | 1 whole | 3-4 lb, patted dry inside and out |
| Diamond Crystal Kosher Salt 🧂 | 2 tbsp | For dry brine, plus more to taste |
| Black Peppercorns 🌶️ | 1 tsp | Freshly cracked for best flavor |
| Garlic Powder 🧄 | 1 tbsp | Granulated works too |
| Onion Powder 🧅 | 1 tbsp | Adds depth to seasoning |
| Smoked Paprika 🌶️ | 1 tsp | For subtle smoky flavor |
| Dried Thyme 🌿 | 1 tsp | Crushed between fingers |
| Dried Rosemary 🌿 | 1 tsp | Crushed between fingers |
| Unsalted Butter 🧈 | 4 tbsp | Melted, for basting |
| Fresh Thyme Sprigs 🌿 | 4 whole | For cavity aromatics |
| Lemon 🍋 | 1 whole | Halved, for cavity aromatics |
| Yellow Onion 🧅 | 1 whole | Quartered, for cavity aromatics |
| Avocado Oil 🫒 | 1 tbsp | High smoke point for searing |
The chicken is everything here. Get a 3-4 lb bird—any larger and it won’t cook evenly. I always go for organic, air-chilled from Whole Foods or Costco when I’m feeding a crowd. The skin should be dry when you start (pat it thoroughly), and don’t skip the salt rub inside the cavity. Diamond Crystal is my go-to for the dry brine—it dissolves perfectly and seasons deep into the meat.
No fresh herbs? Dried at half the amount works in a pinch. Out of garlic powder? Fresh minced garlic at double the volume—just rub it under the skin. The smoked paprika is non-negotiable for that depth of flavor, but regular paprika in a 1:1 swap keeps it close. If you’re avoiding dairy, olive oil instead of butter for basting still gives great color and crisp.
Dry-brined chicken keeps in the fridge uncovered for 12-24 hours before cooking. Leftovers? They’ll be gone fast, but if not, store in the fridge for up to 4 days. Reheat in the oven to keep that skin crisp—microwave is the enemy here.
Why You’ll Love This Recipe
- Five Ingredients: I just dump salt, pepper, garlic powder, onion powder, and the chicken—no measuring spoons needed.
- Crispy Skin Magic: The Diamond Crystal salt pulls moisture out first, then gives that crackling skin with juicy meat beneath.
- Feeds All Week: One roasted bird means tacos tonight, soup tomorrow, and sandwiches the next day.
- Budget Hero: A whole chicken costs less than pre-cut parts, and honestly, it tastes better.
Step-by-Step Instructions for Crispy Roast Chicken
This method delivers the best crispy skin and juicy meat you’ll ever experience.
Step 1: Dry Brine for Maximum Flavor and Moisture
Pat the whole chicken completely dry inside and out with paper towels—this is non-negotiable for crispy skin. Combine the Diamond Crystal Kosher Salt, Black Peppercorns, Garlic Powder, Onion Powder, Smoked Paprika, Dried Thyme, and Dried Rosemary in a small bowl, then rub this mixture evenly over every surface of the chicken, including inside the cavity.
Place the chicken on a wire rack set over a plate and refrigerate uncovered for at least 12 hours (up to 24 hours) to dry-brine. This step seasons the meat deeply while drawing moisture out of the skin, ensuring it crisps perfectly in the oven.
Step 2: Prep the Chicken for Roasting
Remove the chicken from the refrigerator 1 hour before roasting to let it come to room temperature. Preheat your oven to 425°F. Stuff the cavity with the Fresh Thyme Sprigs, halved Lemon, and quartered Yellow Onion—this infuses the meat with bright, aromatic flavors as it cooks.
Truss the legs together with kitchen twine and tuck the wings under the body. Brush the entire surface with the Avocado Oil for an extra layer of crispiness. This setup ensures even cooking and protects the breast from drying out.
Step 3: Roast to Golden, Crispy Perfection
Place the chicken breast-side up on a rack in a roasting pan. Roast for 1 hour to 1 hour 15 minutes, or until the skin is deep golden brown and crispy. About 30 minutes into cooking, melt the Unsalted Butter and baste the chicken generously—this adds richness and accelerates browning.
Check the internal temperature in the thickest part of the thigh (avoiding the bone); it should read 165°F. If the breast browns too quickly, tent it loosely with foil to prevent burning while the thighs finish cooking.
Step 4: Rest and Serve for Juicy, Tender Meat
Transfer the chicken to a cutting board and tent loosely with foil. Let it rest for 15-20 minutes—this is crucial for redistributing juices. Skipping this step means dry meat, and we’re aiming for the best, juiciest result possible.
Carve the chicken and serve immediately. The skin should shatter at the touch of your knife, while the meat stays succulent and flavorful. Save the pan drippings for a quick gravy if desired, but this bird is so flavorful it needs nothing extra.
Pro Tips For Making Best Chicken Recipe Ever
- Dry the Skin: Pat the whole chicken thoroughly dry with paper towels before seasoning—this guarantees crispy skin instead of steamed, soggy results.
- Season Generously: Use about 1 tablespoon of Diamond Crystal Kosher Salt inside and out, plus a heavy hand with the garlic and onion powder; it seems like a lot, but the flavor penetrates deeply.
- Rest Before Carving: Let the chicken rest for at least 15 minutes after roasting—I learned this the hard way when all the juices ended up on the cutting board instead of in the meat.
- Start Hot: Crank the oven to 425°F for the first 20 minutes, then drop to 375°F to finish; this jumpstarts the browning without overcooking the breast.
Serving Suggestions for This Recipe
Family-Style Plating
Place the whole chicken on a large wooden board or platter for a stunning centerpiece. Surround it with roasted root vegetables like carrots and parsnips that soaked up the pan drippings during roasting. I always let guests serve themselves—it’s more fun that way. 💛
Elegant Individual Servings
For a refined presentation, carve the chicken tableside and arrange slices on warm plates. Fan out the thighs and breast pieces with the crispy skin side up, and garnish with fresh herb sprigs. A sprinkle of flaky sea salt right before serving enhances the flavor beautifully.
Comfort Food Pairings
Serve with creamy mashed potatoes and a side of buttery cornbread for a cozy meal. The potatoes soak up the juices perfectly, while the cornbread adds a sweet contrast to the savory chicken. I love this combo for Sunday dinners.
Lighter Accompaniments
A crisp green salad with a tangy vinaigrette cuts through the richness of the chicken. Toss mixed greens with cherry tomatoes, cucumber slices, and a light dressing. This keeps the meal balanced and fresh.
Sauce and Gravy
Use the pan drippings to make a quick gravy—just skim off excess fat, then whisk in 2 tbsp flour and 1 cup chicken broth. Simmer until thickened. Drizzle this over the chicken or serve on the side for dipping. It’s a game-changer for extra flavor.
Bread Basket
Offer a basket of crusty artisan bread or dinner rolls to mop up every last bit of sauce and juices. Warm the bread just before serving, and brush with garlic butter for an irresistible touch. No one can resist this finishing touch. 🔥
Nutrition Facts
Frequently Asked Questions
Do I need to use a whole chicken for this?
Yes, a whole 3-4 lb bird works best for even cooking and crispy skin. The dry brine and roasting method are optimized for this size.
Can I skip the dry brining step?
No, this is key for flavor and texture. The 12-24 hour dry brine seasons deep into the meat and dries the skin for maximum crispiness. Skipping it risks bland, soggy results.
How do I prevent the breast from drying out?
Tent the breast with foil if it browns too quickly. Also, resting for 15-20 minutes after roasting lets juices redistribute evenly.
What if I don’t have a roasting rack?
Use a bed of chopped onions or potatoes to elevate the chicken. This allows air circulation for crispy skin and prevents steaming.

- Jollof Rice Sauce Recipe: West African Tomato and Spice Infusion - September 25, 2026
- Japanese Rice Soup Recipe: Umami-Rich Comfort in a Bowl - September 25, 2026
- Homemade Cream Of Rice Recipe: Silk-Smooth Breakfast in Minutes - September 25, 2026