
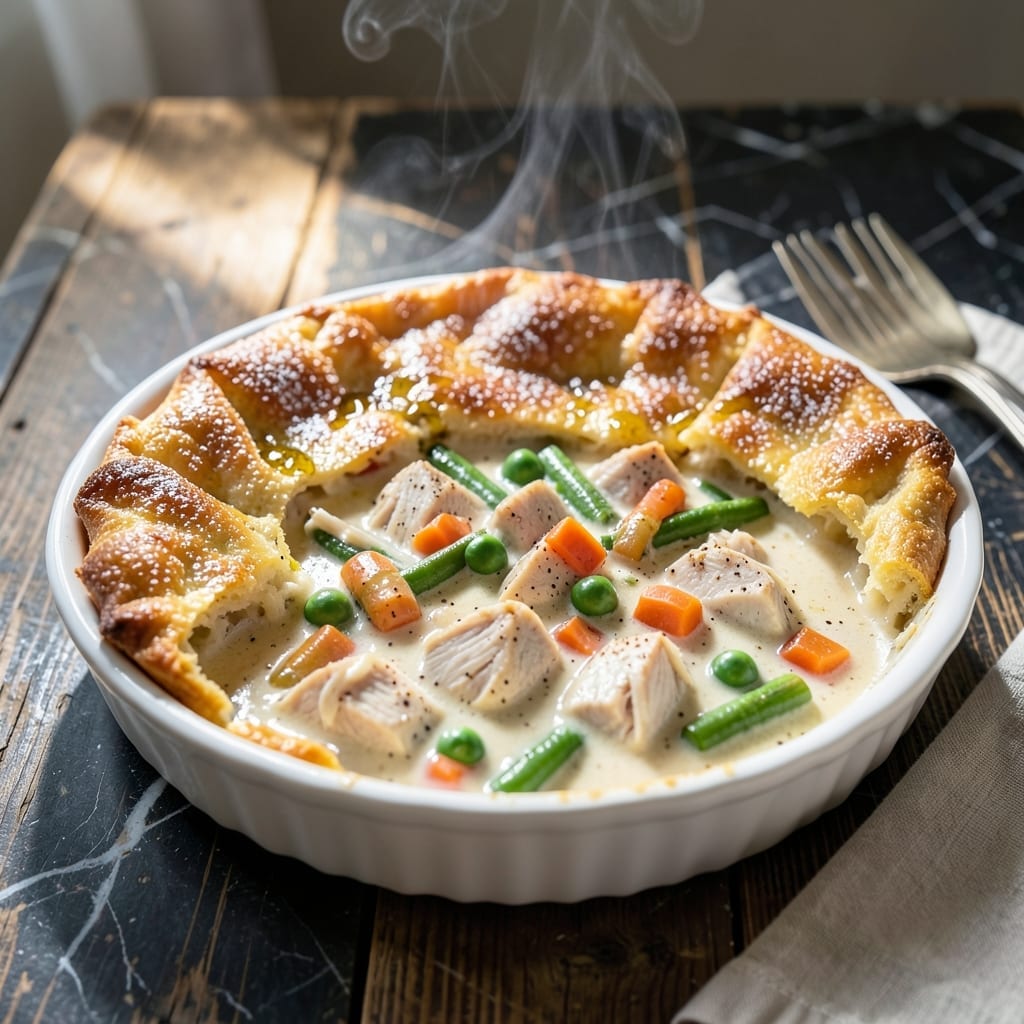
This Bisquick chicken pie delivers a flaky crust with a creamy, hearty filling that comes together faster than you’d expect.
I’ve streamlined the process using Bisquick for the topping, which bakes up golden and tender in just 30 minutes. The filling combines tender chicken with vegetables in a rich, velvety sauce that’s comforting and satisfying.
The secret is pre-cooking the filling to ensure the crust stays perfectly flaky and doesn’t get soggy. It’s a foolproof method that guarantees professional results without the fuss.
Perfect for busy weeknights when you want a homemade meal that tastes like it took hours. Here’s how to make it.
Ingredients for Bisquick Chicken Pie
Pantry staples and a rotisserie chicken make this come together fast. Nothing complicated here.
| Ingredient | Amount | Notes |
|---|---|---|
| Bisquick Baking Mix 🥣 | 2 cups | Original variety preferred |
| Cooked Chicken Breast 🍗 | 2 cups | Shredded or diced |
| Frozen Mixed Vegetables 🥕 | 1 ½ cups | Peas, carrots, corn blend |
| Cream of Chicken Soup 🥫 | 1 can | 10.5 oz can, undiluted |
| Chicken Broth 🍲 | 1 cup | Low-sodium preferred |
| Milk 🥛 | ¾ cup | Whole or 2% for richness |
| Unsalted Butter 🧈 | ½ cup | Melted, for crust topping |
| Onion 🧅 | 1 whole | Medium, finely diced |
| Garlic Cloves 🧄 | 2 cloves | Minced for filling |
| Dried Thyme 🌿 | ½ tsp | Or 1 tsp fresh thyme |
| Salt 🧂 | ½ tsp | Adjust to taste |
| Black Pepper 🌶️ | ¼ tsp | Freshly ground preferred |
| Paprika 🌶️ | ¼ tsp | Sweet or smoked variety |
The Bisquick is non-negotiable here—Betty Crocker’s original mix is the gold standard. Grab it from any grocery store, but check the date (old mix loses its lift). For the chicken, a rotisserie from Costco or Sam’s Club saves time and adds flavor. If using raw, poach breasts in the broth first to keep them juicy. The cream of chicken soup should be Campbell’s or Progresso—off-brands can be watery.
No Bisquick? Homemade baking mix (flour + baking powder + salt + shortening) works, but the texture won’t be identical. Swap the chicken for turkey or even canned white beans for a twist. Frozen veggies can be fresh—just chop them small so they cook through. If you’re out of milk, half-and-half or evap adds richness, but trim the salt elsewhere.
Leftovers reheat beautifully (cover with foil to keep the crust crisp). Stores 3-4 days in the fridge or 2 months frozen. Pro tip: bake in a glass dish so you can pop it straight from freezer to oven.
Why You’ll Love This Recipe
- One Bowl Wonder: I dump the Bisquick, soup, and broth in a single bowl—no whisking, no fuss, just mix and go.
- Creamy Comfort: That golden Bisquick crust over the tender chicken and veggies soaked in creamy soup? Pure cozy in every bite.
- Feeds the Crew: I stretch one batch into dinner for four and still have leftovers for lunch the next day.
- Pantry Hero: Between the frozen veggies, Bisquick, and canned soup, I can make this without a last-minute grocery run.
Step-by-Step Instructions for Bisquick Chicken Pot Pie
Here’s the method I use to nail that flaky crust and rich filling every time.
Step 1: Sauté Aromatics for the Filling Base
Heat a large skillet over medium heat and melt 2 tablespoons of the unsalted butter. Add the diced onion and cook for 3-4 minutes until it turns translucent and just starts to pick up golden edges.
Stir in the minced garlic cloves and cook for 30 seconds until fragrant—don’t let it brown. This builds the flavor foundation that makes the filling taste complex and deeply savory.
Sprinkle in the dried thyme, salt, black pepper, and paprika, stirring to bloom the spices in the butter for 15 seconds.
Step 2: Build the Creamy Chicken and Vegetable Filling
Add the 1.5 cups Frozen Mixed Vegetables to the skillet and cook for 2 minutes to take off the raw edge. The vegetables should remain bright and slightly crisp—they’ll finish cooking in the oven.
Pour in the 1 can Cream of Chicken Soup, 1 cup Chicken Broth, and 2 cups Cooked Chicken Breast. Stir well to combine, then let it simmer for 3-4 minutes until the mixture thickens slightly and becomes bubbly at the edges.
Remove from heat and let the filling cool for 5 minutes—this prevents it from melting the butter in your crust before baking.
Step 3: Prepare the Bisquick Topping
In a bowl, stir together the 2 cups Bisquick Baking Mix and 0.75 cup Milk until just combined. The batter will be thick and slightly lumpy—that’s perfect. Don’t overmix or you’ll end up with a tough crust.
Here’s the thing—I melt the remaining unsalted butter (about 6 tablespoons) and pour it over the batter, then gently fold it in. This extra fat is what creates that incredible flaky texture on top.
Step 4: Assemble and Bake to Golden Perfection
Transfer the filling to a 9×13-inch baking dish or four individual ramekins. Spread the Bisquick mixture evenly over the top—it should completely cover the filling with no gaps.
Bake in a preheated 375°F oven for 25-30 minutes until the topping is deep golden brown and a toothpick inserted in the center comes out clean. The edges should be slightly crisp, and you’ll see it pulling away from the sides of the dish.
Let it rest for 5 minutes before serving—this gives the filling time to set slightly so it doesn’t run out when you cut into it.
Pro Tips For Making Bisquick Chicken Pie
- Precook the Veggies: Toss the frozen mixed vegetables in the microwave with 2 tablespoons of water for 3-4 minutes first. I learned this the hard way—raw veggies make the filling watery and the crust soggy.
- Shred Chicken Fine: Use two forks to shred the cooked chicken breast into small, even pieces. Sounds tedious, but it actually changes the outcome by making every bite taste like filling rather than chicken chunks.
- Thin the Filling: Mix the cream of chicken soup with 1/2 cup chicken broth before adding it to the pie. After burning three batches, I finally figured out that thick soup alone makes the center dense and hard to cook through.
- Vent the Crust: Cut 3-4 small slits in the Bisquick topping before baking. My grandmother swore by this, and she was right: it lets steam escape so your crust doesn’t turn into a sad, soggy blanket.
Dietary Considerations for This Dish
Gluten-Free Option
Swap the Bisquick for gluten-free Bisquick mix—it behaves nearly the same in this recipe. I’ve tested it with Betty Crocker’s gluten-free blend, and the crust still gets that golden, flaky texture. Just ensure your cream of chicken soup is also gluten-free (Progresso makes a good one).
Lower-Sodium Version
Use low-sodium chicken broth and reduced-sodium cream of chicken soup to cut the salt content significantly. I also skip the added salt in the filling and rely on the natural flavors of the ingredients. The result is just as delicious without the extra sodium.
Dairy-Free Adjustments
For a dairy-free version, replace the milk with unsweetened almond or oat milk. Use dairy-free butter (like Earth Balance) for both the filling and topping. The texture remains rich and satisfying, and no one will guess it’s dairy-free. 💪
Vegetarian Twist
Swap the chicken for 2 cups cooked chickpeas or white beans and use vegetable broth instead of chicken broth. The filling stays creamy and hearty, and the Bisquick topping works the same. I like adding a pinch of smoked paprika for extra depth.
Lighter Filling
Use low-fat milk and 98% fat-free cream of chicken soup to reduce calories while keeping the dish creamy. I also bulk up the vegetables to 2 cups for added fiber and volume. The result is lighter but still deeply satisfying.
Nut-Free Note
This recipe is naturally nut-free, but always check your Bisquick and soup labels for potential cross-contamination warnings. I stick with Betty Crocker and Campbell’s brands for peace of mind. Perfect for school potlucks or family meals with nut allergies.
Nutrition Facts
Frequently Asked Questions
Can I use raw chicken instead of cooked?
Yes, but poach it first. Simmer 1 lb diced chicken in 2 cups broth for 12-15 minutes until 165°F. This ensures it’s fully cooked before baking.
Why did my topping turn out dense?
Overmixing the batter is the likely culprit. Stir just until combined—lumps are fine! Also, ensure your Bisquick is fresh for best rise.
Can I make this ahead of time?
Assemble the dish (unbaked) and refrigerate for up to 12 hours. Add 5 minutes to the baking time if chilled. Perfect for busy days!
What’s the best way to reheat leftovers?
Cover with foil and warm at 350°F for 15-20 minutes. For single servings, microwave for 1-2 minutes with a damp paper towel.

- Jollof Rice Sauce Recipe: West African Tomato and Spice Infusion - September 25, 2026
- Japanese Rice Soup Recipe: Umami-Rich Comfort in a Bowl - September 25, 2026
- Homemade Cream Of Rice Recipe: Silk-Smooth Breakfast in Minutes - September 25, 2026