
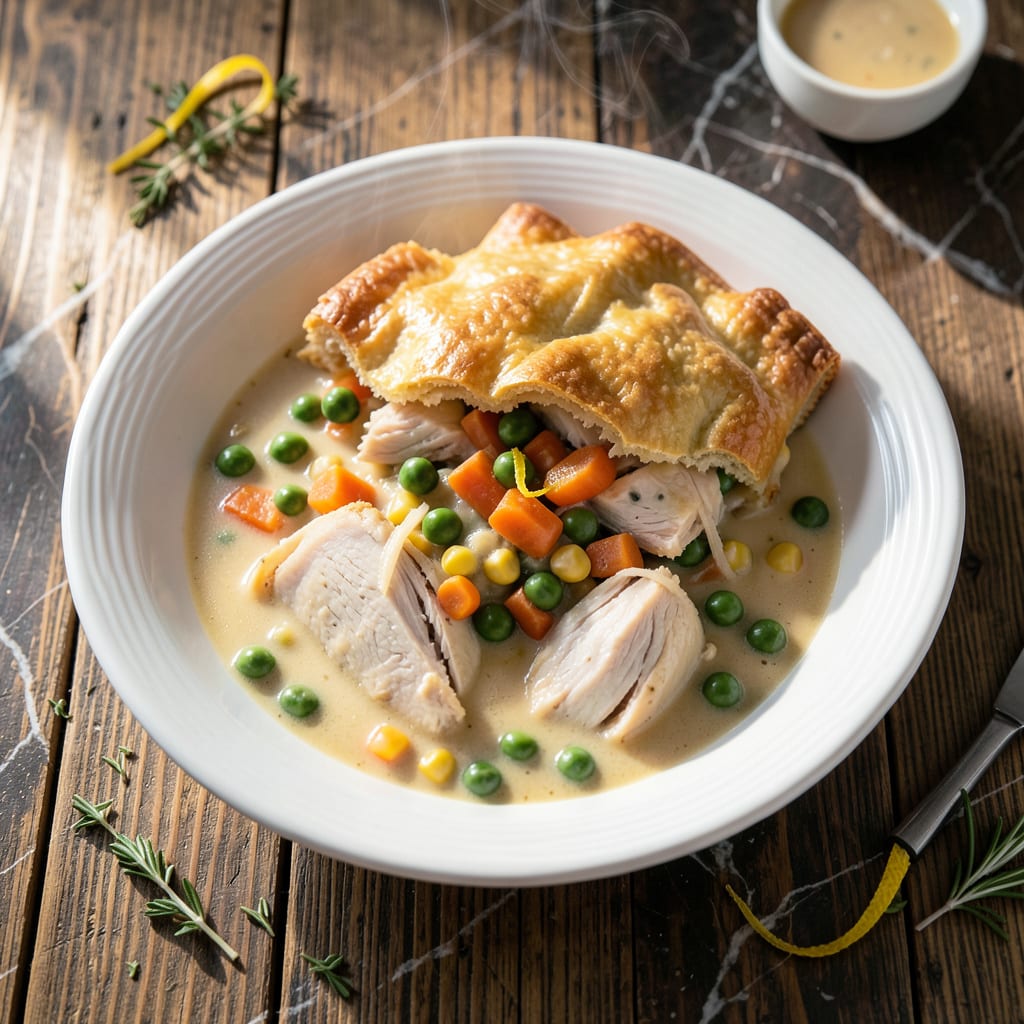
This one-dish wonder transforms simple ingredients into a flaky crust with a rich filling. The Bisquick base creates a golden top while the chicken and vegetables bake to perfection below.
With minimal prep and 30 minutes in the oven, you’ll have a foolproof meal that looks and tastes like you spent hours. It’s comfort food made effortlessly delicious.
Ingredients for Bisquick Impossibly Easy Chicken Pot Pie
Bisquick, chicken, and veggies create this comforting one-dish meal with minimal effort.
| Ingredient | Amount | Notes |
|---|---|---|
| Bisquick Original Baking Mix 🥣 | 1 ½ cups | The base for flaky crust |
| Milk 🥛 | 1 cup | Whole milk preferred |
| Large Eggs 🥚 | 2 whole | For binding and richness |
| Cooked Chicken Breast 🍗 | 2 cups | Shredded or diced |
| Cream of Chicken Soup 🥣 | 1 can | Condensed, not diluted |
| Frozen Mixed Vegetables 🥕 | 1 ½ cups | Peas, carrots, corn, green beans |
| Unsalted Butter 🧈 | ½ cup | Melted for crust topping |
| Onion 🧅 | ½ whole | Diced, about 1/2 cup |
| Garlic Cloves 🧄 | 2 cloves | Minced for depth of flavor |
| Chicken Broth 🍲 | ½ cup | Low-sodium preferred |
| Salt 🧂 | ½ tsp | Adjust to taste |
| Black Pepper 🌶️ | ¼ tsp | Freshly ground preferred |
| Dried Thyme 🌿 | ½ tsp | For earthy aroma |
| Paprika 🌶️ | ¼ tsp | Adds subtle warmth |
[recipeingredientscaler]
The Bisquick is non-negotiable here—Betty Crocker’s original has the right texture for that golden, flaky top. I grab mine at Walmart or any major supermarket. For the chicken, rotisserie chicken (shredded) saves time, but poached chicken breasts work too if you’re starting from scratch. The cream of chicken soup? Campbell’s is the standard, but any brand will do—just make sure it’s condensed.
No Bisquick? Homemade baking mix (flour, baking powder, salt, shortening) works in a pinch. Out of cream of chicken? Cream of mushroom or celery keeps it creamy. Fresh veggies? Use what you’ve got—just chop them small so they cook through. The milk can be any kind, but whole milk gives the richest crust (trust me on this one).
Leftovers reheat like a dream—microwave or oven, both work. Keeps 3-4 days in the fridge, freezes for 2 months. I usually double the recipe and freeze half for lazy nights later.
Why You’ll Love This Recipe
- One-Bowl Wonder: I just dump the Bisquick, milk, eggs, and soup in a bowl, stir, and pour—no extra dishes to wash.
- That Golden Crust: The Bisquick mix bakes up fluffy on top while the creamy chicken filling stays rich and comforting underneath.
- Feeds My Crew: I stretch one batch to cover dinner and next-day lunches for my family of four.
- Budget Stretcher: A rotisserie chicken and pantry staples make this taste like a million bucks for under ten.
Step-by-Step Instructions for Bisquick Impossibly Easy Chicken Pot Pie
Here’s the method. Straightforward, tested, works every time.
Step 1: Prepare the Savory Filling
In a large skillet over medium heat, melt 2 tablespoons of the unsalted butter. Add the diced 0.5 whole Onion and cook for 3-4 minutes until softened and translucent. Stir in the minced 2 cloves Garlic Cloves and cook for 30 seconds until fragrant.
Add the 2 cups Cooked Chicken Breast, 1 can Cream of Chicken Soup, 1.5 cups Frozen Mixed Vegetables, 0.5 cup Chicken Broth, 0.5 tsp Salt, 0.25 tsp Black Pepper, 0.5 tsp Dried Thyme, and 0.25 tsp Paprika. Stir well and cook for 5 minutes until the mixture is hot and bubbly. Remove from heat and set aside.
Step 2: Mix the Batter
In a large bowl, whisk together the 1.5 cups Bisquick Original Baking Mix, 1 cup Milk, and 2 whole Large Eggs until smooth. The batter should be thick but pourable. I always check for any dry pockets at the bottom of the bowl to ensure everything is fully incorporated.
This batter will magically transform into a flaky crust on top while the filling stays creamy underneath. Don’t overmix—just combine until you see no more dry spots. The Bisquick does all the work for that impossible texture we love.
Step 3: Assemble and Bake
Pour the hot chicken filling into a greased 9×13-inch baking dish or similar casserole dish. Spread it out evenly so every bite gets a good mix of chicken, veggies, and that creamy sauce. Then pour the batter evenly over the top—it will spread out as it bakes.
Melt the remaining unsalted butter and drizzle it over the batter. This creates that beautiful golden-brown crust we’re after. Bake at 375°F for 30-35 minutes until the top is deep golden brown and a toothpick inserted into the crust comes out clean.
Step 4: Rest and Serve
Let the pot pie rest for 5-10 minutes after removing it from the oven. This allows the filling to set slightly so it doesn’t run out when you serve it. The crust will firm up just enough to hold its shape while staying tender inside.
Scoop into bowls and serve hot. You’ll get that perfect contrast of flaky, buttery crust on top and rich, creamy chicken filling underneath. Each serving delivers that hearty, comforting combination we all crave in a pot pie.
Pro Tips For Making Bisquick Impossibly Easy Chicken Pot Pie
- Preheat the Pan: I learned this the hard way—always warm your baking dish before pouring in the Bisquick mixture. A cold dish makes the edges gummy while the center bakes unevenly.
- Shred the Chicken: Skip the chunks and shred your cooked chicken breast finely. It distributes better in the Cream of Chicken Soup layer and every bite gets that savory texture.
- Whisk the Batter: Sounds obvious, but I used to just stir the Bisquick, milk, and eggs. Whisking for 30 seconds removes lumps and gives you that light, fluffy topping.
- Check at 25 Minutes: Oven times vary wildly. Start checking for golden brown at 25 minutes—overbaking dries out the custard-like topping, and nobody wants that.
Storing and Reheating This Recipe
Refrigerator Storage
Once cooled, transfer leftovers to airtight containers—I use Pyrex glass with locking lids. This creation keeps beautifully in the fridge for 3-4 days at 40°F or below. The flavors deepen overnight as the herbs meld into the creamy filling. ❄️
Freezer Storage
For longer storage, portion into freezer-safe containers or heavy-duty zip-top bags. It freezes well for up to 2 months without texture loss. Leave 1 inch headspace for expansion, and label with the date—I always use Sharpie on painter’s tape.
Oven Reheating
Preheat to 350°F and cover with foil to prevent over-browning. Reheat for 20-25 minutes until the center reaches 165°F. I add 1 tbsp milk over the crust for extra moisture. The butter topping revives beautifully this way.
Microwave Reheating
For quick meals, microwave individual portions covered with a damp paper towel. Heat on 70% power for 2-3 minutes, stir, then continue in 30-second bursts until hot. The crust stays tender, though not as crisp as oven reheating.
Thawing Tips
Transfer from freezer to fridge 24 hours before reheating. For faster thawing, use the microwave’s defrost setting—just monitor closely. I find thawed portions reheat more evenly than frozen ones.
Freshness Check
Discard if you notice any off smells or the crust becomes soggy. The filling should maintain its creamy texture. Trust your senses—this dish is forgiving but not invincible. 💡
Nutrition Facts
Frequently Asked Questions
Can I use rotisserie chicken?
Rotisserie chicken works perfectly and saves time. Shred or dice 2 cups of the cooked meat, removing skin if desired, and proceed with the recipe as written.
What if I don’t have cream of chicken soup?
Cream of mushroom or celery soup makes an easy substitution. For a homemade option, mix 1 cup milk with 3 tablespoons flour and 2 tablespoons butter, then cook until thickened.
Why is my crust not golden brown?
Ensure you’re using the full ½ cup melted butter drizzled on top. For extra browning, broil for 1-2 minutes at the end, watching closely to avoid burning.
Can I make this ahead of time?
Yes! Assemble the dish, cover, and refrigerate for up to 24 hours before baking. Add 5-10 minutes to the baking time if starting from cold.

- Jollof Rice Sauce Recipe: West African Tomato and Spice Infusion - September 25, 2026
- Japanese Rice Soup Recipe: Umami-Rich Comfort in a Bowl - September 25, 2026
- Homemade Cream Of Rice Recipe: Silk-Smooth Breakfast in Minutes - September 25, 2026