
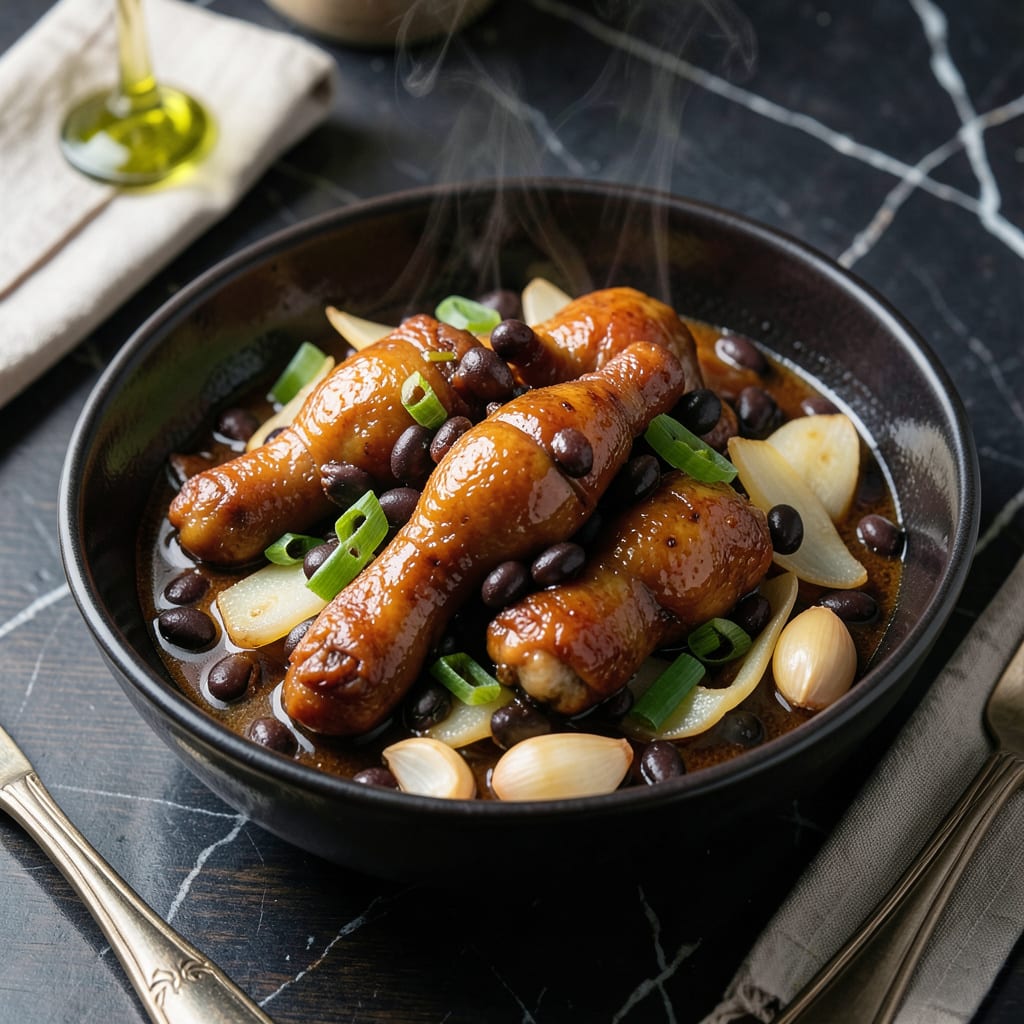
This Cantonese specialty transforms humble chicken feet into a collagen-rich delicacy through slow braising with fermented black beans. The process renders the skin silky while infusing every bite with deep umami flavor.
Traditional techniques ensure the meat becomes fall-off-the-bone tender while the sauce thickens naturally. The result is a dish prized for its texture and the melt-in-your-mouth quality that defines authentic preparation.
Ingredients for Black Bean Chicken Feet
Transform humble ingredients into a collagen-rich Cantonese masterpiece with these essential components.
| Ingredient | Amount | Notes |
|---|---|---|
| Chicken Feet 🍗 | 2 lb | Cleaned, claws removed, blanched |
| Fermented Black Beans ⚫ | ½ cup | Rinsed, drained, chopped |
| Garlic Cloves 🧄 | 8 cloves | Smashed, peeled |
| Ginger Root 🌿 | 3 whole | Sliced into thick coins |
| Green Onions 🧅 | 4 whole | Cut into 2-inch pieces |
| Shaoxing Wine 🍷 | ½ cup | Dry sherry as substitute |
| Soy Sauce 🫒 | ½ cup | Light soy sauce preferred |
| Rock Sugar 🍬 | ¼ cup | Or substitute granulated |
| Star Anise Pods ✨ | 2 whole | Lightly crushed |
| Bay Leaves 🍃 | 2 whole | Dried, whole |
| Dried Chili Peppers 🌶️ | 2 whole | Optional for heat |
| Vegetable Oil 🫒 | 2 tbsp | For blanching chicken feet |
| Water 💧 | 4 cups | For braising liquid |
| Cornstarch 🌾 | 1 tbsp | Mixed with water for slurry |
| Sesame Oil 🫒 | 1 tsp | For finishing aroma |
[recipeingredientscaler]
The fermented black beans are non-negotiable—look for Lee Kum Kee or Koon Chun brands at any Asian grocery. Chicken feet must be fresh (never frozen if possible) with intact skin for that silky texture. For rock sugar, specialty Asian markets carry it, but granular works in a pinch (just dissolve it first). The Shaoxing wine adds depth; dry sherry is the closest substitute if unavailable.
No fermented black beans? Douchi (yellow fermented soybean) paste at half the amount can work, though flavor differs. Green onions can be swapped for sweet onion wedges. Star anise is key for authenticity—skip the ground version (it muddies the sauce). For heat, Sichuan peppercorns add numbing spice instead of dried chilies.
Blanched chicken feet keep 3 days refrigerated before cooking. The finished dish tastes even better next day and stores 4-5 days in the fridge. Braising liquid freezes well for 3 months—just skims fat before reheating.
Why You’ll Love This Recipe
- One Pot Wonder: I toss everything in—chicken feet, black beans, garlic—and let the pressure cooker do the work.
- Umami Bomb: Fermented black beans and ginger create that deep, salty-sweet flavor I crave every time.
- Party Starter: Honestly, this is the dish my guests always ask about at potlucks.
- Budget Stretch: A bag of chicken feet costs pennies, and it feeds my whole family with leftovers for days.
Step-by-Step Instructions for Black Bean Chicken Feet
Master this traditional Cantonese technique for tender, collagen-rich results every time.
Step 1: Blanch the Chicken Feet
Bring a large pot of water to a boil and add the 2 lb Chicken Feet. Blanch for 3-4 minutes until you see impurities rise to the surface. This step removes any lingering odors and tightens the skin for better texture absorption during braising.
Drain the chicken feet and rinse under cold water. Pat them dry thoroughly with paper towels—excess moisture will dilute your braising liquid. At this stage, the feet should appear slightly opaque with a firmer texture.
Step 2: Sauté Aromatics and Fermented Black Beans
Heat the 2 tbsp Vegetable Oil in a wok or large pot over medium-high heat. Add the 0.5 cup Fermented Black Beans, 8 cloves Garlic Cloves, 3 whole Ginger Root slices, and 2 whole Dried Chili Peppers. Stir-fry for 2-3 minutes until the garlic turns light golden and the black beans become fragrant.
This foundation layer builds the deep umami base characteristic of authentic Cantonese braises. The fermented black beans should start to soften slightly, releasing their salty, funky aroma that defines this dish.
Step 3: Braise with Liquids and Spices
Add the blanched chicken feet to the pot along with the 0.5 cup Shaoxing Wine, 0.5 cup Soy Sauce, 0.25 cup Rock Sugar, 2 whole Star Anise Pods, 2 whole Bay Leaves, and 4 cups Water. Bring to a boil, then reduce heat to maintain a gentle simmer.
Cover and braise for 1.5-2 hours, stirring occasionally, until the chicken feet are tender and the liquid has reduced by about a third. The collagen will transform the braising liquid into a rich, velvety sauce that clings to each piece.
Step 4: Thicken and Finish
Mix the 1 tbsp Cornstarch with 2 tablespoons of water to create a slurry. Stir this into the pot and simmer for an additional 3-4 minutes until the sauce reaches your desired consistency—it should coat the back of a spoon with a glossy sheen.
Remove from heat and stir in the 1 tsp Sesame Oil and 4 whole Green Onions. Let the dish rest for 10 minutes to allow the flavors to meld completely before serving. The final sauce should be thick enough to cling to the chicken feet while still being pourable.
Pro Tips For Making Black Bean Chicken Feet
- Blanch the Feet: Parboil chicken feet for 3-5 minutes first to remove impurities and tighten the skin—skipping this step leaves the broth murky and the texture chewy.
- Rinse the Beans: Soak fermented black beans for 10 minutes, then rinse well to reduce excess salt; I learned this the hard way after one batch came out unpleasantly briny.
- Simmer Low and Slow: Keep the heat at a gentle simmer for at least 1.5 hours—cranking it high makes the feet tough and the broth bitter.
- Smash the Aromatics: Lightly crush garlic cloves and ginger slices with the side of your knife before adding; it releases way more flavor than leaving them whole.
Essential Equipment for This Recipe
Heavy-Duty Pot
A 5-6 quart Dutch oven or sturdy stainless steel pot is essential for even heat distribution during the long braise. I recommend Le Creuset or All-Clad for their heat retention. A heavy base prevents scorching of the sugar-rich braising liquid.
Wok Alternative
If you prefer traditional Cantonese methods, a carbon steel wok works beautifully for both the blanching and braising stages. Look for a 14-inch flat-bottom wok that fits your stovetop. The wide surface area allows for better evaporation and sauce reduction.
Precision Thermometer
Maintaining a gentle simmer between 190-200°F is crucial for breaking down collagen without toughening the meat. I use a ThermoWorks Instant Read to monitor the temperature. This small investment ensures perfect texture every time.
Slotted Spoon
A stainless steel slotted spoon helps remove chicken feet from the blanching water while leaving impurities behind. The slots should be ¼ to ½ inch wide to catch small pieces. I keep mine handy throughout the entire cooking process.
Fat Skimmer
As the collagen renders, you’ll notice a layer of fat forming on the surface. A fine mesh fat skimmer lets you remove excess oil without losing the precious braising liquid. I skim every 30 minutes during the braise. 💡
Serving Bowl
Choose a deep, wide ceramic bowl to showcase this dish—the sauce is as important as the chicken feet. A 1.5 quart capacity works well for family-style serving. The dark sauce looks stunning against white or light-colored ceramic. 🔥
Nutrition Facts
Frequently Asked Questions
Why blanch chicken feet first?
Blanching removes impurities and tightens the skin for better flavor absorption. It also eliminates any lingering odors, ensuring a cleaner taste in the final dish.
Can I substitute regular soy sauce?
Yes, but light soy sauce is preferred for its milder saltiness. If using regular, reduce the amount by 25% to avoid overpowering the dish.
How long can I store leftovers?
The dish keeps well in the fridge for 4-5 days and tastes even better the next day. For longer storage, freeze the braising liquid for up to 3 months.
What if I can’t find rock sugar?
Granulated sugar works in a pinch—just dissolve it first. The texture won’t be identical, but the sweetness will balance the dish just as well.

- Jollof Rice Sauce Recipe: West African Tomato and Spice Infusion - September 25, 2026
- Japanese Rice Soup Recipe: Umami-Rich Comfort in a Bowl - September 25, 2026
- Homemade Cream Of Rice Recipe: Silk-Smooth Breakfast in Minutes - September 25, 2026