
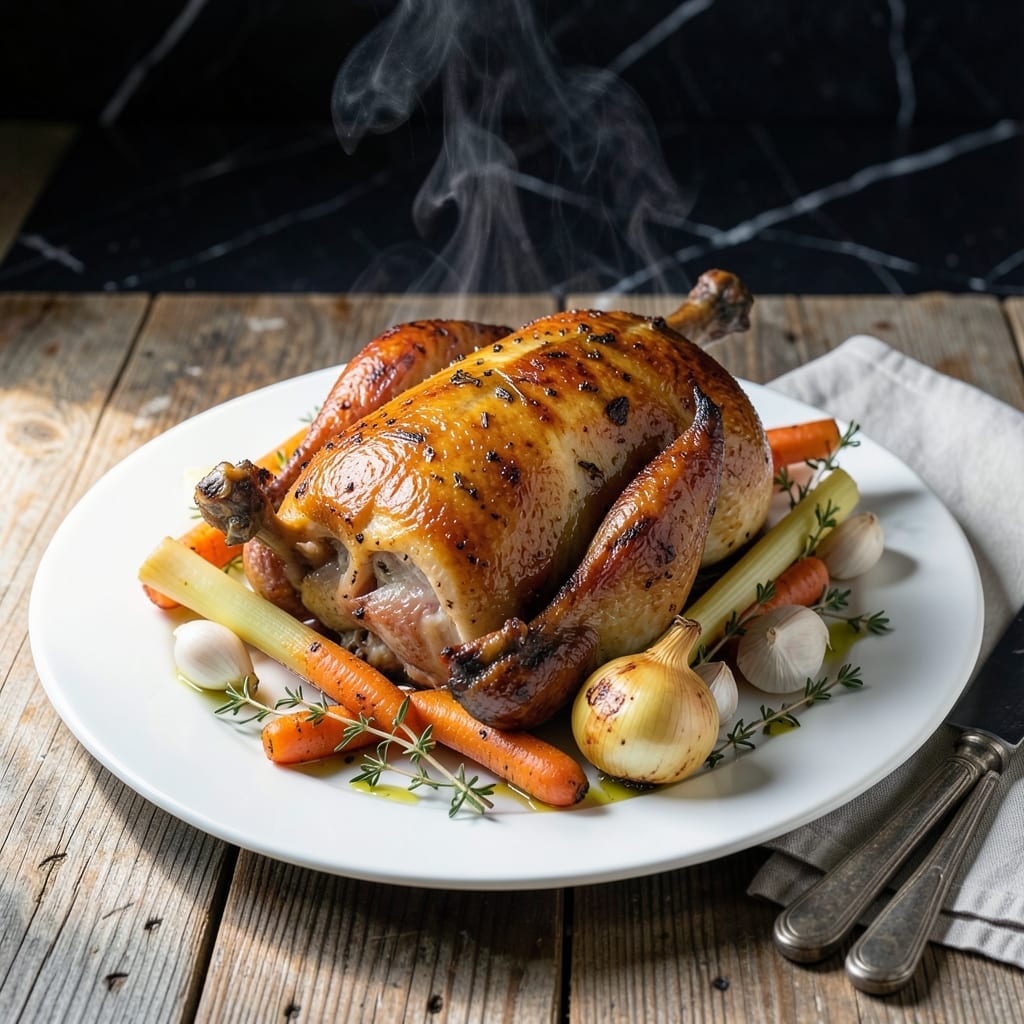
This method delivers tender meat with rich, flavorful broth every time. The process combines boiling to lock in moisture with roasting for golden, crispy skin.
By starting the chicken in simmering water, you ensure the interior stays juicy while the exterior develops deep flavor. The transition to the oven creates that perfect finish.
What results is fall-off-the-bone meat with a complex broth that forms the base for soups or gravies. The roasting step adds color and texture.
This technique works for any whole chicken and requires minimal hands-on time. The broth alone is worth the effort.
Ingredients for Boiled Roast Chicken
Whole chicken plus aromatics create this flavorful dish with rich, savory broth.
| Ingredient | Amount | Notes |
|---|---|---|
| Whole Chicken 🍗 | 3 ½ lb | Pat dry before roasting |
| Yellow Onion 🧅 | 1 whole | Quartered for boiling |
| Carrots 🥕 | 2 whole | Cut into large chunks |
| Celery Stalks 🥬 | 2 whole | Cut into large chunks |
| Garlic Cloves 🧄 | 6 cloves | Smashed for maximum flavor |
| Bay Leaves 🌿 | 2 whole | Dried or fresh |
| Black Peppercorns 🌶️ | 1 tbsp | Whole for boiling |
| Kosher Salt 🧂 | 1 tbsp | Plus more to taste |
| Fresh Thyme 🌿 | 4 sprigs | Optional but recommended |
| Olive Oil 🫒 | 2 tbsp | For roasting chicken |
| Lemon 🍋 | 1 whole | Halved for boiling |
| Chicken Broth 💧 | 4 cups | Low-sodium preferred |
| Fresh Parsley 🌿 | ¼ cup | Chopped for garnish |
The chicken quality matters most here. Look for a fresh, never-frozen bird (about 3.5 pounds) from a reputable grocer like Whole Foods or Trader Joe’s. Free-range or organic options yield better flavor and texture. The aromatics should be fresh—vibrant carrots, firm celery, and a heady onion. Don’t skip the bay leaves; they add depth to the broth that’s hard to replicate.
No fresh thyme? Dried thyme at one-third the amount works fine. Short on carrots or celery? Fennel or parsnips add a nice twist. The broth can be swapped with water in a pinch, but low-sodium chicken broth is ideal. If you’ve got a lemon on hand, toss it in—it brightens the broth. The olive oil can be any neutral oil if that’s what you have.
The broth keeps 4-5 days refrigerated or 3 months frozen. Store the cooked chicken separately—it stays moist for 3-4 days in the fridge. Reheat the broth gently to preserve its rich flavor. Always let the chicken rest before carving to retain its juices.
Why You’ll Love This Recipe
- Set It and Forget: I toss everything into one pot, let it simmer, and walk away—no babysitting required.
- Garlic-Infused Comfort: The whole garlic cloves and veggies turn the broth into something I’d drink straight from the pot.
- Feeds the Week: I shred the leftovers for tacos, soups, or sandwiches—three meals from one chicken.
- Pocket-Friendly Protein: A whole chicken and pantry staples stretch further than any takeout I’ve tried.
Step-by-Step Instructions for Boiled Roast Chicken
This two-stage method guarantees juicy meat and a flavorful broth you can use for soups.
Step 1: Boil the Chicken with Aromatics
Place the 3.5 lb Whole Chicken in a large pot. Add the 1 whole Yellow Onion, 2 whole Carrots, 2 whole Celery Stalks, 6 cloves Garlic Cloves, 2 whole Bay Leaves, 1 tbsp Black Peppercorns, 1 tbsp Kosher Salt, and 4 sprigs Fresh Thyme.
Pour in the 4 cups Chicken Broth and add the 1 whole Lemon, halved. Add enough water to cover the chicken completely. Bring to a boil over high heat, then reduce to a simmer. Partially cover and cook for 30 minutes, skimming off any foam that rises to the surface.
Step 2: Finish in the Oven for Golden Skin
Preheat your oven to 425°F. Remove the chicken from the broth and pat it thoroughly dry with paper towels. This ensures the skin will crisp up properly in the oven. Discard the lemon halves but reserve the broth and remaining aromatics for later use.
Rub the chicken all over with 2 tbsp Olive Oil and season lightly with additional Kosher Salt. Transfer it to a roasting pan, breast-side up. Roast for 20-25 minutes until the skin is golden brown and crispy, and the internal temperature reaches 165°F when measured at the thickest part of the thigh.
Step 3: Rest and Garnish Before Serving
Transfer the chicken to a cutting board and let it rest for 10-15 minutes. This allows the juices to redistribute throughout the meat, ensuring every bite is tender and moist. Tent loosely with foil to keep it warm.
While the chicken rests, strain the reserved broth through a fine-mesh sieve to remove the solids. You can use this aromatic broth as a base for soups or serve it alongside the chicken. Just before serving, garnish with 0.25 cup Fresh Parsley, chopped, for a bright, fresh finish.
Step 4: Carve and Serve
Carve the chicken into pieces, starting with the legs and thighs, then removing the breasts and cutting them into slices. Arrange the pieces on a platter and drizzle with a little of the reserved broth for extra moisture and flavor.
Serve the chicken hot with additional chopped Fresh Parsley and a side of your choice. The meat should be tender and juicy, with crispy skin that holds up well to the rich, aromatic broth.
Pro Tips For Making Boiled Roast Chicken
- Start in Cold Water: Place the chicken in cold water with aromatics, then bring to a boil—this prevents the meat from seizing up and keeps it juicy. I learned this the hard way after ending up with rubbery chicken too many times.
- Skim the Foam: As the water heats, skim off the gray foam that rises to the top with a spoon. It’s not dangerous, but it makes the broth clearer and the flavor cleaner.
- Use a Thermometer: Pull the chicken when the thickest part of the thigh hits 165°F—no higher, or it’ll dry out. Guessing by time alone is how you end up with overcooked meat.
- Rest Before Shredding: Let the chicken sit in the broth off the heat for 10-15 minutes before handling. It’ll hold together better and soak up extra flavor—my grandmother swore by this, and she was right.
Storing and Reheating Leftovers
Refrigerator Storage
Let the chicken cool completely before storing. Transfer it to an airtight container and refrigerate at 40°F or below. It stays fresh for 3-4 days. The broth should be stored separately in another container. ❄️
Freezer Storage
For longer storage, freeze the chicken and broth in separate freezer-safe containers or heavy-duty bags. Both keep well for up to 3 months. Leave 1 inch of headspace in containers to allow for expansion.
Reheating the Chicken
To reheat, place the chicken in a baking dish, add ¼ cup broth, and cover with foil. Warm in a 350°F oven for 15-20 minutes until heated through. This keeps the meat moist and flavorful. 🔥
Reheating the Broth
Gently reheat the broth in a saucepan over medium-low heat for 5-10 minutes. Avoid boiling to preserve its rich flavors. Stir occasionally and adjust seasoning if needed.
Meal Prep Tips
Shred the chicken and portion it with broth into meal prep containers. This makes for easy lunches or dinners throughout the week. The broth also works great as a base for soups or stews.
Nutrition Facts
Frequently Asked Questions
Why boil the chicken before roasting?
Boiling first ensures the meat stays tender and juicy by locking in moisture. The simmering process also infuses the chicken with flavor from the aromatics in the broth.
Can I skip the boiling step?
Skipping boiling will result in less juicy meat and a less flavorful broth. The 30 minutes of simmering is key for texture and taste. Without it, the chicken may dry out during roasting.
What if my skin doesn’t crisp?
Pat the chicken very dry before roasting and ensure your oven is fully preheated to 425°F. If needed, broil for 2-3 minutes to finish crisping.
Can I use this broth for soup?
The strained broth is rich and aromatic, perfect for soups, stews, or gravies. Store it separately and use within 3-4 days or freeze for later.

- Jollof Rice Sauce Recipe: West African Tomato and Spice Infusion - September 25, 2026
- Japanese Rice Soup Recipe: Umami-Rich Comfort in a Bowl - September 25, 2026
- Homemade Cream Of Rice Recipe: Silk-Smooth Breakfast in Minutes - September 25, 2026