
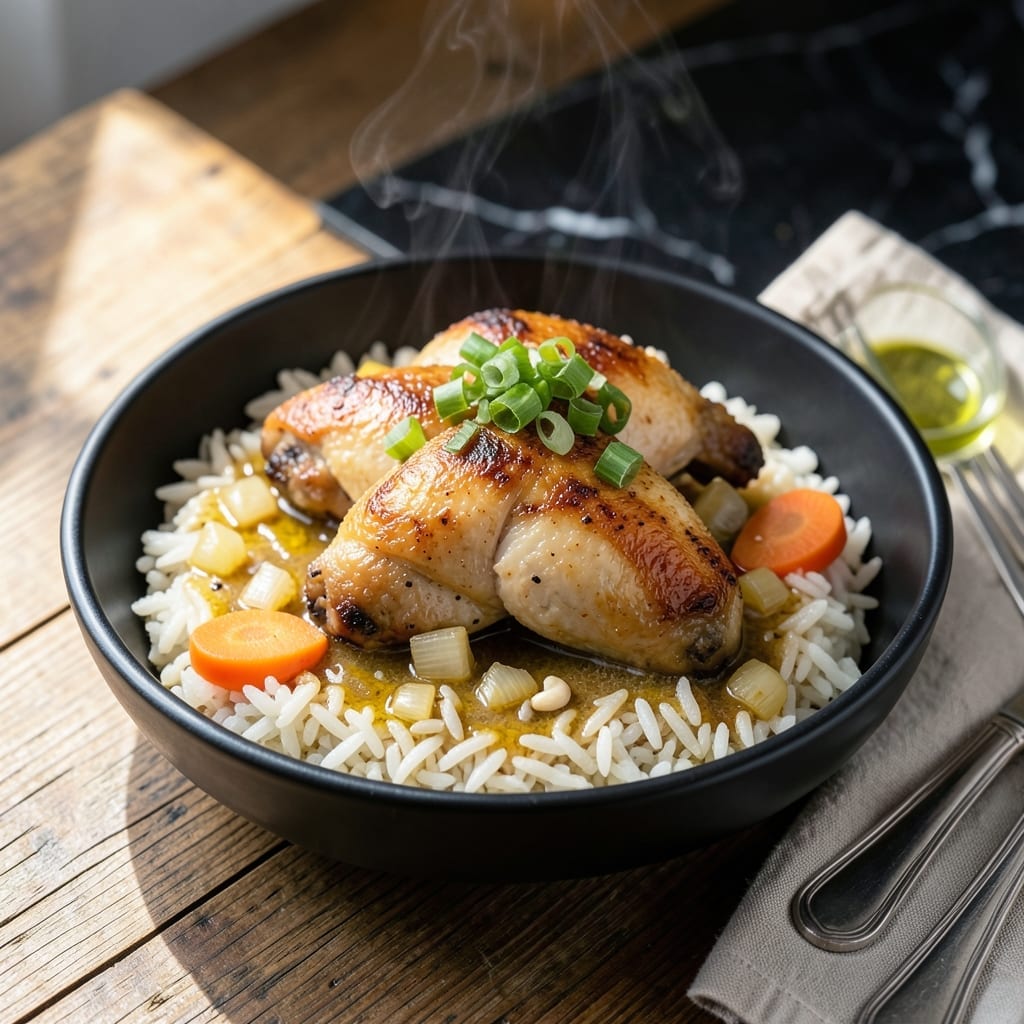
This dish exemplifies the beauty of one-pot cooking, where chicken and rice simmer together to create a meal greater than the sum of its parts.
The braising process ensures tender, fall-off-the-bone meat while the rice absorbs all the rich, savory flavors. No complicated techniques—just simple, hands-off cooking.
What emerges is the ultimate comfort food: perfectly cooked chicken over fluffy rice, each grain infused with deep, satisfying taste.
Ideal for busy weeknights or lazy weekends when you want maximum flavor with minimal effort. Here’s how to make it.
Ingredients for Braised Chicken Rice
A handful of pantry staples and fresh veggies make this one-pot wonder sing.
| Ingredient | Amount | Notes |
|---|---|---|
| Chicken Thighs 🍗 | 2 lb | Boneless, skinless, trimmed |
| Long-Grain White Rice 🍚 | 1 ½ cups | Uncooked, rinsed until clear |
| Chicken Broth 💧 | 2 ½ cups | Low-sodium preferred for control |
| Yellow Onion 🧅 | 1 whole | Medium size, finely diced |
| Garlic Cloves 🧄 | 4 cloves | Minced for even distribution |
| Carrots 🥕 | 2 whole | Medium, peeled and sliced |
| Celery Stalks 🌿 | 2 whole | Sliced thin for quick cooking |
| Olive Oil 🫒 | 2 tbsp | Extra-virgin for depth |
| Dried Thyme 🍃 | 1 tsp | Crushed between fingers |
| Dried Rosemary 🌿 | 1 tsp | Finely chopped if fresh |
| Bay Leaf 🍃 | 1 whole | Removed before serving |
| Salt 🧂 | 1 ½ tsp | Diamond Crystal kosher preferred |
| Black Pepper 🌶️ | 1 tsp | Freshly ground for best flavor |
| Tomato Paste 🍅 | 2 tbsp | For umami depth |
The chicken is the star here. Thighs stay juicier than breasts through the long braise—look for skinless, boneless at Costco or your butcher counter. If you’re using bone-in, add 10 minutes to the cook time. The rice should be long-grain white (jasmine works great too) for that fluffy, separate-grain texture. Avoid instant rice—it’ll turn to mush. Grab low-sodium broth so you can control the salt level yourself.
No thyme? Poultry seasoning at half the amount works in a pinch. Fresh herbs? Double the quantity and add them at the end. Short on veggies? Bell peppers or mushrooms add great texture. If you’re out of tomato paste, ketchup in a 1:1 swap (yes, really) saves the day. The carrots and celery are classic, but zucchini or green beans work if that’s what you’ve got.
Leftovers taste even better the next day—store in the fridge for up to 4 days. Freezes well for 3 months too (portion into containers first). The rice soaks up more liquid as it sits, so add a splash of broth when reheating.
Why You’ll Love This Recipe
- One Pot Wonder: I toss everything in—chicken thighs, rice, broth, onions—and let it simmer while I set the table.
- Deep, Rich Flavor: The garlic and chicken broth soak into the rice, making every bite ridiculously savory.
- Meal Prep Hero: It reheats perfectly, so I make a big batch for lunches all week.
- Budget Friendly: Chicken thighs and basic pantry staples keep this dish cheap but tasting like a million bucks.
Step-by-Step Instructions for Braised Chicken Rice
This one-pot wonder comes together with minimal effort and maximum flavor.
Step 1: Sear the Chicken Thighs
Heat the 2 tbsp olive oil in a large, heavy pot or Dutch oven over medium-high heat. Pat the 2 lb chicken thighs dry with paper towels—this ensures a good sear. Season both sides with 1 tsp black pepper and half the 1.5 tsp salt.
Working in batches if necessary, add the chicken thighs to the pot. Sear undisturbed for 4-5 minutes per side until deeply golden brown and crisp. Don’t crowd the pan. Transfer to a plate and set aside. The fond left in the pot will build the sauce’s depth.
Step 2: Sauté the Aromatics and Vegetables
In the same pot, add the finely diced yellow onion, sliced carrots, and sliced celery stalks. Cook over medium heat for 5-6 minutes, stirring occasionally, until the vegetables soften and the onion becomes translucent.
Add the minced garlic cloves and cook for 30 seconds until fragrant. Stir in the 2 tbsp tomato paste, 1 tsp dried thyme, and 1 tsp dried rosemary. Cook for 1-2 minutes, stirring constantly, until the tomato paste darkens slightly. This step intensifies its umami richness.
Step 3: Braise the Chicken with Rice
Return the chicken thighs and any accumulated juices to the pot. Add the 1.5 cups long-grain white rice, 2.5 cups chicken broth, remaining salt, and 1 whole bay leaf. Stir to combine, ensuring the rice is fully submerged in the liquid.
Bring to a boil, then reduce heat to low. Cover and simmer for 20-25 minutes, without stirring, until the rice is tender and the chicken is cooked through to 165°F. The rice should absorb all the liquid, and the chicken should be fork-tender.
Step 4: Rest and Serve
Remove the pot from heat and let it sit covered for 5-10 minutes. This allows the rice to steam and the flavors to meld. Discard the bay leaf before serving. Fluff the rice gently with a fork, mixing in the braised chicken and vegetables.
Serve hot in shallow bowls, ensuring each portion has chicken, rice, and vegetables. The rice should be creamy and infused with the chicken’s braising liquid, while the chicken remains juicy and flavorful. This dish only gets better as it sits, making it perfect for leftovers.
Pro Tips For Making Braised Chicken Rice
- Brown the Thighs: Sear the chicken thighs skin-side down in a hot pan for 4-5 minutes until deep golden—this builds flavor the rice will absorb.
- Toast the Rice: After removing the chicken, cook the rice in the same pot for 2 minutes to soak up the fond; it adds a nutty depth.
- Skip the Rinse: I learned this the hard way—don’t rinse the rice, as the starch helps thicken the braising liquid into a silky sauce.
- Use Warm Broth: Adding cold broth drops the temperature and slows the braise; warm it first so the rice cooks evenly from the start.
Pro Cooking Tips for Great braised chicken rice
Perfect Searing Technique
Pat the chicken thighs completely dry with paper towels before seasoning. This ensures a proper sear at medium-high heat for 4-5 minutes per side. I use tongs to avoid piercing the meat, which keeps the juices inside where they belong. 🔥
Build Flavor Layers
After removing the chicken, don’t rush the aromatics. Cook the onion, carrots, and celery for 5-6 minutes until softened. The tomato paste step is crucial—cook it until it darkens slightly, which develops its natural sweetness and umami depth.
Braising Without Stirring
Once you add the rice and broth, resist the urge to stir. Cover and let it simmer undisturbed for 20-25 minutes on low heat. Stirring breaks the rice and releases starch, which can make the dish gummy instead of fluffy.
Resting for Best Texture
After cooking, let it rest covered for 5-10 minutes. This allows the rice to absorb any remaining liquid and the chicken to reabsorb its juices. I always discard the bay leaf before serving to avoid any unwanted bites. 💡
Liquid Ratio Tip
If your rice seems undercooked but the liquid is gone, add ¼ cup hot broth and let it steam covered for 5 more minutes. For extra flavor, I sometimes swap ½ cup broth for white wine when braising.
Nutrition Facts
Frequently Asked Questions
Can I use chicken breasts instead of thighs?
Yes, but they dry out faster. If using breasts, reduce cook time to 15-20 minutes and check for 165°F early. Thighs stay juicier and are more forgiving for this dish.
What if my rice is still crunchy after cooking?
Add ¼ cup hot broth, cover, and let it steam for 5 more minutes off heat. Avoid stirring to prevent breaking the grains.
Can I make this in a slow cooker?
Sear the chicken first, then transfer everything to the slow cooker. Cook on low for 3-4 hours or high for 2 hours.
How do I store leftovers?
Keep in an airtight container in the fridge for up to 4 days. Freezes well for 3 months—add broth when reheating.

- Jollof Rice Sauce Recipe: West African Tomato and Spice Infusion - September 25, 2026
- Japanese Rice Soup Recipe: Umami-Rich Comfort in a Bowl - September 25, 2026
- Homemade Cream Of Rice Recipe: Silk-Smooth Breakfast in Minutes - September 25, 2026