
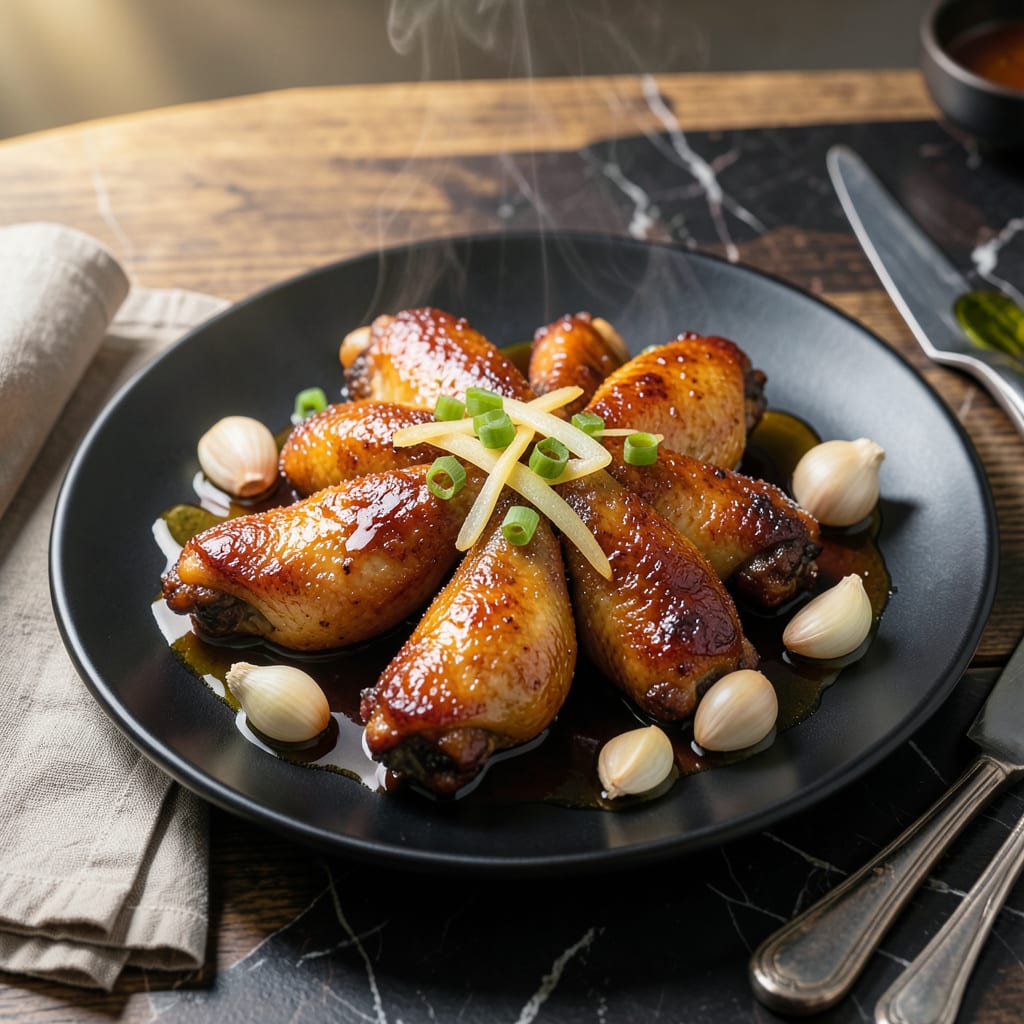
This braised chicken delivers a silky texture and rich umami depth through a simple soy sauce base. The slow cooking process transforms tough cuts into tender, fall-off-the-bone perfection.
With minimal effort and pantry staples, you’ll achieve a dish that’s both comforting and impressive. The sauce reduces to a glossy, flavorful glaze that coats every piece.
Ingredients for Braised Soy Sauce Chicken
Pantry raid plus a quick stop at the Asian market. Nothing fancy, just bold flavors.
| Ingredient | Amount | Notes |
|---|---|---|
| Chicken Thighs 🍗 | 2 lb | Bone-in, skin-on preferred |
| Soy Sauce 🫒 | ¾ cup | Low-sodium for control |
| Brown Sugar 🧈 | 3 tbsp | Light or dark works |
| Fresh Ginger 🌿 | 2 tbsp | Peeled and minced |
| Garlic Cloves 🧄 | 6 cloves | Peeled and smashed |
| Shaoxing Wine 🍷 | ¼ cup | Dry sherry as substitute |
| Star Anise Pods ✨ | 2 whole | Whole for infusion |
| Cinnamon Stick 🌰 | 1 whole | 2-inch piece |
| Green Onions 🧅 | 4 whole | Cut into 2-inch pieces |
| Sesame Oil 🫒 | 1 tbsp | Toasted for aroma |
| Water 💧 | 1 cup | For braising liquid |
| Vegetable Oil 🫒 | 1 tbsp | For searing chicken |
[recipeingredientscaler]
The chicken is everything here. Bone-in, skin-on thighs give you that silky texture the intro promises—breasts dry out and just won’t work. Most supermarkets have them, but H-Mart or 99 Ranch have better quality. Look for thighs with good marbling (those white streaks of fat). If you’re feeling fancy, organic or free-range levels up the flavor even more.
No Shaoxing wine? Dry sherry is your best bet—close enough in flavor. If you’re all out, extra soy sauce plus a splash of water in a pinch (not ideal, but doable). The star anise and cinnamon can be swapped for five-spice powder (use 1 tsp instead). Fresh ginger is non-negotiable though—ground ginger just doesn’t have the same punch.
This tastes even better the next day once the flavors meld. Keeps 4-5 days in the fridge, freezes for 3 months. I always make extra—leftovers make killer fried rice or noodles. Just reheat gently to keep that silky texture intact.
Why You’ll Love This Recipe
- One Pot Wonder: I just toss the chicken thighs with soy sauce, brown sugar, ginger, and garlic in a single pot and let it work its magic.
- Sticky Sweet Depth: The brown sugar caramelizes with the soy sauce, while the ginger and garlic give it this deep, savory-sweet kick that’s honestly hard to resist.
- Meal Prep Hero: I make a big batch on Sunday and it tastes even better reheated for lunches or quick dinners during the week.
- Budget Stretcher: Chicken thighs are so affordable, and this recipe transforms them into something that feels way fancier than the cost.
Step-by-Step Instructions for Braised Soy Sauce Chicken
Here’s the method that delivers that silky texture and rich umami flavor you’re after.
Step 1: Sear the Chicken Thighs
Heat the 1 tablespoon vegetable oil in a large Dutch oven or heavy pot over medium-high heat until it shimmers. Pat the 2 lb chicken thighs dry with paper towels—this ensures a proper sear instead of steaming.
Working in batches if needed, add the chicken skin-side down and cook undisturbed for 5-6 minutes until the skin is deep golden brown and crisp. Flip and sear the other side for 3-4 minutes. Transfer to a plate and set aside.
Step 2: Build the Aromatic Base
In the same pot, add the 2 tablespoons fresh ginger, 6 cloves garlic cloves, 4 whole green onions, 2 whole star anise pods, and 1 whole cinnamon stick. Sauté for 2-3 minutes until the aromatics are fragrant and the ginger begins to soften.
Pour in the 0.25 cup Shaoxing wine and scrape up any browned bits from the bottom of the pot. Let it simmer for 1 minute to cook off the alcohol and deepen the flavors.
Step 3: Braise the Chicken to Silky Perfection
Return the chicken to the pot along with any accumulated juices. Add the 0.75 cup soy sauce, 3 tablespoons brown sugar, 1 cup water, and 1 tablespoon sesame oil. Stir gently to combine and dissolve the sugar.
Bring the liquid to a gentle simmer, then reduce heat to low. Cover and braise for 40-45 minutes, turning the chicken halfway through, until the meat is fall-off-the-bone tender and the sauce has thickened slightly.
Step 4: Reduce the Sauce and Finish
Uncover the pot and increase heat to medium. Simmer for an additional 5-7 minutes to reduce the sauce to a glossy, syrupy consistency that coats the back of a spoon. The sauce should be rich and deeply flavored, with the aromatics infused throughout.
Discard the star anise and cinnamon stick. Taste and adjust seasoning if needed—though the soy sauce and sugar should provide the perfect balance. Serve the chicken hot, spooning the reduced sauce over the top and garnishing with extra green onions if desired.
Pro Tips For Making Braised Soy Sauce Chicken
- Brown the Thighs: Sear the chicken thighs skin-side down for 5-6 minutes on medium-high until golden brown—I learned this the hard way, but skipping this step leaves the meat pale and the sauce bland.
- Bloom the Aromatics: Cook the ginger and garlic in the same pan after the chicken, just until fragrant (about 30 seconds), or they’ll turn bitter and overpower the soy sauce.
- Reduce the Sauce: Simmer the braising liquid uncovered for the last 10 minutes so it thickens enough to cling to the chicken—watery sauce is the most common mistake with this dish.
- Use Skin-On Thighs: Sounds obvious, but skinless thighs dry out and don’t absorb the soy-brown sugar glaze the same way—plus, the rendered fat adds depth to the sauce.
Storing and Reheating This Recipe
Fridge Storage
Let the chicken cool to room temperature first—this prevents condensation. Transfer to airtight containers with some sauce. It’ll keep in the fridge at 40°F or below for 4-5 days. The flavors deepen beautifully over time. ❄️
Freezing Tips
Portion leftovers into freezer-safe bags or containers, leaving 1 inch of headspace for expansion. Freeze for up to 3 months without losing quality. I use quart-sized bags for easy single-serving reheating.
Stovetop Reheating
Gently reheat in a covered skillet over low heat with 2 tablespoons water to prevent drying. Stir occasionally until warmed through, about 8-10 minutes. This keeps the texture silky and the sauce glossy. 🔥
Microwave Method
For quick meals, place a portion in a microwave-safe dish with a splash of water. Cover with a damp paper towel and heat on 50% power in 1-minute intervals, stirring between each, until reaching 165°F.
Nutrition Facts
Frequently Asked Questions
Can I use chicken breasts instead of thighs?
Thighs are best for their fat content and connective tissue, which break down during braising. Chicken breasts will dry out and become tough. Stick with bone-in, skin-on thighs for the silkiest texture.
What if I don’t have Shaoxing wine?
Dry sherry is the closest substitute. In a pinch, use extra soy sauce plus a splash of water, though the flavor won’t be as complex. Avoid cooking wine—it’s too salty.
How do I know when the chicken is done?
The meat should pull away from the bone easily and reach 165°F internally. After 40-45 minutes of braising, it will be fall-off-the-bone tender.
Can I make this ahead of time?
The flavors deepen overnight. Store in airtight containers in the fridge for up to 5 days or freeze for 3 months. Reheat gently to preserve texture.

- Jollof Rice Sauce Recipe: West African Tomato and Spice Infusion - September 25, 2026
- Japanese Rice Soup Recipe: Umami-Rich Comfort in a Bowl - September 25, 2026
- Homemade Cream Of Rice Recipe: Silk-Smooth Breakfast in Minutes - September 25, 2026