
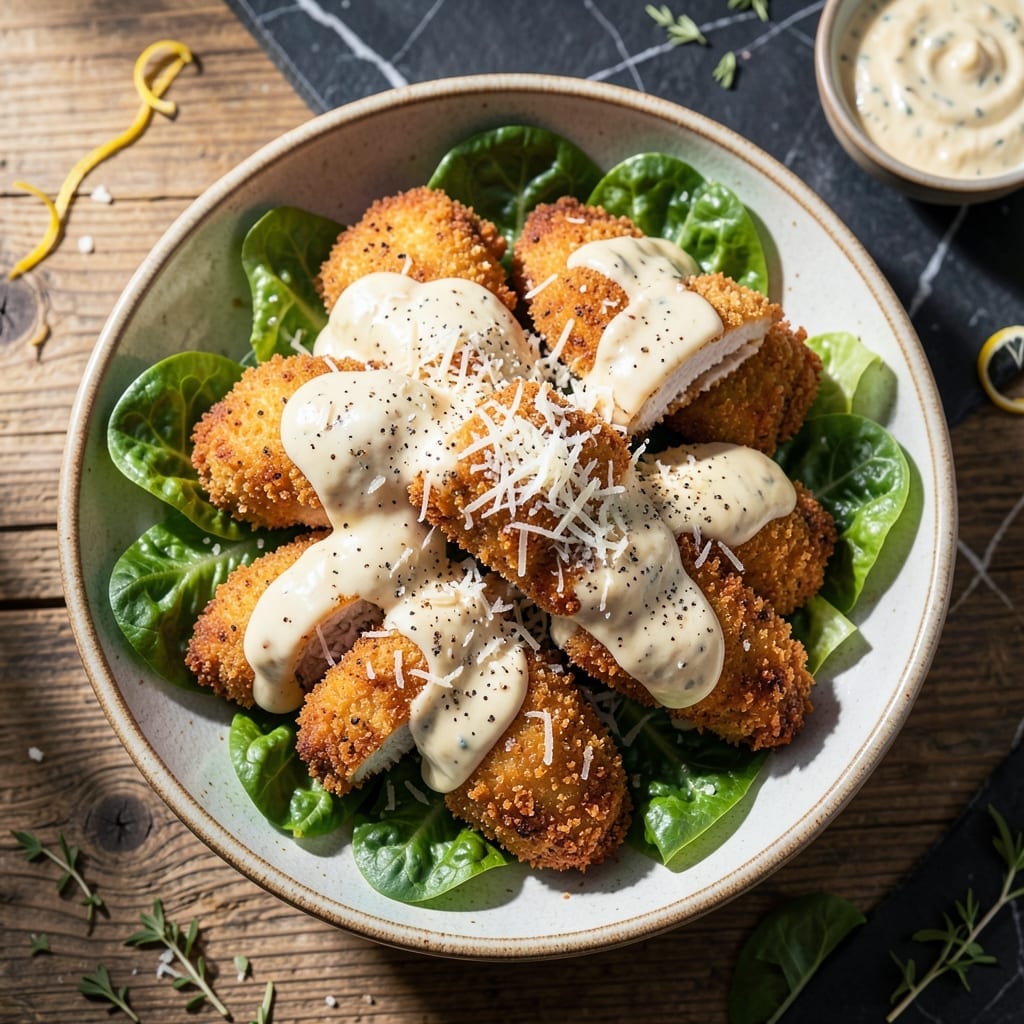
This recipe reimagines classic Caesar flavors as crispy, golden chicken bites with all the bold taste you love. The secret is in the coating—a perfect blend of Parmesan, garlic, and herbs that creates an irresistible crust.
I’ve tested multiple techniques to ensure these stay crispy on the outside while remaining juicy inside. The chicken is baked at high heat, locking in moisture while achieving that restaurant-quality texture everyone craves.
What you’ll get is a dish that brings together the savory depth of Caesar dressing, the sharp tang of Parmesan, and the satisfying crunch of perfectly cooked chicken. It’s a meal that feels indulgent but is surprisingly simple to prepare.
Serve these bites with a side of creamy Caesar for dipping or over a bed of crisp romaine for a complete, flavor-packed experience.
Ingredients for Caesar Chicken
Crispy golden bites packed with Caesar flavor require these pantry and fridge staples.
| Ingredient | Amount | Notes |
|---|---|---|
| Boneless Skinless Chicken Breasts 🍗 | 1 ½ lb | Cut into bite-sized pieces |
| Parmesan Cheese 🧀 | 1 cup | Freshly grated from wedge |
| All-Purpose Flour 🌾 | ¾ cup | For dredging the chicken |
| Large Eggs 🥚 | 2 whole | Beaten for egg wash |
| Panko Breadcrumbs 🍞 | 1 ½ cups | Light and crispy texture |
| Garlic Powder 🧄 | 2 tsp | For robust garlic flavor |
| Dried Oregano 🍃 | 1 tsp | Mediterranean herb blend |
| Dried Basil 🌿 | 1 tsp | Complements Parmesan well |
| Salt 🧂 | 1 tsp | Kosher or sea salt preferred |
| Black Pepper 🌶️ | ½ tsp | Freshly ground for best flavor |
| Caesar Dressing 🥗 | ½ cup | For coating and dipping |
| Olive Oil 🫒 | 2 tbsp | For baking and crisping |
| Grated Romano Cheese 🧀 | ½ cup | Optional for extra depth |
| Fresh Garlic Cloves 🧄 | 2 cloves | Minced for fresh garlic punch |
| Lemon Zest 🍋 | 1 tsp | For bright Caesar tang |
The chicken is the foundation—boneless, skinless breasts cut into even pieces ensure consistent cooking. For the Parmesan, grab a wedge from the deli counter and grate it fresh (pre-shredded has anti-caking agents that mess with the melt). Panko breadcrumbs are non-negotiable for that restaurant-quality crunch. Trader Joe’s and Kroger both carry great options in the bread aisle.
No panko? Crush plain breadcrumbs in a pinch, but the texture won’t be as light. Swap fresh Parmesan for Pecorino Romano at the same amount—it’s saltier, so taste before adding extra. Out of Caesar dressing? Mix mayo, lemon juice, garlic, and anchovy paste (or Worcestershire sauce for fish-free). The garlic powder can be replaced with half the amount of onion powder if that’s all you’ve got.
Coat the chicken right before baking for maximum crispiness. Leftover bites keep in the fridge for 3-4 days—reheat in the oven or air fryer to revive the crunch. The dressing and cheese can be prepped 2 days ahead (store separately). Freezing isn’t ideal for the coating, but plain cooked chicken freezes for 2 months.
Why You’ll Love This Recipe
- One Pan Wonder: I bread the chicken with panko and Parmesan, bake it on a single sheet, and cleanup takes seconds.
- Crispy Perfection: That golden panko crust with melted Parmesan inside? It’s the reason I make this weekly.
- Weeknight Hero: Honestly, it’s my go-to for busy Tuesdays—ready before the kids finish homework.
- Leftovers Win: Cold slices taste great in wraps the next day, and the chicken stays juicy even reheated.
Step-by-Step Instructions for Caesar Chicken
Here’s the method that guarantees perfectly crispy, flavorful bites every time.
Step 1: Prep and Season the Chicken
Cut the 1.5 lb Boneless Skinless Chicken Breasts into 1-inch bite-sized pieces. Pat them completely dry with paper towels—moisture prevents crispiness. Season with the 1 tsp Salt and 0.5 tsp Black Pepper, tossing to coat evenly.
This step ensures the chicken absorbs the seasoning and creates a perfect base for the coating. Real talk: skipping the drying step means soggy breading. Don’t rush it.
Step 2: Create the Breading Station
Set up three shallow bowls. In the first, combine the 0.75 cup All-Purpose Flour, 2 tsp Garlic Powder, 1 tsp Dried Oregano, and 1 tsp Dried Basil. In the second, beat the 2 whole Large Eggs until smooth. In the third, mix the 1.5 cups Panko Breadcrumbs, 1 cup Parmesan Cheese, and 0.5 cup Grated Romano Cheese.
The herb-infused flour adds depth, while the cheese mixture guarantees that signature Caesar flavor. I’ve found that using freshly grated Parmesan makes a noticeable difference in texture and taste.
Step 3: Coat and Crisp the Chicken
Dredge each piece of chicken in the flour mixture, shaking off excess. Dip into the beaten eggs, letting any excess drip off. Then press into the Panko-cheese mixture, ensuring full coverage. Place coated pieces on a parchment-lined baking sheet.
Heat the 2 tbsp Olive Oil in a large skillet over medium-high heat. Working in batches to avoid crowding, cook the chicken for 3-4 minutes per side until golden brown and crispy. Transfer to a paper towel-lined plate to drain.
Step 4: Finish with Caesar Dressing and Aromatics
In a large bowl, combine the 0.5 cup Caesar Dressing, minced 2 cloves Fresh Garlic Cloves, and 1 tsp Lemon Zest. Add the crispy chicken and toss gently until every piece is evenly coated.
Here’s the thing—the lemon zest brightens the rich flavors, while fresh garlic adds a punch that dried garlic can’t match. Serve immediately while the coating is still crisp, or keep warm in a 200°F oven for up to 15 minutes if needed.
Pro Tips For Making Caesar Chicken
- Pound the Chicken: I learned this the hard way—pound the chicken breasts to an even ½-inch thickness so they cook through without burning the panko before the center’s done.
- Grate Fresh Parmesan: Skip the pre-shredded stuff; freshly grated Parmesan melts better into the breading and actually changes the outcome.
- Skip the Overcrowding: After burning three batches, I finally figured out to fry in small batches—about 2 pieces at a time—so the oil stays hot and the crust gets crisp.
- Rest Before Serving: Give it a solid 5 minutes on a wire rack before slicing; it keeps the juices in and the breading from sliding off.
Pro Cooking Tips for caesar chicken
Double-Dredge Technique
For extra-crispy coating that stays put, dredge each piece in flour, dip in egg, then return to flour for a second dusting before the final cheese-breadcrumb step. This creates a thicker, more durable crust that won’t fall off during frying. 🔥
Oil Temperature Control
Maintain 350-375°F oil temperature in your skillet—I use a candy thermometer clipped to the side. Too cool and you’ll get greasy chicken; too hot and the outside burns before the inside cooks. Adjust heat between batches as needed.
Rest Between Batches
Let your skillet rest for 2-3 minutes between batches to recover heat. This prevents temperature drops that lead to uneven cooking. I keep my burner at medium-high and monitor closely during this time.
Cheese Melting Trick
Add ¼ cup of the Panko-cheese mixture to your hot skillet right after cooking each batch. Stir for 30 seconds to create crispy cheese bits that you can sprinkle over the finished dish for extra texture and flavor.
Dressing Timing
Toss the chicken in the Caesar dressing only after all batches are cooked. This prevents the coating from absorbing too much moisture and getting soggy. The lemon zest in the dressing helps cut through the richness beautifully. 💡
Oven Alternative
For a hands-off approach, bake at 425°F on a wire rack over a baking sheet for 15-18 minutes. Flip halfway through. The rack allows air circulation for even crisping on all sides.
Nutrition Facts
Frequently Asked Questions
Can I use chicken tenders instead of breasts?
Chicken tenders work great for bite-sized pieces. They cook slightly faster, so reduce the time to 2-3 minutes per side on medium-high heat to avoid overcooking.
How do I keep the coating from falling off?
Pat the chicken completely dry before dredging, and let the egg wash drip off before pressing into the panko mixture. The double-dredge technique also creates a more durable crust.
Can I make this ahead for a party?
Prepare the chicken through coating, then refrigerate uncovered for up to 2 hours before cooking. This helps the coating set. Cook just before serving for maximum crispiness.
What if I don’t have panko?
Crush plain breadcrumbs in a food processor until fine. The texture won’t be as light, but it’ll still work. Add an extra ¼ cup Parmesan to boost flavor.

- Jollof Rice Sauce Recipe: West African Tomato and Spice Infusion - September 25, 2026
- Japanese Rice Soup Recipe: Umami-Rich Comfort in a Bowl - September 25, 2026
- Homemade Cream Of Rice Recipe: Silk-Smooth Breakfast in Minutes - September 25, 2026