
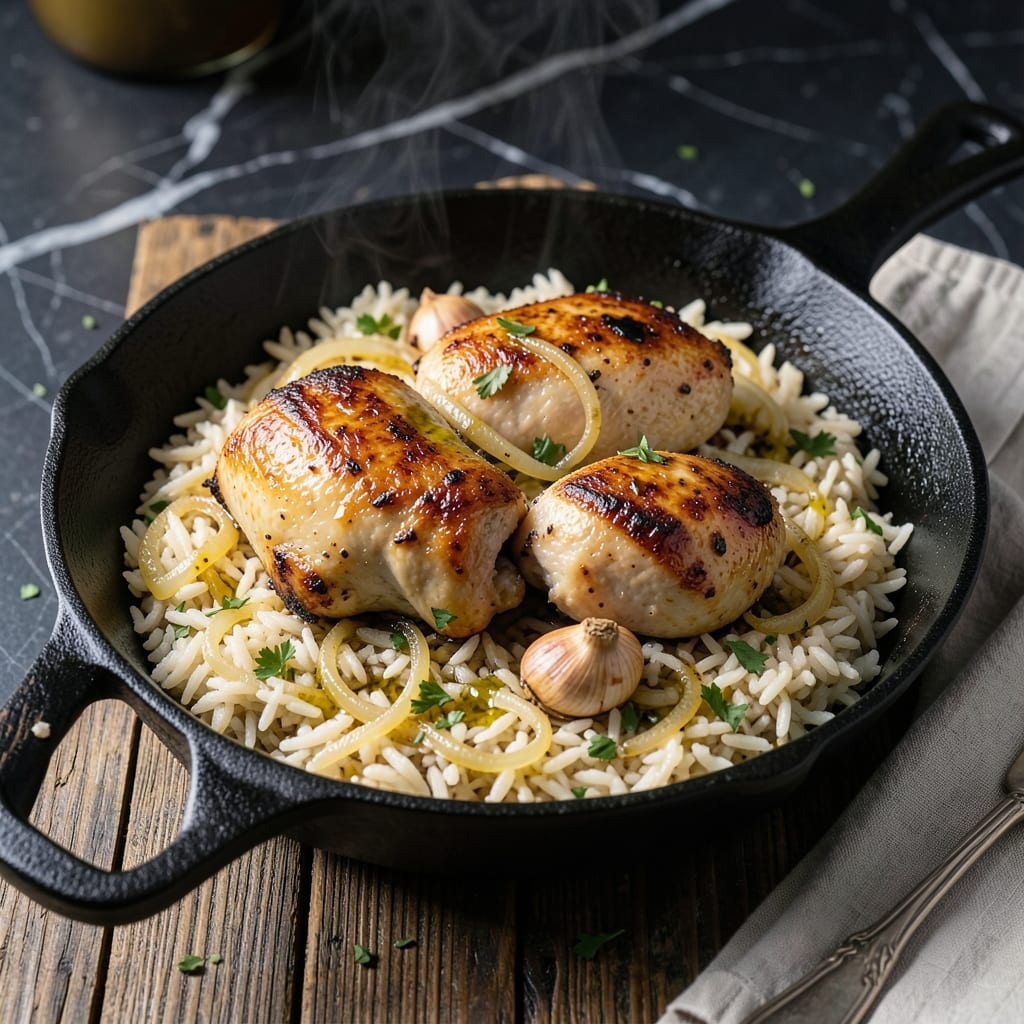
This method guarantees crispy chicken skin while cooking the rice to fluffy perfection in one cast iron skillet. The technique relies on precise heat control and timing to achieve both textures simultaneously.
By searing the chicken first, then finishing with the rice, you create a dish where every element cooks evenly. The cast iron retains heat, ensuring the skin stays crispy even as the rice absorbs the flavorful juices.
Ingredients for Cast Iron Chicken and Rice
Simple ingredients create a skillet meal with crispy chicken and tender rice.
| Ingredient | Amount | Notes |
|---|---|---|
| Chicken Thighs 🍗 | 4 whole | Bone-in, skin-on for crispiness |
| Long-Grain White Rice 🍚 | 1 ½ cups | Uncooked, rinsed before use |
| Chicken Stock 🥣 | 2 ½ cups | Low-sodium preferred for control |
| Yellow Onion 🧅 | 1 whole | Medium-sized, finely diced |
| Garlic Cloves 🧄 | 3 cloves | Minced for even distribution |
| Olive Oil 🫒 | 2 tbsp | Divided for searing and sautéing |
| Unsalted Butter 🧈 | 2 tbsp | For richness in rice |
| Kosher Salt 🧂 | 1 ½ tsp | Diamond Crystal brand recommended |
| Black Pepper 🌶️ | 1 tsp | Freshly ground for best flavor |
| Dried Thyme 🌿 | 1 tsp | Or substitute 1 tbsp fresh |
| Bay Leaf 🍃 | 1 whole | Removed before serving |
| Fresh Parsley 🌿 | ¼ cup | Chopped, for garnish |
The chicken thighs are non-negotiable—bone-in, skin-on gives you that crispy skin the intro promises. Most grocery stores carry them, but Whole Foods has great organic options. For the rice, any long-grain white works, but Basmati or Jasmine add a nice fragrance. The cast iron skillet needs to be well-seasoned; if yours is new, do a quick seasoning first (flaxseed oil, 450°F for an hour).
No chicken stock? Water with a bouillon cube works in a pinch, but the depth of flavor won’t be the same. Out of fresh garlic? Garlic powder at one-third the amount gets you close. The dried thyme can be swapped for rosemary or sage—just use the same quantity. For extra richness, a splash of white wine in the stock adds brightness (don’t worry about cooking off the alcohol).
Leftovers keep well for 3-4 days in the fridge, though the chicken skin loses its crispness. Reheat gently in a skillet to revive it. This dish doesn’t freeze perfectly—the rice gets mushy—but you can freeze the chicken separately and cook fresh rice when ready to eat.
Why You’ll Love This Recipe
- One Pan Magic: I love how everything cooks together in the cast iron—no extra pots, no fuss.
- Garlic-Infused Comfort: The garlic and onions caramelize into the rice, making each bite ridiculously flavorful.
- Weeknight Hero: Honestly, it’s my go-to for busy evenings when I need dinner on the table fast.
- Budget Stretch: Chicken thighs and rice feed my family for days without breaking the bank.
Step-by-Step Instructions for Cast Iron Chicken and Rice
Here’s the method I rely on for perfectly crispy skin and tender, flavorful rice every time.
Step 1: Sear the Chicken Thighs to Golden Perfection
Heat 1 tablespoon olive oil in a large cast iron skillet over medium-high heat. Pat the 4 whole Chicken Thighs dry with paper towels, then season both sides with 1 tsp Kosher Salt and 1 tsp Black Pepper. The dry surface is critical for achieving that coveted crispy skin.
Place the chicken thighs skin-side down in the hot skillet. Cook undisturbed for 6-8 minutes until the skin is deep golden brown and crispy. Resist the urge to move them—this ensures even browning and prevents sticking. Flip and cook for 4-5 minutes until the internal temperature reaches 165°F. Transfer to a plate and set aside.
Step 2: Sauté Aromatics and Toast the Rice
In the same skillet, add the remaining 1 tablespoon olive oil and reduce heat to medium. Add the finely diced 1 whole Yellow Onion and cook for 3-4 minutes until softened and translucent. Stir in the 3 cloves minced Garlic Cloves and cook for 30 seconds until fragrant.
Add the 1.5 cups Long-Grain White Rice to the skillet and stir to coat in the oil. Toast for 2 minutes, stirring constantly, until the rice is lightly golden. This step enhances the nutty flavor of the grains and prevents them from becoming mushy during cooking.
Step 3: Deglaze and Simmer the Rice
Pour in the 2.5 cups Chicken Stock, then add the 1 tsp Dried Thyme, remaining 0.5 tsp Kosher Salt, and 1 whole Bay Leaf. Stir well to combine, scraping up any browned bits from the bottom of the skillet—this adds depth of flavor to the rice.
Bring the mixture to a boil, then reduce heat to low. Cover the skillet and let it simmer for 18-20 minutes until the rice is tender and the liquid is absorbed. Avoid lifting the lid during cooking, as this releases steam and can lead to unevenly cooked rice.
Step 4: Finish with Butter and Rest
Once the rice is cooked, remove the skillet from heat. Stir in the 2 tbsp Unsalted Butter until fully melted and incorporated. This adds a rich, velvety texture to the grains. Remove and discard the Bay Leaf.
Return the seared Chicken Thighs to the skillet, nestling them into the rice. Cover and let rest for 5 minutes. This allows the juices in the chicken to redistribute, ensuring moist, flavorful meat. Garnish with 0.25 cup chopped Fresh Parsley before serving.
Pro Tips For Making Cast Iron Chicken And Rice
- Sear Chicken First: Get your cast iron screaming hot before adding the thighs—skin-side down for at least 5 minutes until it’s deep golden. I learned this the hard way after pulling up pale, sad chicken that stuck to the pan.
- Toast the Rice: After removing the chicken, toss the rice into the same pan for 2 minutes to soak up those browned bits. It adds a nutty depth that plain steamed rice just can’t match.
- Use Room-Temp Stock: Cold stock straight from the fridge slows everything down and can make the rice gummy. Let it sit out for 10 minutes or microwave it for 30 seconds first—your rice will cook evenly every time.
- Skip the Lid: Resist the urge to cover the pan while the chicken finishes cooking. The steam softens the skin, and you’ll lose that crispy texture that makes this dish worth making.
Flavor Customization for This cast iron chicken and rice
Spicy Kick
Add ½ tsp cayenne pepper with the thyme for a subtle heat, or 1 tsp smoked paprika for depth. For serious spice lovers, mix 1 tbsp hot sauce into the chicken stock before simmering. I love the balance of crispy skin with a little fire underneath. 🌶️
Herb Variations
Swap the thyme for 1 tsp dried rosemary or 1 tbsp fresh sage for earthier notes. A 1 tsp poultry seasoning blend adds complexity. Fresh herbs like tarragon or chives work beautifully as a garnish instead of parsley.
Citrus Brightness
Stir 1 tbsp lemon zest into the rice before serving, or add 2 tbsp orange juice to the stock. The acidity cuts through the richness of the chicken skin. I often add a few lemon wedges on the side for squeezing.
Umami Boost
For deeper flavor, add 1 tbsp soy sauce to the stock or 2 tsp fish sauce for a subtle savory note. A pinch of MSG (¼ tsp) enhances all the flavors without tasting distinct. Trust me, it makes a difference. ✨
Creamy Texture
Stir ¼ cup heavy cream or 2 oz cream cheese into the rice at the end for extra richness. For a lighter option, ½ cup grated Parmesan melts beautifully into the grains. The creaminess pairs perfectly with the crispy chicken.
Vegetable Additions
Sauté 1 diced bell pepper or 1 cup mushrooms with the onions. For greens, stir in 2 cups baby spinach at the end until wilted. These additions make the dish feel more complete without overpowering the chicken.
Nutrition Facts
Frequently Asked Questions
Can I use chicken breasts instead of thighs?
Yes, but they’ll dry out faster. Use bone-in, skin-on breasts and reduce cooking time by 2-3 minutes per side. Thighs stay juicier and are more forgiving.
Why toast the rice first?
Toasting for 2 minutes enhances the nutty flavor and prevents mushiness. It also helps the grains absorb liquid evenly during simmering.
What if my rice is undercooked?
Add ¼ cup hot stock, cover, and cook for another 5 minutes. Check liquid levels before adding more. Avoid stirring while cooking.
Can I make this ahead?
Cook the rice fully, but sear chicken just before serving to keep skin crispy. Reheat rice with a splash of stock to restore moisture.

- Jollof Rice Sauce Recipe: West African Tomato and Spice Infusion - September 25, 2026
- Japanese Rice Soup Recipe: Umami-Rich Comfort in a Bowl - September 25, 2026
- Homemade Cream Of Rice Recipe: Silk-Smooth Breakfast in Minutes - September 25, 2026