
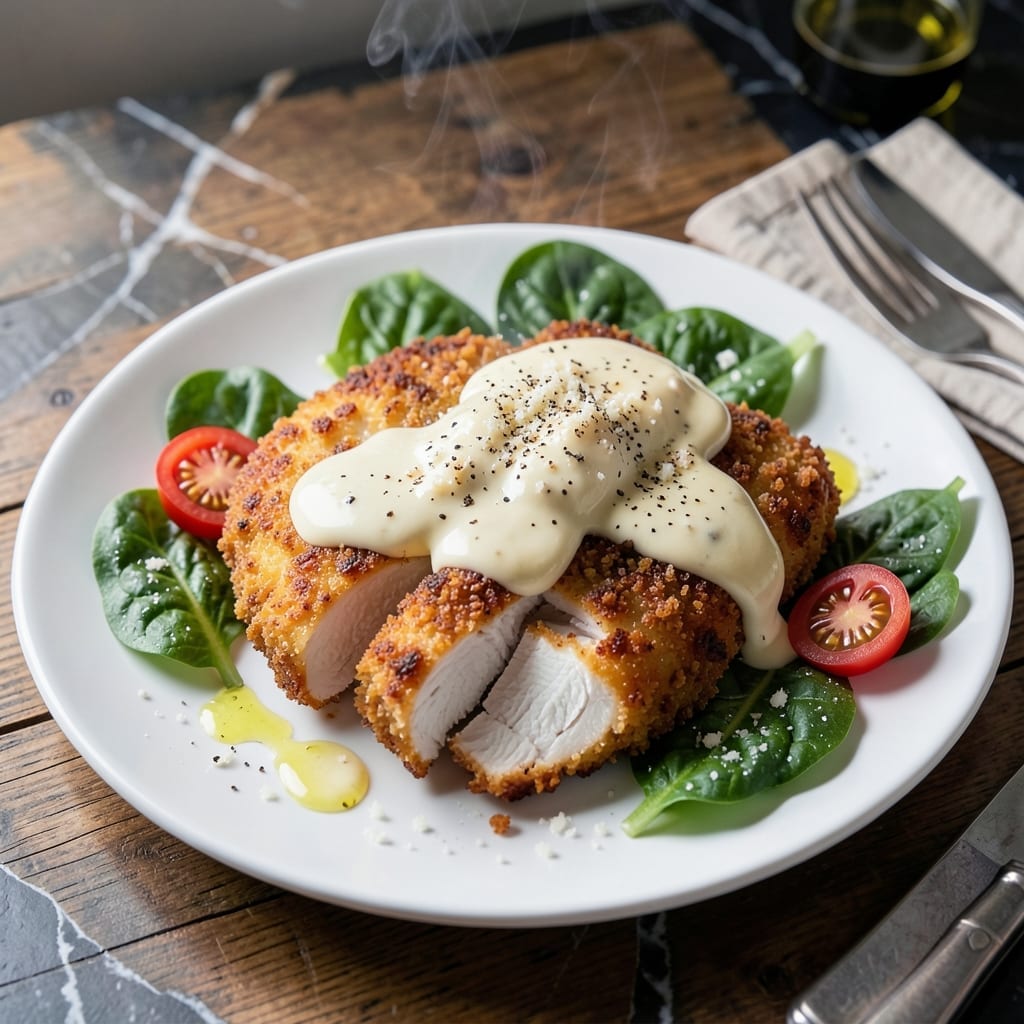
This recipe transforms simple chicken into a restaurant-worthy dish with a tender center and crispy Parmesan crust. The secret is in the breading technique and precise cooking temperature.
I developed this method to ensure juicy cutlets every time, using a double-dredge process for extra crunch. The Caesar-inspired seasoning infuses each bite with zesty, savory depth.
The result is golden-brown chicken with a tender interior, perfect for serving with fresh greens or as a main course. It’s a foolproof way to elevate weeknight dinners.
Ready in under an hour, this dish proves that impressive meals don’t require complicated steps. Here’s how to make it perfectly every time.
Ingredients for Cesar Chicken
Restaurant-quality ingredients transform simple chicken into a zesty, crispy masterpiece with tender centers.
| Ingredient | Amount | Notes |
|---|---|---|
| Chicken Breast Cutlets 🍗 | 1 ½ lb | Boneless, skinless, pounded to 1/4-inch thickness |
| All-Purpose Flour 🌾 | 1 cup | For initial dredging layer |
| Large Eggs 🥚 | 2 whole | Beaten for egg wash binding |
| Panko Breadcrumbs 🍞 | 1 ½ cups | Japanese-style for extra crunch |
| Parmesan Cheese 🧀 | 1 cup | Freshly grated, fine texture |
| Garlic Powder 🧄 | 1 tbsp | For Caesar-inspired seasoning |
| Dried Oregano 🌿 | 1 tsp | Mediterranean variety preferred |
| Black Pepper 🌶️ | 1 tsp | Freshly ground for best flavor |
| Anchovy Paste 🐟 | 1 tsp | Key for authentic Caesar flavor |
| Dijon Mustard 🟡 | 1 tbsp | Adds tangy depth to breading |
| Lemon Zest 🍋 | 1 tbsp | Finely grated for brightness |
| Olive Oil 🫒 | ¾ cup | For pan-frying cutlets |
| Kosher Salt 🧂 | 1 ½ tsp | Diamond Crystal brand preferred |
| Romaine Lettuce 🥬 | 1 whole | For serving, optional |
| Caesar Dressing 🥗 | ½ cup | For drizzling or dipping |
The chicken cutlets must be uniformly thin for even cooking—pound them to 1/4-inch thickness between plastic wrap. For Parmesan, whole wedges from the deli produce superior melt and flavor compared to pre-grated. Panko breadcrumbs (found in the Asian aisle at most supermarkets) create the signature crunch. Anchovy paste, available at Whole Foods or specialty stores, is non-negotiable for authentic Caesar flavor depth.
No anchovy paste? Worcestershire sauce at half the amount works in a pinch (though it contains anchovies, so check dietary needs). Panko can be swapped for regular breadcrumbs, but the texture won’t be as crisp. Fresh Parmesan is ideal, but Pecorino Romano offers a sharper alternative. The Dijon mustard can be replaced with whole-grain mustard for a rustic twist. Always use freshly ground black pepper—pre-ground lacks the aromatic punch.
Breaded cutlets hold in the fridge for 24 hours before cooking. Cooked chicken keeps for 3-4 days in an airtight container. For longer storage, freeze uncooked breaded cutlets on a tray, then transfer to a bag—they’ll keep 2 months. Reheat in a 375°F oven to maintain crispiness.
Why You’ll Love This Recipe
- One Pan Magic: I bread and bake these cutlets on a single sheet pan—minimal cleanup, maximum flavor.
- Crispy Perfection: The panko and parmesan create a golden crust that stays crunchy even with sauce.
- Weeknight Hero: I throw these together on busy evenings when I need dinner fast but still crave restaurant quality.
- Leftovers? Yes Please: Honestly, they taste even better the next day tucked into a sandwich or chopped over salad.
Step-by-Step Instructions for Cesar Chicken
Master the technique for achieving a crispy, flavorful crust on perfectly tender cutlets.
Step 1: Season and Dredge the Chicken Breast Cutlets
Pat the 1.5 lb Chicken Breast Cutlets dry with paper towels to ensure maximum crispiness. Season both sides evenly with 1.5 tsp Kosher Salt and 1 tsp Black Pepper. This initial seasoning penetrates the meat for consistent flavor throughout.
Place the 1 cup All-Purpose Flour in a shallow dish. Dredge each cutlet through the flour, pressing gently to create an even, thin coating. Shake off any excess—too much flour creates a gummy layer under the breading. This first layer acts as a glue for the egg wash.
Step 2: Create the Parmesan Panko Breading Station
In a second shallow dish, whisk the 2 whole Large Eggs with 1 tbsp Dijon Mustard, 1 tbsp Lemon Zest, 1 tsp Anchovy Paste, 1 tbsp Garlic Powder, and 1 tsp Dried Oregano until fully combined. The mustard and anchovy paste add depth, while the lemon zest brightens the flavor profile.
In a third dish, combine the 1.5 cups Panko Breadcrumbs and 1 cup Parmesan Cheese. The panko’s coarse texture creates superior crunch, while the finely grated Parmesan melts into the breading for a rich, savory finish. This two-step breading process ensures a thick, even crust that won’t fall off during cooking.
Step 3: Bread the Cutlets with Precision
Dip each floured cutlet into the egg mixture, allowing excess to drip off for 5 seconds. Then press it firmly into the panko-Parmesan mixture, turning to coat all sides completely. Press down with your palm to compact the breading—this creates those desirable crispy ridges.
Place the breaded cutlets on a wire rack set over a baking sheet. Let them rest for 10 minutes at room temperature. This resting period allows the breading to adhere properly and prevents it from sliding off during frying. The cutlets should look uniformly golden-brown even before cooking begins.
Step 4: Pan-Fry to Golden Perfection
Heat 0.75 cup Olive Oil in a large skillet over medium-high heat until shimmering but not smoking. The oil should be about ¼-inch deep—enough to come halfway up the cutlets. To test readiness, drop in a pinch of breading; it should sizzle immediately and float to the surface.
Carefully place the cutlets in the hot oil, working in batches to avoid crowding. Cook for 3-4 minutes per side until the breading is deep golden brown and the internal temperature reaches 165°F. The crust should be audibly crisp when tapped with a spatula. Drain on a paper towel-lined plate to remove excess oil.
Step 5: Serve with Romaine and Caesar Dressing
Slice the 1 whole Romaine Lettuce into quarters lengthwise or chop into bite-sized pieces for serving. Arrange the hot cutlets over the romaine. The residual heat from the chicken will slightly wilt the lettuce at the point of contact, creating a pleasant contrast in textures.
Drizzle with 0.5 cup Caesar Dressing or serve it on the side for dipping. The dressing’s creamy, tangy profile complements the crispy, savory breading perfectly. Serve immediately while the cutlets are at their crispiest—the crust will soften slightly as it cools, but the interior will remain tender.
Pro Tips For Making Cesar Chicken
- Pound the Chicken: Use a meat mallet to flatten the cutlets to an even 1/2-inch thickness—this guarantees they cook through without drying out the thinner parts.
- Grate Fresh Parmesan: Skip the pre-shredded stuff; freshly grated Parmesan melts better into the breading and actually sticks to the chicken instead of falling off.
- Skip Overcrowding: I learned this the hard way—fry the cutlets in batches with space between each piece, or the breading will steam instead of crisp.
- Rest Before Serving: Give the chicken 5 minutes on a wire rack after frying so the crust stays crisp while it finishes cooking inside.
Common Mistakes When Making This Recipe
Skipping the Drying Step
Never skip patting the 1.5 lb Chicken Breast Cutlets dry with paper towels. Moisture creates steam between the meat and breading, causing it to detach. I always press extra hard on the thickest parts to remove hidden moisture. 💡
Using Cold Cutlets
Bring your cutlets to room temperature before breading—about 20 minutes on the counter. Cold chicken lowers the oil temperature too much, resulting in greasy, undercooked centers. This is especially important for even cooking.
Overcrowding the Pan
Cook in batches with at least 1 inch between cutlets. Overcrowding lowers the oil temperature, creating a steamed effect instead of crispy breading. I use a 12-inch skillet for proper spacing.
Incorrect Oil Temperature
Test oil readiness by dropping in a pinch of breading—it should sizzle immediately. If it sinks, the 0.75 cup Olive Oil isn’t hot enough. Maintain medium-high heat throughout cooking to prevent soggy results. 🔥
Skipping the Rest Period
Let breaded cutlets rest for 10 minutes before frying. This allows the coating to set properly. Without this step, the breading often slides right off during cooking.
Overcooking the Chicken
Use a meat thermometer to pull cutlets at exactly 165°F internal temperature. Overcooking dries out the meat, even with the protective breading. The carryover heat will finish the cooking as they rest.
Nutrition Facts
Frequently Asked Questions
Can I use regular breadcrumbs instead of panko?
Yes, but the texture will be less crisp. Panko’s coarse texture creates the signature crunch, while regular breadcrumbs may yield a softer crust.
What can I substitute for anchovy paste?
Use ½ tsp Worcestershire sauce as a substitute. It contains anchovies and provides similar umami depth to the breading.
How do I keep the breading crispy when serving?
Serve immediately after cooking. To maintain crispiness for a crowd, place cooked cutlets on a wire rack in a 200°F oven for up to 15 minutes.
Can I bake instead of pan-fry?
Yes, bake at 400°F for 15-20 minutes on a wire rack over a baking sheet. Flip halfway for even browning, but pan-frying gives better crispiness.

- Jollof Rice Sauce Recipe: West African Tomato and Spice Infusion - September 25, 2026
- Japanese Rice Soup Recipe: Umami-Rich Comfort in a Bowl - September 25, 2026
- Homemade Cream Of Rice Recipe: Silk-Smooth Breakfast in Minutes - September 25, 2026