
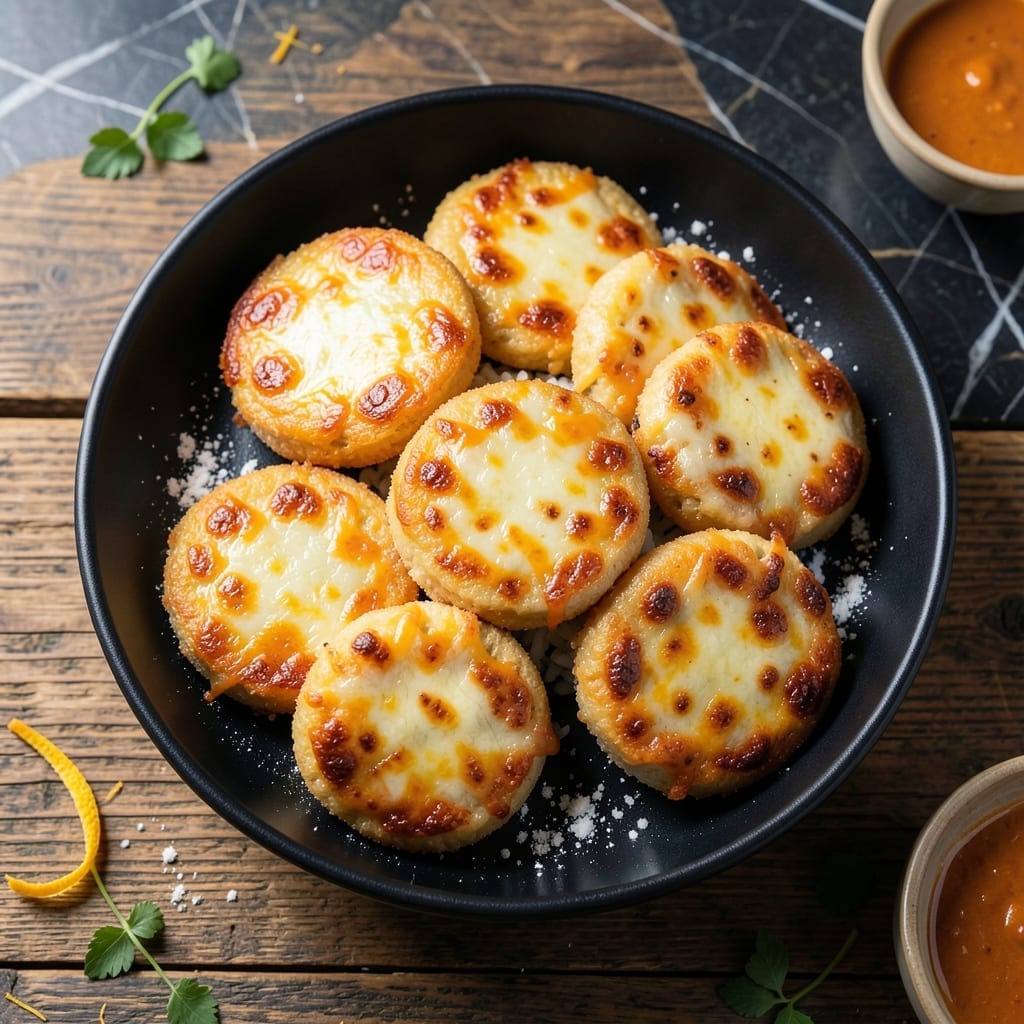
These rice cakes deliver a crispy exterior with melted cheese centers that stretch with every bite. The secret is pressing the rice firmly before cooking to ensure even browning and maximum crunch.
With just a few ingredients and 15 minutes, you can create a snack that’s both satisfying and versatile. The contrast between the golden, crispy edges and the gooey cheese makes them irresistibly addictive.
Ingredients for Cheese Rice Cakes
Short grain rice, melted cheese, and a crispy coating create this addictive snack in minutes.
| Ingredient | Amount | Notes |
|---|---|---|
| Sushi Rice 🍚 | 2 cups | Short-grain, uncooked |
| Water 💧 | 2 ½ cups | For cooking rice |
| Cheddar Cheese 🧀 | 8 oz | Shredded, block preferred |
| Mozzarella Cheese 🧀 | 8 oz | Shredded, part-skim ok |
| All-Purpose Flour 🌾 | ½ cup | For dusting rice |
| Large Eggs 🥚 | 2 whole | Beaten for binding |
| Panko Breadcrumbs 🍞 | 1 cup | For extra crispiness |
| Vegetable Oil 🫒 | ½ cup | For frying, neutral flavor |
| Salt 🧂 | 1 tsp | Fine grain preferred |
| Garlic Powder 🧄 | ½ tsp | Adds depth to flavor |
| Onion Powder 🧅 | ½ tsp | Enhances cheese flavor |
| Black Pepper 🌶️ | ¼ tsp | Freshly ground preferred |
The rice is non-negotiable—short-grain sushi rice is essential for the right sticky texture that holds shape. Nishiki or Koshihikari brands at Whole Foods or any Asian market deliver consistent quality. For the cheese, block cheddar shredded by hand melts better than pre-shredded (which has anti-caking agents). Mozzarella adds stretch, but skip the fresh kind—it releases too much moisture.
No sushi rice? Arborio works in a pinch but may need extra pressing. Swap cheeses for Colby Jack or Monterey Jack—just avoid anything too soft. The egg wash can be whole milk or plant-based milk for a vegan version, though binding won’t be as strong. Panko is ideal for crunch, but regular breadcrumbs work if that’s what’s on hand.
Cooked rice holds in the fridge for 2 days before shaping. The cakes fry best straight from the fridge—cold rice sticks together better. Leftovers keep 3-4 days refrigerated; reheat in a toaster oven to revive the crisp. Freezing isn’t recommended as it alters the texture.
Why You’ll Love This Recipe
- One Bowl Wonder: I just dump the sushi rice, flour, and shredded cheddar in a bowl, mix, and shape—no fancy steps.
- Cheesy Pull Magic: That stretchy mozzarella center with the sharp cheddar bite? I make extra just to watch it melt.
- Kid-Approved Snack: Honestly, my picky nephew devours these warm or cold, and they’re perfect for lunchboxes.
- Budget Stretcher: A little rice and cheese goes a long way—feeds four for less than a takeout meal.
Step-by-Step Instructions for Cheese Rice Cakes
Master this technique for consistently crisp exterior and molten cheese centers every time.
Step 1: Cook and Prepare the Sushi Rice Base
Rinse the 2 cups Sushi Rice thoroughly under cold water until the water runs clear. This removes excess starch and prevents gummy texture. Cook the rice with the 2.5 cups Water using your preferred method until tender and slightly sticky—I recommend a rice cooker for perfect consistency.
Once cooked, spread the rice on a baking sheet and let it cool completely. Sprinkle the 0.5 cup All-Purpose Flour over the warm rice and gently fold to coat evenly. This flour coating is crucial as it helps bind the rice and creates the foundation for crispiness during frying.
Step 2: Form and Fill the Rice Cakes
In a bowl, combine the 8 oz Cheddar Cheese and 8 oz Mozzarella Cheese with 0.5 tsp Garlic Powder, 0.5 tsp Onion Powder, and 0.25 tsp Black Pepper. The combination of these cheeses gives you both sharpness and meltability.
Divide the cooled rice into 8 equal portions. Take one portion, flatten it in your palm, and create a small well in the center. Add a generous amount of the cheese mixture, then seal the rice around it to form a compact cake. Repeat with remaining rice and filling.
Step 3: Bread and Prepare for Frying
Beat the 2 whole Large Eggs with 1 tsp Salt in a shallow dish. In another dish, spread the 1 cup Panko Breadcrumbs. Dip each rice cake first in the egg mixture, ensuring complete coverage, then press into the panko, coating thoroughly on all sides.
Here’s the thing—don’t skip pressing the panko firmly into the rice. This creates that extra-crispy exterior that contrasts perfectly with the gooey interior. Place breaded cakes on a plate and refrigerate for 15 minutes to set the coating.
Step 4: Fry to Golden Perfection
Heat 0.5 cup Vegetable Oil in a large skillet over medium-high heat until shimmering. Carefully place the rice cakes in the hot oil, working in batches if necessary to avoid crowding. Fry for 3-4 minutes per side until deep golden brown and crispy.
Watch for the edges to turn that perfect golden color—that’s your visual cue. The oil temperature is critical; if it’s too cool, the cakes will absorb oil and become greasy rather than crisp. Transfer to a paper towel-lined plate to drain excess oil.
Serve immediately while hot—the cheese centers should be fully melted and stretchy when you cut into them, with that satisfying contrast to the crispy exterior.
Pro Tips For Making Cheese Rice Cakes
- Pre-cook the rice: Use day-old, cooled sushi rice—it holds its shape way better than fresh, sticky rice. I learned this the hard way after my first batch fell apart in the pan.
- Shred your own cheese: Skip pre-shredded cheddar and mozzarella; the anti-caking agents make the melt uneven. Grate it fresh for that perfect gooey stretch.
- Chill before frying: After forming the rice cakes, refrigerate them for 15-20 minutes to firm up. This prevents them from disintegration when they hit the hot oil.
- Dust with flour: Lightly coat the rice cakes in all-purpose flour before frying—just enough to create a crispy crust that locks in the cheese. Sounds weird, but it works.
Storing and Reheating This Recipe
Refrigerator Storage
Let your rice cakes cool completely at room temperature for about 30 minutes before storing. Place them in a single layer between parchment paper in an airtight container. They’ll stay fresh in the fridge for up to 3-4 days. ❄️
Freezing Tips
While I don’t recommend freezing (it changes the texture), if you must, freeze unbreaded rice cakes on a baking sheet first for 1 hour. Then transfer to a freezer bag with parchment between layers. They’ll keep for 1 month, but expect slightly less crispiness after reheating.
Toaster Oven Reheating
This is my favorite method for reviving crispness. Preheat to 375°F and heat for 5-7 minutes, flipping halfway. The dry heat replicates frying better than a microwave. Watch closely—they can go from perfect to overdone quickly. 🔥
Air Fryer Method
For quick reheating, set your air fryer to 350°F and cook for 3-4 minutes. No oil needed. This works great for single servings. The circulating air helps maintain that crispy exterior while melting the cheese center.
Microwave Last Resort
If you’re in a hurry, microwave on 50% power for 30-second bursts, checking between each. Place a paper towel under them to absorb moisture. Honestly, the texture won’t be as good, but it’ll get the cheese melted.
Nutrition Facts
Frequently Asked Questions
Can I use a different type of rice?
Short-grain sushi rice works best for the right sticky texture. Arborio can substitute in a pinch but may need extra pressing to hold shape. Long-grain varieties like jasmine or basmati won’t stick together properly.
Why do my rice cakes fall apart when frying?
This usually means the rice wasn’t pressed firmly enough or cooled completely before breading.
Can I bake these instead of frying? Yes! Bake at 400°F for 12-15 minutes per side on a parchment-lined tray. Brush with a little oil first for extra crispiness. The texture won’t be identical, but it’s a healthier alternative.
What cheese works best for extra stretch?
Mozzarella gives the most stretch, but a mix with cheddar adds flavor. For maximum gooeyness, try adding 1-2 oz of American cheese to your blend—it melts beautifully.

- Jollof Rice Sauce Recipe: West African Tomato and Spice Infusion - September 25, 2026
- Japanese Rice Soup Recipe: Umami-Rich Comfort in a Bowl - September 25, 2026
- Homemade Cream Of Rice Recipe: Silk-Smooth Breakfast in Minutes - September 25, 2026