
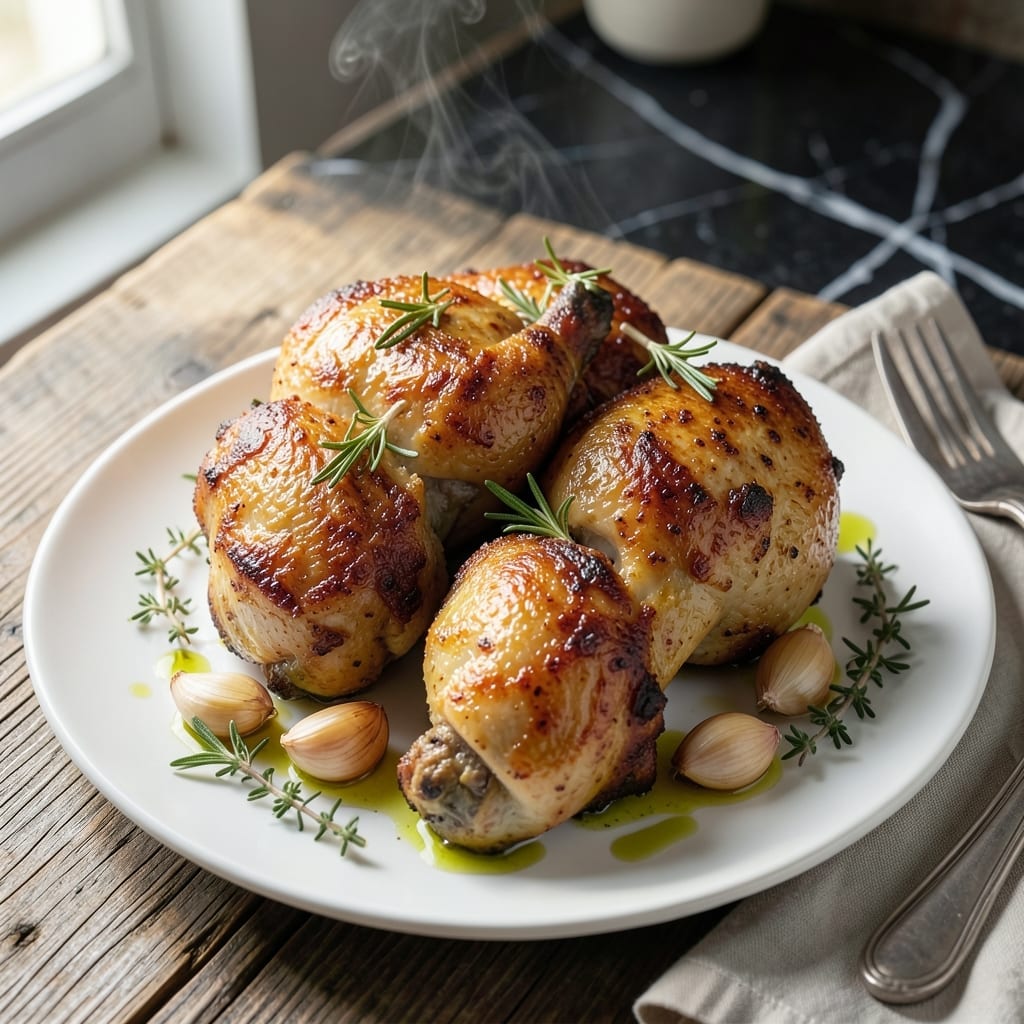
This chicken and garlic dish delivers crispy skin with deeply aromatic flavor in every bite. The method is straightforward but precise, ensuring perfect results each time.
I’ve refined this technique to balance golden, shatteringly crispy skin with tender, juicy meat. Garlic infuses the dish with bold, savory notes without overpowering the chicken’s natural richness.
The secret lies in proper heat control and timing. High heat at the start creates that coveted crispy exterior, while finishing at a lower temperature keeps the meat succulent.
Serve it as the centerpiece of a meal, and let the aroma draw everyone to the table. The result is a dish that’s simple yet impressive.
Ingredients for Chicken and Garlic
Bone-in thighs, aromatic herbs, and plenty of garlic create this restaurant-quality dish.
| Ingredient | Amount | Notes |
|---|---|---|
| Chicken Thighs 🍗 | 4 whole | Bone-in, skin-on for crispiness |
| Garlic Cloves 🧄 | 12 cloves | Peeled, smashed for infusion |
| Olive Oil 🫒 | 3 tbsp | Extra-virgin for richness |
| Unsalted Butter 🧈 | 2 tbsp | For basting and browning |
| Fresh Rosemary 🌿 | 2 tbsp | Chopped, for aromatic depth |
| Fresh Thyme 🍃 | 2 tsp | Leaves stripped from stems |
| Kosher Salt 🧂 | 1 ½ tsp | Divided for seasoning and finishing |
| Black Pepper 🌶️ | 1 tsp | Freshly ground for best flavor |
| Lemon 🍋 | 1 whole | Zested and juiced for brightness |
| Red Pepper Flakes 🔥 | ½ tsp | Optional for subtle heat |
| Chicken Stock 🥫 | ½ cup | Low-sodium preferred |
The chicken thighs are non-negotiable here. Bone-in, skin-on gives you that shatteringly crispy texture the intro promises. Most supermarkets carry them—look for organic or free-range if you can. The garlic should be fresh (those pre-peeled cloves in jars are fine in a pinch, but fresh tastes brighter). Whole Foods and Trader Joe’s have great options for both.
Short on fresh herbs? Dried rosemary and thyme at half the amount work, but fresh is ideal. No chicken stock? Water with a bouillon cube in a pinch. The butter can be swapped for ghee if you want a nuttier flavor. For extra crispiness, pat the chicken skin very dry before cooking—worth the extra minute.
Leftovers keep in the fridge for 4 days—reheat in the oven to revive the crispiness. Freeze for up to 3 months (without the herbs). The garlic-infused oil at the bottom of the pan? Pour it over everything. Don’t waste a drop.
Why You’ll Love This Recipe
- One Pan Wonder: I toss everything on a single sheet pan—chicken, garlic, rosemary—then let the oven do the work.
- Garlic Butter Magic: The butter and garlic melt into the chicken thighs, and that rosemary? Honestly, it’s the best part.
- Feeds a Crowd: I make a big batch Sunday night and we’re set for leftovers all week.
- Budget Friendly: Chicken thighs stay cheap, and a head of garlic plus fresh rosemary won’t break the bank.
Step-by-Step Instructions for Chicken and Garlic
Here’s the method. Straightforward, tested, works every time.
Step 1: Season and Sear the Chicken Thighs
Pat the 4 whole Chicken Thighs dry with paper towels, then season both sides with 1 tsp Kosher Salt and 1 tsp Black Pepper. This step is crucial for crispy skin—moisture is the enemy of that perfect golden crust.
Heat 2 tbsp Olive Oil in a large, heavy skillet over medium-high heat. When the oil shimmers, add the chicken thighs skin-side down. Sear undisturbed for 6-8 minutes until the skin is deep golden brown and crisp. Flip and cook for another 4-5 minutes until the internal temperature reaches 165°F.
Transfer the chicken to a plate and set aside. The skin should be crisp and the juices should run clear when pierced. Don’t discard the rendered fat—it’s packed with flavor for the next steps.
Step 2: Infuse Aromatics in Rendered Fat
In the same skillet, reduce the heat to medium. Add the remaining 1 tbsp Olive Oil and 2 tbsp Unsalted Butter. Once the butter melts, add the 12 cloves Garlic Cloves, 2 tbsp Fresh Rosemary, and 2 tsp Fresh Thyme.
Sauté for 2-3 minutes, stirring occasionally, until the garlic turns light golden brown and the herbs release their aroma. Be careful not to let the garlic burn—it should be fragrant, not bitter. Add the 0.5 tsp Red Pepper Flakes for a subtle kick if desired.
This step builds the foundation of flavor for the dish. The garlic will soften and sweeten, while the herbs infuse the fat with their aromatic oils.
Step 3: Deglaze and Finish the Sauce
Pour in the 0.5 cup Chicken Stock and scrape up any browned bits from the bottom of the skillet with a wooden spoon. These bits, known as fond, are packed with flavor and will dissolve into the sauce.
Zest the 1 whole Lemon directly into the skillet, then add the juice. Simmer the mixture for 3-4 minutes until the liquid reduces slightly and the sauce thickens enough to coat the back of a spoon. Taste and adjust the seasoning with the remaining 0.5 tsp Kosher Salt if needed.
The sauce should be rich, aromatic, and slightly tangy from the lemon. The butter and olive oil will give it a glossy, velvety texture.
Step 4: Combine and Serve
Return the chicken thighs to the skillet, skin-side up, and spoon the sauce over them. Let everything simmer together for 1-2 minutes to meld the flavors and reheat the chicken.
Serve the chicken immediately, with the sauce spooned over the top. The skin should remain crisp, and the meat should be juicy and infused with the garlic and herbs. Garnish with additional fresh herbs if desired.
Pro Tips For Making Chicken And Garlic
- Dry the Thighs: Pat the chicken thighs very dry with paper towels before searing—this is the only way to get that golden crust without steaming them in their own juices.
- Smash the Garlic: Lightly smash the garlic cloves with the flat of your knife before peeling; it releases more flavor and makes them easier to handle than mincing.
- Skip the Crowding: Cook the thighs in batches if needed—overcrowding the pan drops the temperature and turns your sear into a sad simmer.
- Brown the Butter: Let the butter foam and turn nutty brown before adding the garlic and rosemary; it adds a depth of flavor that plain melted butter just can’t.
Storing and Reheating This Recipe
Refrigerator Storage
Let the dish cool for no more than 2 hours before transferring to airtight containers. I use glass containers with snap-tight lids. Store in the fridge at 40°F or below for up to 4 days. The flavors deepen as the garlic and herbs infuse the meat. ❄️
Freezer Storage
This dish freezes beautifully for up to 3 months without losing quality. Use heavy-duty freezer bags or vacuum-sealed containers. Leave 1 inch of headspace for expansion. Squeeze out excess air to prevent freezer burn.
Oven Reheating
Preheat oven to 350°F and place chicken on a wire rack over a baking sheet. Heat for 15-20 minutes until the internal temperature reaches 165°F. This method restores the skin’s crispiness beautifully. 🔥
Stovetop Reheating
Warm in a skillet over medium-low heat with a splash of chicken stock or water. Cover and heat for 5-7 minutes, turning occasionally. This keeps the meat moist while reviving the sauce.
Microwave Reheating
For quick meals, microwave individual portions covered with a damp paper towel. Use 70% power for 2-3 minutes, stir, then continue in 30-second intervals until hot. Add a splash of water if needed.
Nutrition Facts
Frequently Asked Questions
Can I use boneless thighs instead?
Yes, but bone-in gives better flavor and stays juicier. If using boneless, reduce cooking time by 2-3 minutes per side to avoid drying out.
How do I prevent the garlic from burning?
Keep heat at medium and stir often. Remove pan from heat if garlic browns too quickly. Burnt garlic turns bitter.
What if my sauce is too thin?
Simmer uncovered for 1-2 extra minutes. If still thin, mix 1 tsp cornstarch with water and stir in.
Can I make this ahead?
Cook fully, cool, and refrigerate up to 2 days. Reheat in oven at 350°F for 15 minutes to restore crispiness.

- Jollof Rice Sauce Recipe: West African Tomato and Spice Infusion - September 25, 2026
- Japanese Rice Soup Recipe: Umami-Rich Comfort in a Bowl - September 25, 2026
- Homemade Cream Of Rice Recipe: Silk-Smooth Breakfast in Minutes - September 25, 2026