
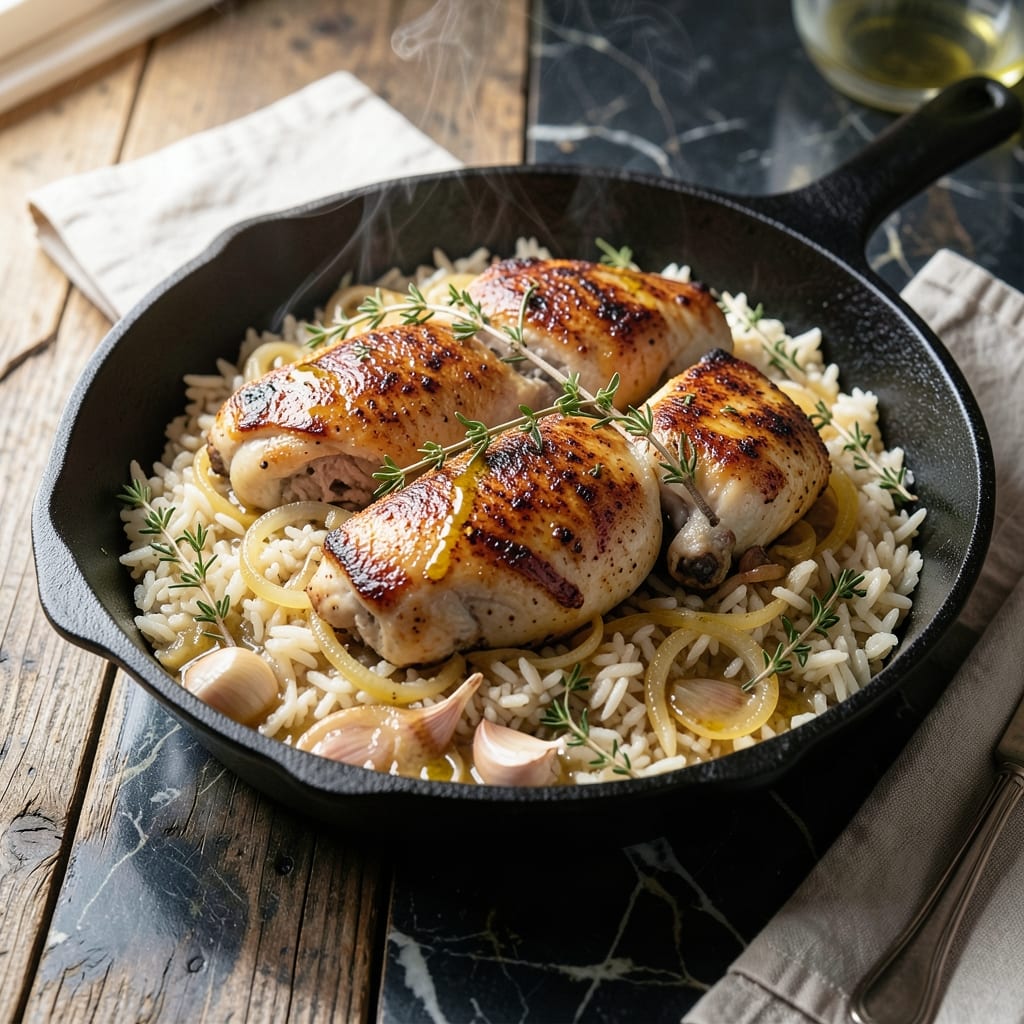
This cast iron skillet recipe transforms simple chicken and rice into a meal with golden crust and rich flavor. The one-pan method ensures every bite is infused with savory depth.
Using a well-seasoned skillet, you’ll achieve crispy edges and tender chicken with minimal effort. The technique is straightforward, yet delivers professional results every time.
Ingredients for Chicken and Rice Cast Iron Skillet
Transform simple chicken and rice into golden-crusted perfection with these essentials.
| Ingredient | Amount | Notes |
|---|---|---|
| Chicken Thighs 🍗 | 1 ½ lb | Boneless, skin-on preferred for crispiness |
| Long-Grain White Rice 🍚 | 1 ½ cups | Uncooked, rinsed before use |
| Chicken Stock 🥣 | 2 ½ cups | Low-sodium preferred for control |
| Yellow Onion 🧅 | 1 whole | Medium-sized, finely diced |
| Garlic Cloves 🧄 | 4 cloves | Minced for even distribution |
| Fresh Thyme Sprigs 🌿 | 4 pieces | Leaves stripped from stems |
| Dried Oregano 🍃 | 1 tsp | Mediterranean variety preferred |
| Smoked Paprika 🌶️ | 1 tsp | For depth of flavor |
| Kosher Salt 🧂 | 1 ½ tsp | Diamond Crystal preferred for texture |
| Freshly Ground Black Pepper 🌶️ | ¾ tsp | Coarse grind for texture |
| Olive Oil 🫒 | 2 tbsp | Extra-virgin for richness |
| Unsalted Butter 🧈 | 2 tbsp | For golden crust development |
| Bay Leaf 🍃 | 1 whole | Dried or fresh, removed before serving |
| Fresh Parsley 🌿 | ¼ cup | Chopped, for garnish |
The chicken thighs are non-negotiable for this application. Skin-on, bone-in yields superior crispiness and moisture retention in the cast iron environment. Source from a reputable butcher or Whole Foods for consistent sizing. The rice should be long-grain white (Basmati or Jasmine work well) for optimal texture after absorbing the cooking liquid. A well-seasoned skillet is essential—avoid non-stick for the crust development.
Substituting chicken breasts? Brine them first to prevent dryness, though thighs remain ideal. Vegetable stock can replace chicken stock at a 1:1 ratio. Fresh rosemary can substitute for thyme, but reduce by half due to its potency. For a smokier profile, chipotle powder can replace smoked paprika. The onion can be shallots for a milder, sweeter note.
Leftovers keep remarkably well. Store in the skillet (once cooled) or transfer to an airtight container for up to 4 days refrigerated. The crust softens upon storage but crisps beautifully when reheated in the skillet over medium heat. Freezing is possible for 3 months, though texture changes slightly upon thawing.
Why You’ll Love This Recipe
- One Pan Magic: I toss everything into my cast iron, cover it, and let the oven do the work—no babysitting required.
- Crispy & Savory: The chicken thighs get a perfect sear while the rice soaks up all that garlic and onion flavor.
- Meal Prep Hero: I make a big batch on Sunday and it tastes even better for lunch the next day.
- Budget Stretcher: Chicken thighs and rice feed my family for pennies per serving, and nobody complains.
Step-by-Step Instructions for Chicken and Rice Cast Iron Skillet
Master the technique for achieving a golden crust while keeping the chicken juicy and the rice perfectly tender.
Step 1: Sear the Chicken Thighs to Crispy Perfection
Pat the 1.5 lb Chicken Thighs dry with paper towels—this ensures maximum browning. Season both sides evenly with 1 tsp Smoked Paprika, 1.5 tsp Kosher Salt, and 0.75 tsp Freshly Ground Black Pepper. I press the seasoning in lightly so it adheres to the skin.
Heat 2 tbsp Olive Oil in a 12-inch cast iron skillet over medium-high heat until shimmering. Add the chicken thighs skin-side down and sear undisturbed for 6-7 minutes until the skin is deep golden brown and crisp. Flip and sear for 3-4 minutes on the other side. Transfer to a plate and set aside.
Step 2: Sauté Aromatics and Toast the Rice
Reduce heat to medium and add 2 tbsp Unsalted Butter to the same skillet. Once melted, add the finely diced 1 whole Yellow Onion and cook for 3-4 minutes until translucent and soft. Stir in the minced 4 cloves Garlic Cloves, 1 tsp Dried Oregano, and the leaves from the 4 pieces Fresh Thyme Sprigs, cooking for 30 seconds until fragrant.
Add the 1.5 cups Long-Grain White Rice and cook for 2 minutes, stirring constantly, until the grains are lightly toasted and smell nutty. This step prevents gummy rice by sealing the starches.
Step 3: Deglaze and Simmer to Perfection
Pour in the 2.5 cups Chicken Stock and add the 1 whole Bay Leaf. Stir to scrape up all the browned bits from the bottom of the skillet—this adds incredible depth of flavor. Return the chicken thighs to the skillet, skin-side up, along with any accumulated juices.
Bring to a boil, then reduce heat to low. Cover and simmer for 20-25 minutes until the rice is tender and the liquid is absorbed. Avoid stirring during cooking to preserve the crust forming at the bottom.
Step 4: Rest and Garnish for Optimal Flavor
Remove from heat and let the dish rest, covered, for 10 minutes. This allows the rice to steam and absorb any remaining liquid while the chicken reabsorbs its juices. Discard the bay leaf before serving.
Garnish with the 0.25 cup Fresh Parsley and fluff the rice gently with a fork. The bottom layer should have a golden, crispy crust while the top remains light and fluffy. Serve immediately in the skillet for a rustic presentation.
Pro Tips For Making Chicken And Rice Cast Iron Skillet
- Sear Chicken First: Get your cast iron ripping hot before adding the chicken thighs—skin-side down for at least 5-6 minutes until golden and crisp. I learned this the hard way after pulling up pale, soggy skin too early.
- Toast the Rice: After removing the chicken, toss the rice in the same skillet with the onion and garlic for 2 minutes. Sounds weird, but it works: this builds a nutty base flavor that plain rice just can’t match.
- Use Room-Temp Stock: Skip the cold chicken stock straight from the fridge—it drops the skillet’s temperature and turns your rice mushy. I keep mine on the counter while prepping, or microwave it for 30 seconds.
- Cover and Forget: Once everything’s in the skillet, cover it tight and resist the urge to peek for 18-20 minutes. My grandmother swore by this, and she was right: lifting the lid releases steam and messes with the cooking time.
Make-Ahead Tips for This Dish
Prep Ahead Strategy
You can prep all ingredients 12-24 hours in advance. Dice the onion, mince garlic, and measure spices, storing each in separate containers. I keep the chicken thighs in a sealed container with the seasoning already applied to save time. 💡
Rice Prep Tip
Rinse the 1.5 cups Long-Grain White Rice and let it soak in cold water for 30 minutes before cooking. This removes excess starch for fluffier results. Drain well and pat dry before toasting in the skillet.
Skillet Ready
Have your 12-inch cast iron skillet clean and well-seasoned, ready on the stovetop. A properly seasoned skillet ensures the golden crust releases easily. I recommend Lodge for consistent heat distribution.
Morning Assembly
If cooking later, assemble everything in the skillet (except chicken) and refrigerate covered. When ready, add 5 minutes to the cooking time to account for the cold start. Bring to room temperature first for even cooking.
Partial Cook Method
For ultimate convenience, sear the chicken and toast the rice the night before. Store separately in the fridge, then combine with stock and finish cooking the next day. This cuts active prep to just 10 minutes before serving.
Reheating Prep
Portion leftovers into individual containers for easy grab-and-go meals. The flavors deepen overnight, making this dish even better the next day. Just add a splash of stock when reheating to restore moisture. ✨
Nutrition Facts
Frequently Asked Questions
Can I use chicken breasts instead of thighs?
Use boneless, skinless breasts but brine them in saltwater for 30 minutes first to prevent dryness. They cook faster, so reduce simmering time to 15 minutes. Thighs remain ideal for juiciness.
How do I prevent the rice from burning?
Keep heat at low once simmering begins. Stir only when adding liquid—never during cooking. A well-seasoned skillet and proper liquid ratio (2.5 cups) also help.
What if my crust isn’t crispy enough?
Uncover and cook for 2-3 minutes on medium-high heat after simmering. Press the rice down lightly with a spatula to encourage crust formation. Let it rest 10 minutes before serving.
Can I make this with brown rice?
Use 1.75 cups liquid per 1 cup brown rice and extend simmering to 40-45 minutes. The texture will be chewier, and the crust may be less pronounced.

- Jollof Rice Sauce Recipe: West African Tomato and Spice Infusion - September 25, 2026
- Japanese Rice Soup Recipe: Umami-Rich Comfort in a Bowl - September 25, 2026
- Homemade Cream Of Rice Recipe: Silk-Smooth Breakfast in Minutes - September 25, 2026