
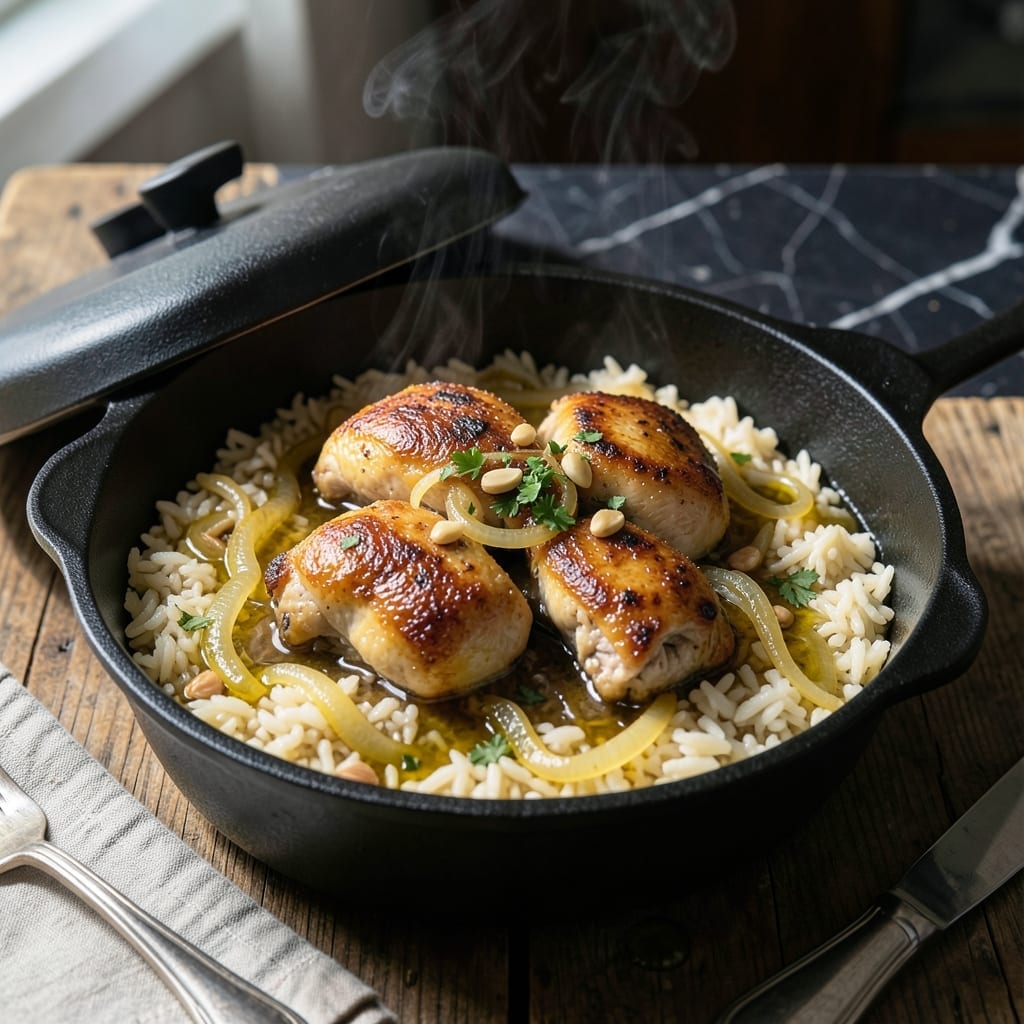
This stovetop method delivers one-pot perfection with minimal cleanup. I developed this technique during busy service nights when efficiency mattered most.
The key is browning the chicken first, then using those flavorful bits to build the rice base. Simple ingredients transform into a deeply satisfying meal with tender chicken and perfectly cooked grains.
What emerges is a dish where every bite carries layers of flavor. The chicken stays juicy, the rice absorbs all the savory notes, and the result is far greater than the sum of its parts.
Ideal for weeknight dinners when you want restaurant-quality results without the fuss. This approach never fails to deliver consistent, delicious outcomes.
Ingredients for Chicken and Rice Stovetop
Professional kitchens rely on these precise ingredients for consistent one-pot excellence every time.
| Ingredient | Amount | Notes |
|---|---|---|
| Chicken Thighs 🍗 | 1 ½ lb | Boneless, skinless, patted dry |
| Long-Grain White Rice 🍚 | 1 ½ cups | Rinsed until water runs clear |
| Chicken Broth 🥫 | 2 ½ cups | Low-sodium preferred for control |
| Yellow Onion 🧅 | 1 whole | Medium size, finely diced |
| Garlic Cloves 🧄 | 3 cloves | Minced for even distribution |
| Olive Oil 🫒 | 2 tbsp | Extra-virgin for browning |
| Unsalted Butter 🧈 | 1 tbsp | For finishing richness |
| Dried Thyme 🌿 | ½ tsp | Crushed between fingers to release oils |
| Dried Oregano 🍃 | ½ tsp | Mediterranean variety preferred |
| Bay Leaves 🌿 | 2 pieces | Removed before serving |
| Kosher Salt 🧂 | 1 ½ tsp | Diamond Crystal preferred for even seasoning |
| Freshly Ground Black Pepper 🌶️ | ½ tsp | Coarse grind for texture |
| Fresh Parsley 🌿 | ¼ cup | Chopped, for garnish |
The chicken is non-negotiable here. Boneless, skinless thighs deliver juicy results without drying out—breasts will overcook. Source from Whole Foods or Costco for quality marbling. The rice must be long-grain (jasmine or basmati work well); avoid instant or short-grain varieties as they turn mushy. Low-sodium broth allows you to control seasoning precisely, which matters for restaurant-quality outcomes.
No chicken thighs? Bone-in, skin-on thighs add more flavor but require longer cooking—adjust timing accordingly. Substitute brown rice at a 1:1 ratio, but expect a 50% longer cook time and slightly chewier texture. Fresh herbs can replace dried at triple the amount, though the flavor profile will differ. For a richer finish, heavy cream stirred in at the end adds depth without overpowering.
This dish holds well for 3-4 days refrigerated in an airtight container. Reheat gently with a splash of broth to restore moisture. For longer storage, freeze portions up to 3 months—thaw overnight before reheating to preserve texture.
Why You’ll Love This Recipe
- One-Pot Wonder: I love that everything cooks together in a single pot—no extra dishes, just tender chicken thighs and fluffy rice soaking up all that garlicky broth.
- Ridiculously Good: The onion and garlic caramelize just enough to make the rice rich and flavorful, while the chicken stays juicy from the slow simmer in the broth.
- Meal Prep Magic: This keeps beautifully for days, and honestly, it tastes even better the next day when the flavors meld.
- Budget Winner: Chicken thighs and pantry staples make this a cheap meal that still feels hearty and satisfying.
Step-by-Step Instructions for Chicken and Rice
This one-pot method ensures even cooking and maximum flavor infusion with minimal cleanup.
Step 1: Sear the Chicken Thighs
Heat the 2 tbsp olive oil in a large, heavy pot with a tight-fitting lid over medium-high heat. Pat the 1.5 lb chicken thighs dry again—this prevents splattering and ensures proper browning.
Season both sides with 1 tsp kosher salt and the 0.5 tsp freshly ground black pepper. Place the thighs in the pot in a single layer, leaving space between pieces. Sear undisturbed for 5-6 minutes per side until deep golden brown and an instant-read thermometer registers 165°F.
Remove the chicken to a plate and set aside. The fond left in the pot will deepen the flavor of the rice.
Step 2: Sauté Aromatics and Toast the Rice
Reduce heat to medium and add the 1 whole yellow onion to the same pot. Cook, stirring occasionally, for 3-4 minutes until softened and translucent. Add the 3 cloves garlic cloves and sauté for 30 seconds until fragrant but not browned.
Stir in the 1.5 cups long-grain white rice, 0.5 tsp dried thyme, 0.5 tsp dried oregano, remaining 0.5 tsp kosher salt, and 2 pieces bay leaves. Toast the rice for 2 minutes, stirring constantly, until the grains turn slightly opaque and smell nutty.
Step 3: Add Liquids and Finish Cooking
Pour in the 2.5 cups chicken broth and scrape up any browned bits from the bottom of the pot. This deglazing step incorporates all that flavor into the rice. Bring the mixture to a boil over high heat.
Once boiling, nestle the seared chicken thighs into the rice mixture, skin-side up. Reduce heat to low, cover the pot tightly, and simmer for 20-25 minutes without stirring. The rice is done when all liquid is absorbed and the grains are tender with no chalky center.
Step 4: Rest and Serve
Remove the pot from heat and let it sit, covered, for 10 minutes. This resting period allows the rice to steam and the chicken to reabsorb some of its juices. Discard the bay leaves before serving.
Stir in the 1 tbsp unsalted butter until melted, then fluff the rice gently with a fork. Garnish with the 0.25 cup fresh parsley and serve the chicken atop the rice. Each serving should have a generous portion of both, with the rice absorbing all the rich, savory flavors.
Pro Tips For Making Chicken And Rice Stovetop
- Brown the Chicken Well: Sear the chicken thighs skin-side down for 6-7 minutes on medium-high heat until deeply golden—I learned this the hard way after serving pale, soggy chicken too many times.
- Toast the Rice First: After removing the chicken, add the rice to the pot and stir for 2 minutes to lightly toast it. This keeps the grains separate and adds a nutty flavor.
- Use Warm Broth: Pour in hot chicken broth (not cold) to prevent the temperature from dropping and turning your rice mushy. I keep mine warming in a small pot while prepping.
- Skip the Stirring: Once the rice is cooking, resist the urge to stir—it releases starch and makes the dish gummy. Just cover and let it steam for 18-20 minutes.
Wine and Beer Pairings for chicken and rice stovetop
Crisp White Wines
I love a chilled Sauvignon Blanc from New Zealand with this dish—the bright acidity cuts through the richness. Kim Crawford is my go-to for $15-20. The citrus and herb notes complement the thyme and oregano beautifully. 🍷
Rich White Options
A buttery Chardonnay from California works surprisingly well, especially if you finish with extra butter. Look for Kendall-Jackson Vintner’s Reserve—its creamy texture balances the savory chicken and rice.
Light Red Wines
For red lovers, a light Pinot Noir from Oregon adds earthy complexity without overpowering. Eyrie Vineyards makes a beautiful $25-30 bottle that pairs perfectly with the dish’s depth. 🍇
Craft Beer Choices
A crisp pilsner like SweetWater 420 from Atlanta cleanses your palate between bites. The slight bitterness contrasts nicely with the savory chicken and aromatic rice.
Wheat Beer Pairing
Try a Belgian witbier such as Hoegaarden—its citrus and coriander notes echo the herbs in your meal. The effervescence refreshes your palate for the next bite.
Avoid These
Skip heavy reds like Cabernet or bold IPAs—they’ll clash with the dish’s delicate balance. The tannins in big reds can make the chicken taste metallic, and hoppy beers overwhelm the subtle spices. 💡
Nutrition Facts
Frequently Asked Questions
Can I use chicken breasts instead of thighs?
You can, but thighs stay juicier. Breasts dry out faster and may turn tough during the 20-25 minutes simmering. If using breasts, reduce cooking time to 15-18 minutes to prevent overcooking.
Why toast the rice before adding liquid?
Toasting deepens the nutty flavor and prevents mushiness. Those 2 minutes of stirring in the pot develop aromatic compounds that make the dish taste richer. Skip this step and you’ll miss out on layers of flavor.
What if my rice is still crunchy?
Add 1/4 cup more broth, cover, and cook for another 5 minutes on low. If the chicken is done, remove it first to avoid overcooking. The rice needs time to absorb all the liquid properly.
Can I make this ahead?
It holds well for 3-4 days refrigerated. Reheat gently with a splash of broth to restore moisture. The flavors actually meld and improve overnight, making it perfect for meal prep.

- Jollof Rice Sauce Recipe: West African Tomato and Spice Infusion - September 25, 2026
- Japanese Rice Soup Recipe: Umami-Rich Comfort in a Bowl - September 25, 2026
- Homemade Cream Of Rice Recipe: Silk-Smooth Breakfast in Minutes - September 25, 2026