
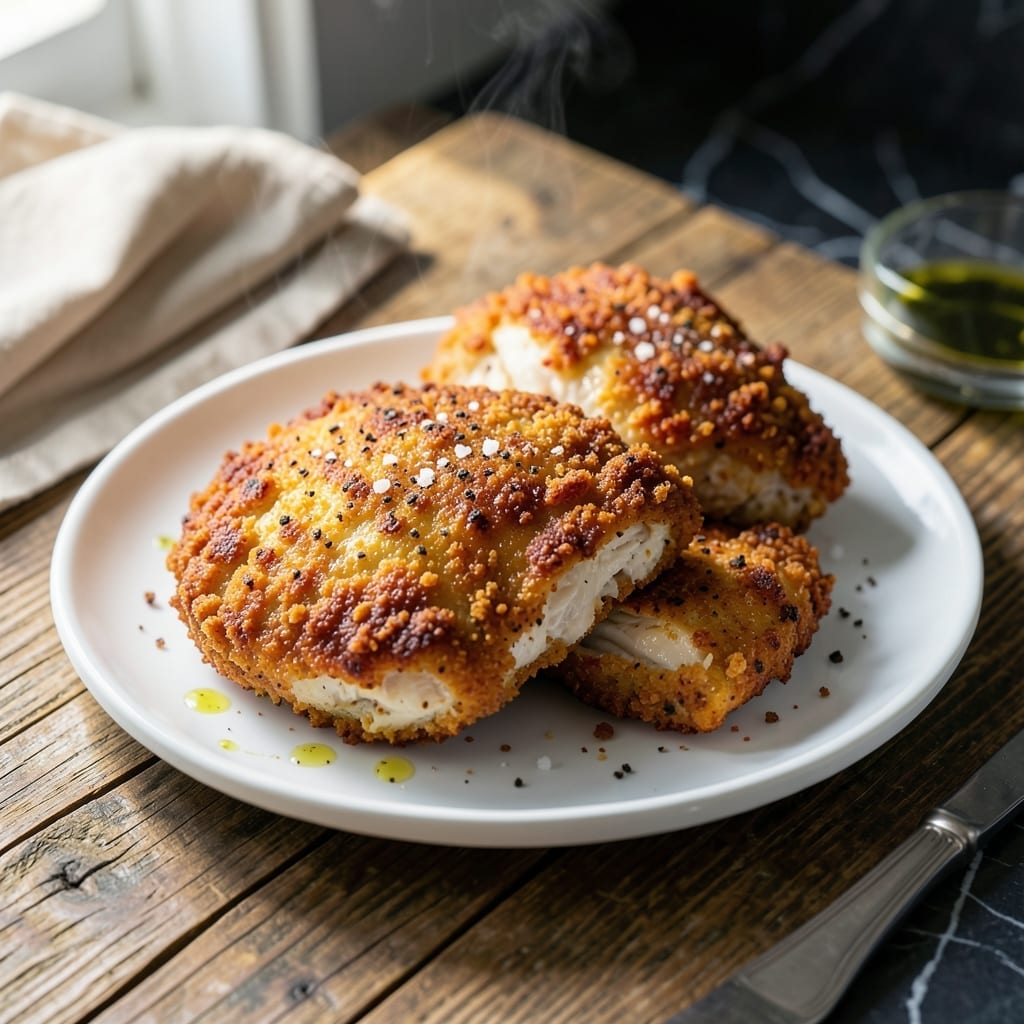
Achieving perfectly crispy chicken at home comes down to one thing: the breading. This method delivers a golden, shatteringly crispy coating that stays put through frying or baking without falling apart.
The secret is a three-step process—flour, egg wash, and crumbs—that creates layers of texture. Each step locks in moisture while building that signature crunch. I’ve tested countless ratios to find the ideal balance.
What you get is chicken with a coating so crispy it crackles at the first bite, yet tender inside. The breading adheres perfectly, whether you pan-fry, deep-fry, or bake it to golden perfection.
Use this for cutlets, tenders, or whole pieces. The results will change how you bread chicken forever.
Ingredients for Chicken Breader
Twelve ingredients for that shatteringly crispy, golden coating everyone craves.
| Ingredient | Amount | Notes |
|---|---|---|
| Chicken Breast 🍗 | 1 ½ lb | Boneless, skinless, pounded to 1/2-inch thickness |
| All-Purpose Flour 🌾 | 1 ½ cups | Divided for dredging and thickening |
| Kosher Salt 🧂 | 2 tsp | Diamond Crystal preferred for even distribution |
| Freshly Ground Black Pepper 🌶️ | 1 tsp | Coarse grind for texture |
| Paprika 🌶️ | 1 tsp | Sweet or smoked variety |
| Garlic Powder 🧄 | 1 tsp | Not garlic salt |
| Large Eggs 🥚 | 2 whole | Beaten for egg wash |
| Whole Milk 🥛 | ¼ cup | Added to egg wash for richness |
| Panko Breadcrumbs 🍞 | 2 cups | For ultra crispy texture |
| Grated Parmesan Cheese 🧀 | ½ cup | Freshly grated from block |
| Dried Oregano 🍃 | 1 tsp | Mediterranean variety preferred |
| Dried Thyme 🌿 | 1 tsp | Rubbed between fingers to release flavor |
| Neutral Oil 🫒 | 1 cup | For frying, like vegetable or canola |
The chicken is key here—boneless, skinless breasts pounded to even thickness ensure even cooking and maximum crunch. I grab mine from Whole Foods or Costco (their organic options are solid). For the flour, King Arthur all-purpose is my go-to. The panko matters too: Kikkoman or Progresso have the coarsest grind for that signature crisp. Don’t skip pounding the chicken—it’s non-negotiable for tenderness.
No panko? Crush cornflakes or Ritz crackers in a food processor—they’ll give you great crunch. Out of Parmesan? Pecorino Romano works (it’s saltier, so ease up). Fresh herbs can sub for dried at three times the amount, but dried are actually better here for even distribution. The milk in the egg wash? Buttermilk or water in a pinch, but you’ll miss some richness.
The breading holds best if you use it within 2 hours—after that, the chicken can start to weep moisture. Leftovers? Reheat in a 400°F oven for 10-12 minutes to revive the crisp. Prepped chicken can chill in the fridge for 1 day before cooking, but don’t let it sit in the egg wash too long or the coating will slide off.
Why You’ll Love This Recipe
- One Pan Meal: I toss everything together on a single sheet—flour, paprika, salt, pepper—and the chicken bakes while I set the table.
- Crispy & Spiced: That paprika in the breading gives it a subtle warmth, and the crust stays crunchy even if I make extra for leftovers.
- Weeknight Hero: Honestly, it’s my Tuesday standby—fast enough for school nights, but fancy enough for weekend lunches with friends.
- Feeds Four Cheap: A pound of chicken breasts and pantry staples stretch to feed my family for less than a takeout run.
Step-by-Step Instructions for Ultra Crispy Chicken Coating
Here’s the method I use to get that perfect golden crunch every single time.
Step 1: Season and Dredge the Chicken in Flour
Pat the 1.5 lb Chicken Breast dry with paper towels—this ensures the coating adheres properly. Season both sides with the 2 tsp Kosher Salt, 1 tsp Freshly Ground Black Pepper, 1 tsp Paprika, and 1 tsp Garlic Powder. Rub the spices in gently so they stick to the meat.
Place 1.5 cups All-Purpose Flour in a shallow dish. Dredge each piece of chicken in the flour, pressing lightly to create an even, thin layer. Shake off any excess—you want a light dusting, not a thick paste. This first layer acts as a base for the egg wash to cling to.
Step 2: Create the Egg Wash for Maximum Adhesion
In a separate shallow dish, whisk together the 2 whole Large Eggs and 0.25 cup Whole Milk until fully combined and slightly frothy. The milk adds richness and helps thin the egg mixture, allowing it to coat the chicken evenly without being too thick.
Dip each floured chicken piece into the egg wash, turning to coat completely. Let any excess drip off for a moment—this prevents the breadcrumb mixture from becoming soggy or clumping. The egg wash is the glue that binds everything together, so don’t rush this step.
Step 3: Coat with Seasoned Panko for Ultra Crispy Texture
In a third shallow dish, combine the 2 cups Panko Breadcrumbs, 0.5 cup Grated Parmesan Cheese, 1 tsp Dried Oregano, and 1 tsp Dried Thyme. I like to rub the dried herbs between my fingers as I mix them in to release their full flavor.
Press each egg-washed chicken piece into the panko mixture, turning to coat all sides thoroughly. Apply firm pressure to ensure the crumbs adhere well—this is the secret to that ultra crispy finish. For extra crunch, I double-dip: after the first coating, I repeat the egg wash and panko steps once more.
Step 4: Fry to Golden Perfection
Heat 1 cup Neutral Oil in a large, deep skillet over medium-high heat until it reaches 350°F. To test the temperature, drop a pinch of panko into the oil—if it sizzles immediately, it’s ready. Carefully place the breaded chicken in the hot oil, working in batches if needed to avoid crowding the pan.
Fry for 4-5 minutes per side until the coating is deep golden brown and crispy. Avoid moving the chicken too much during frying—this helps the crust set properly. Use a slotted spatula to transfer the chicken to a paper towel-lined plate to drain excess oil. Serve immediately while hot and crispy.
Pro Tips For Making Chicken Breader
- Pound the Chicken: Use a meat mallet to pound the chicken breasts to an even ½-inch thickness—I learned this the hard way after too many dry, overcooked edges.
- Season the Flour: Mix the kosher salt, black pepper, and paprika directly into the flour before dredging; it sticks better and seasons every bite.
- Skip the Overcrowding: Fry in batches with space between pieces, or the breading steams instead of crisps—yes, even if you’re impatient like me.
- Rest Before Serving: Give it a solid 5 minutes on a wire rack after frying to keep the crust crisp while the juices settle.
Serving Suggestions for This Recipe
Plating Like a Pro
Serve your crispy chicken on a wire rack set over a baking sheet to maintain that perfect crunch. I arrange pieces in a single layer to prevent steam from softening the coating. Garnish with lemon wedges and fresh parsley for a pop of color that complements the golden breading. 🌟
Dipping Sauces
Offer a trio of sauces for variety: honey mustard (mix ¼ cup mayo, 2 tbsp Dijon, and 2 tbsp honey), classic ranch, and spicy sriracha mayo. The sweetness of honey mustard pairs beautifully with the savory crunch.
Side Dish Pairings
A crisp green salad with tangy vinaigrette cuts through the richness. For heartier meals, serve with roasted potatoes or steamed asparagus. I love adding a side of coleslaw—the cool crunch contrasts perfectly with the hot, crispy chicken.
Family-Style Serving
For gatherings, keep pieces warm in a 200°F oven on a wire rack while finishing batches. Present on a large platter with sauce bowls and sides arranged around. This lets guests build their own plates and keeps the chicken crispy until served.
Garnish Ideas
Sprinkle with flaky sea salt right before serving to enhance flavor. A dusting of smoked paprika adds color and a subtle smoky note. Fresh herbs like thyme or rosemary add an aromatic touch that elevates the presentation.
Kid-Friendly Touches
Cut into tender strips for easy handling and serve with fun dipping sauces in small cups. Arrange on a colorful platter with veggie sticks for a balanced meal. I’ve found kids love helping with the breading process too. 💛
Nutrition Facts
Frequently Asked Questions
Can I use regular breadcrumbs instead of panko?
You can, but panko creates a much crispier coating. Regular breadcrumbs will work in a pinch, but expect a softer texture. For best results, pulse regular crumbs in a processor to make them coarser.
Why does my breading fall off during cooking?
The most common cause is not letting the egg wash drip off before coating. Also, ensure the oil is hot enough (350°F) before adding chicken. Press firmly when applying panko to help it stick.
Can I bake instead of frying?
Yes! Bake at 400°F for 20-25 minutes, flipping halfway. For extra crispiness, spray with oil before baking and use a wire rack on the baking sheet.
How do I keep the chicken crispy for leftovers?
Reheat in a 400°F oven for 10-12 minutes on a wire rack. Microwaving will make it soggy. Store leftovers in a single layer to prevent steam buildup.

- Jollof Rice Sauce Recipe: West African Tomato and Spice Infusion - September 25, 2026
- Japanese Rice Soup Recipe: Umami-Rich Comfort in a Bowl - September 25, 2026
- Homemade Cream Of Rice Recipe: Silk-Smooth Breakfast in Minutes - September 25, 2026