
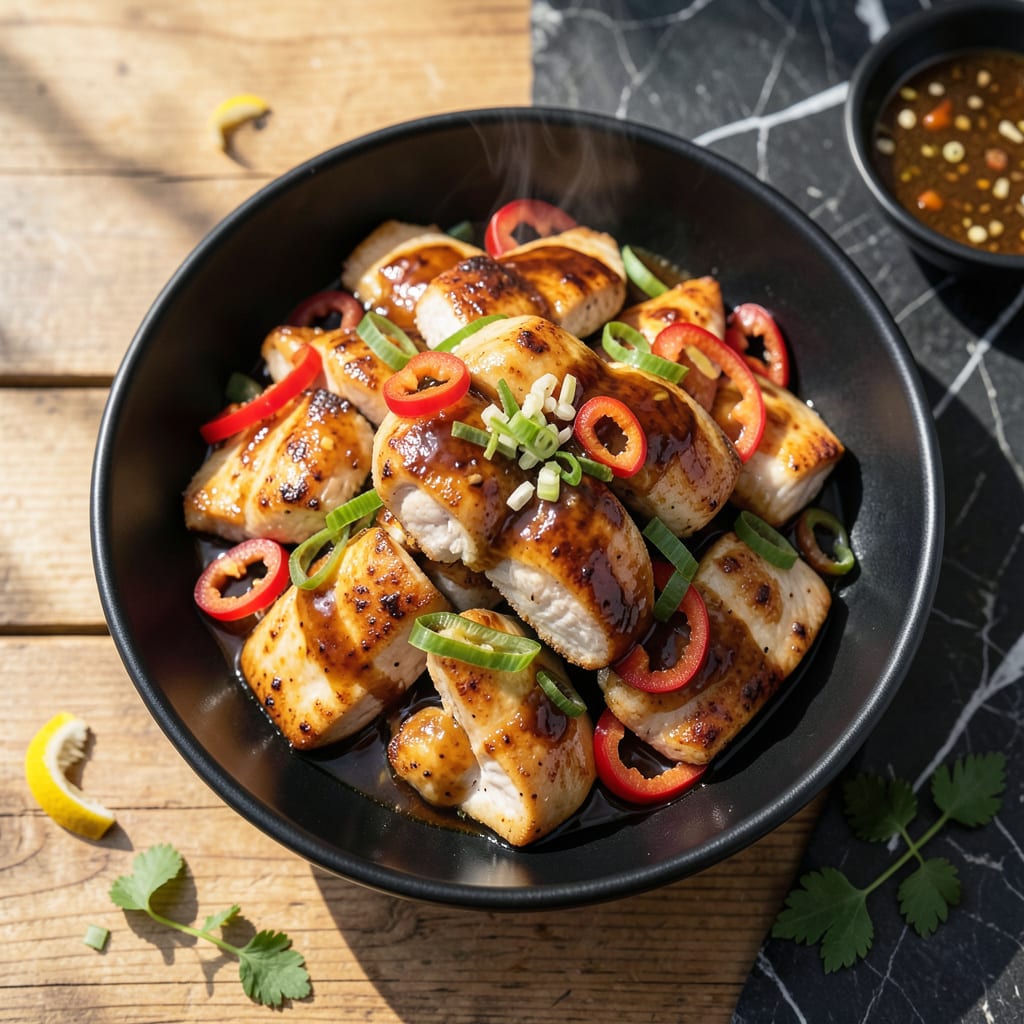
This chicken breast recipe delivers a restaurant-quality dish with minimal effort and maximum flavor. The oyster sauce creates a rich, savory glaze that perfectly complements the tender chicken.
With just a few simple ingredients and 15 minutes of active cooking, you’ll have a meal that tastes like it came from a professional kitchen. The wok-tossed method ensures every bite is coated in that delicious umami sauce.
Ingredients for Chicken Breast Recipe with Oyster Sauce
Restaurant-quality ingredients create these umami-rich wok-tossed chicken bites with minimal effort.
| Ingredient | Amount | Notes |
|---|---|---|
| Boneless, Skinless Chicken Breast 🍗 | 1 ½ lb | Cut into bite-sized pieces |
| Oyster Sauce 🫒 | ½ cup | High-quality brand preferred |
| Soy Sauce 🫒 | 3 tbsp | Low-sodium for balance |
| Rice Wine 🍶 | 2 tbsp | Dry sherry works too |
| Minced Garlic 🧄 | 4 cloves | Freshly minced for best flavor |
| Fresh Ginger 🌿 | 1 tbsp | Peeled and finely grated |
| Cornstarch 🌾 | 2 tbsp | For velveting chicken |
| Vegetable Oil 🫒 | 3 tbsp | High smoke point for wok frying |
| Brown Sugar 🍚 | 1 tbsp | Dark or light variety |
| Sesame Oil 🫒 | 1 tsp | Toasted for aroma |
| Green Onions 🧅 | 4 whole | Thinly sliced, for garnish |
| Red Bell Pepper 🌶️ | 1 whole | Thinly sliced for color |
| Sesame Seeds 🌾 | 1 tsp | Toasted for garnish |
[recipeingredientscaler]
The oyster sauce is non-negotiable here—Lee Kum Kee or Maekrua are the gold standard. Most Asian markets carry multiple brands, but avoid anything with added preservatives. The chicken should be uniform in size so it cooks evenly. For the rice wine, Shaoxing wine is ideal, but dry sherry from the regular grocery store works in a pinch.
No oyster sauce? Hoisin sauce plus a dash of fish sauce gets you 80% there (skip if vegetarian). Low-sodium soy sauce prevents the dish from becoming too salty—Kikkoman or Pearl River Bridge are reliable. The cornstarch creates that signature velvet texture; arrowroot powder works as a 1:1 substitute. Sesame oil can be omitted if you dislike the flavor, but it adds a nutty finish.
The cooked dish keeps 3-4 days in the fridge, though the chicken is best fresh. Freeze the sauce separately for up to 3 months. Reheat gently to avoid drying out the meat—microwave at 50% power with a damp paper towel cover.
Why You’ll Love This Recipe
- One Pan Magic: I toss everything in a skillet and let the oyster sauce and garlic do the work. Honestly, cleanup is just one pan and a spatula.
- Umami Bomb: The oyster sauce and soy sauce blend creates this deep, savory flavor that coats every bite of chicken. I’ll be real: I’ve caught myself licking the plate.
- Meal Prep Hero: This reheats beautifully for lunches, and the flavors actually get richer the next day. Between us, it’s my secret to not hating packed lunches.
- Budget Friendly: Chicken breast and a few pantry staples stretch into multiple meals. Took me three tries to get the ratio right, but now it’s foolproof and cheap.
Step-by-Step Instructions for Chicken Breast With Oyster Sauce
This method ensures tender chicken with a glossy, umami-packed sauce every time.
Step 1: Velvet the Chicken
Cut the 1.5 lb boneless, skinless chicken breast into bite-sized pieces. In a bowl, toss the chicken with 2 tbsp cornstarch until evenly coated. This velveting technique guarantees extra tenderness during cooking.
I always let the coated chicken rest for 10 minutes while I prep the remaining ingredients. This brief pause allows the cornstarch to absorb moisture from the chicken’s surface, creating that signature velvety texture.
Step 2: Prepare the Aromatics and Vegetables
Thinly slice the 4 whole green onions and 1 whole red bell pepper. Finely mince the 4 cloves minced garlic and grate the 1 tbsp fresh ginger. Keep these separate from each other as they cook at different rates.
In a small bowl, combine the 0.5 cup oyster sauce, 3 tbsp soy sauce, 2 tbsp rice wine, 1 tbsp brown sugar, and 1 tsp sesame oil. Stir until the brown sugar dissolves completely. This sauce base develops complex layers of flavor as it reduces.
Step 3: Stir-Fry the Chicken
Heat 2 tbsp vegetable oil in a wok or large skillet over high heat until shimmering. Add the chicken in a single layer—work in batches if needed to avoid crowding. Cook for 3-4 minutes until the pieces turn opaque and develop light golden edges.
Transfer the chicken to a clean plate, leaving any browned bits in the pan. These fond will dissolve into your sauce, adding depth. I never skip this step; it’s where the magic happens.
Step 4: Build the Sauce and Finish
Add the remaining 1 tbsp vegetable oil to the wok. Stir-fry the minced garlic and fresh ginger for 30 seconds until fragrant but not browned. Immediately add the sliced red bell pepper and cook for 2 minutes until slightly softened but still crisp.
Return the chicken to the wok and pour in the prepared sauce. Stir everything together and cook for 2-3 minutes until the sauce thickens and coats the chicken in a glossy sheen. The sauce should bubble gently and cling to the pieces when tossed.
Step 5: Garnish and Serve
Remove from heat and stir in half of the sliced green onions. Transfer to a serving dish and garnish with the remaining green onions and 1 tsp sesame seeds. The green onions add a fresh contrast to the rich sauce.
Serve immediately over steamed rice. The chicken should be tender with a silky texture, and the sauce should pool slightly on the plate. Each bite delivers a perfect balance of savory, sweet, and umami flavors.
Pro Tips For Making Chicken Breast Recipe With Oyster Sauce
- Pound the Chicken: Slice the breast horizontally then pound to an even ½-inch thickness—this guarantees quick, even cooking and prevents dry, chewy edges.
- Velvet the Meat: Toss the chicken with 1 teaspoon cornstarch and 1 tablespoon rice wine before cooking; it keeps the meat tender and helps the oyster sauce cling better.
- Skip the Overcrowding: Cook the chicken in a single layer with space between pieces, or it’ll steam instead of sear and the sauce will turn watery.
- Bloom the Garlic: Sauté the minced garlic in hot oil for just 20–30 seconds until fragrant but not browned—burnt garlic will make the whole dish bitter.
Wine and Beer Pairings for This Recipe
White Wine Pairs
Off-dry German Riesling is my top pick—the slight sweetness balances the salty oyster sauce beautifully. Look for Dr. Loosen Blue Slate or Clean Slate at $12-$18. Serve chilled at 45-50°F for optimal crispness. 🍷
Rich White Options
Viognier offers stone fruit notes that complement the dish’s umami depth. Try Yalumba Y Series from Australia for $15. The wine’s natural oiliness matches the sauce’s texture perfectly.
Light Red Choices
For red lovers, Pinot Noir with bright acidity works well. I recommend Meiomi or La Crema at $20-$25. Serve slightly chilled at 55°F to enhance its fruit-forward profile.
Beer Pairings
A crisp Asian lager like Sapporo or Asahi cuts through the richness with its clean finish. The subtle sweetness in these beers enhances the oyster sauce’s depth. Serve at 40-45°F in a frosted glass. 🍺
Craft Beer Alternatives
For craft options, a Belgian witbier with citrus notes works wonderfully. Hoegaarden or Blue Moon at $10-$12 offers orange peel and coriander that lift the dish’s flavors.
Non-Alcoholic Pairing
Jasmine tea with its floral aroma complements the umami beautifully. Brew 1 tbsp loose leaves in 1 cup hot water for 3-4 minutes. The slight bitterness cleanses your palate between bites.
Nutrition Facts
Frequently Asked Questions
Can I substitute chicken thighs instead?
Thighs stay juicier during cooking and handle the bold sauce well. Reduce cooking time by 1-2 minutes since dark meat cooks faster.
Why velvet the chicken with cornstarch?
This technique locks in moisture for tender, silky pieces. The cornstarch creates a protective layer that prevents the meat from drying out during high-heat stir-frying.
How do I prevent the sauce from being too salty?
Use low-sodium soy sauce and taste before adding extra salt. The oyster sauce already contributes significant sodium. Balance with a pinch of sugar if needed.
Can I make this ahead of time?
Cook the chicken fully, then store sauce separately in the fridge for up to 3 days. Reheat gently in a pan with a splash of water to prevent drying.

- Jollof Rice Sauce Recipe: West African Tomato and Spice Infusion - September 25, 2026
- Japanese Rice Soup Recipe: Umami-Rich Comfort in a Bowl - September 25, 2026
- Homemade Cream Of Rice Recipe: Silk-Smooth Breakfast in Minutes - September 25, 2026