
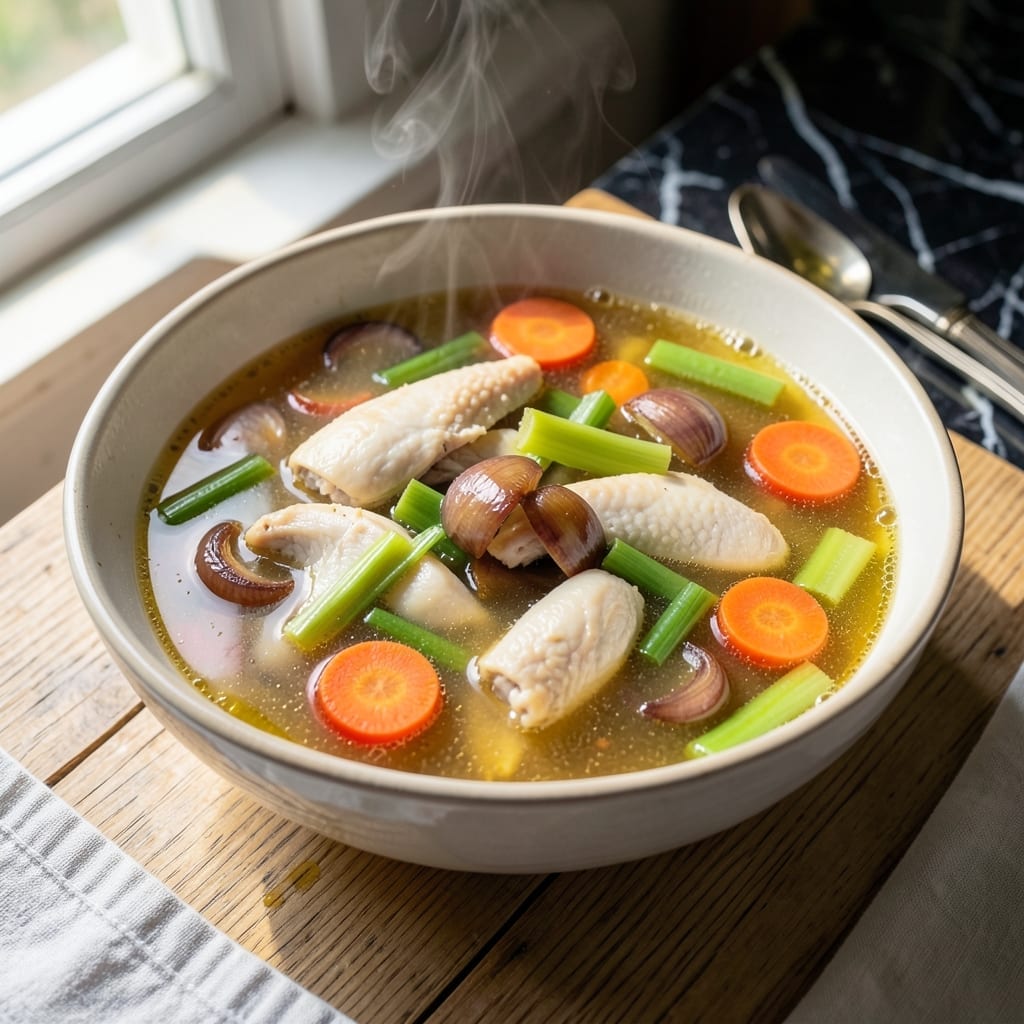
There’s a reason professional kitchens always have chicken broth on hand—it forms the flavor foundation for countless dishes. This recipe delivers a rich, deeply aromatic liquid that elevates soups, stews, and sauces to restaurant quality.
The secret lies in the simmering process, where chicken bones, vegetables, and herbs release their essence slowly. I use a combination of chicken backs, necks, and wings for maximum gelatin, which gives the broth its signature body and mouthfeel.
By the time it’s done, you’ll have a golden, fragrant broth that’s packed with savory depth. Strain and cool it properly, and you’ll have a versatile base that freezes beautifully for months of culinary use.
Perfect for risottos, braises, or simply sipping when you need a comforting pick-me-up.
Ingredients for Chicken Broth
A few bones, some veggies, and herbs build a rich, aromatic foundation for everything else.
| Ingredient | Amount | Notes |
|---|---|---|
| Chicken Backs 🍗 | 2 lb | With skin and bones on |
| Chicken Necks 🍗 | 1 lb | Rinsed and patted dry |
| Chicken Wings 🍗 | 1 lb | Tips removed if desired |
| Yellow Onions 🧅 | 2 whole | Quartered, skin on |
| Carrots 🥕 | 3 whole | Cut into large chunks |
| Celery Stalks 🥬 | 3 whole | Including leafy tops |
| Garlic Cloves 🧄 | 6 cloves | Unpeeled, smashed |
| Fresh Parsley Stems 🌿 | 1 bunch | Leaves reserved for garnish |
| Fresh Thyme Sprigs 🌿 | 4 sprigs | Whole, unchopped |
| Bay Leaves 🍃 | 2 pieces | Dried or fresh |
| Black Peppercorns 🌶️ | 1 tbsp | Whole, not ground |
| Cold Water 💧 | 4 cups | Or enough to cover all ingredients |
The bones are everything here. Chicken backs and necks give the most gelatin for that silky mouthfeel, while wings add extra richness. I get mine from Whole Foods or Costco—they usually sell them cheap since most people don’t want them. Look for parts with lots of connective tissue (that’s the gelatin goldmine). Don’t skip rinsing them first, or your broth might get cloudy.
No chicken parts? Turkey bones work just as well. Short on time? Rotisserie chicken carcass (pick off the meat first) makes a quick but still flavorful version. The veggies can be swapped—leeks instead of onions, parsnips instead of carrots. The herbs are flexible too: fresh rosemary or sage would be great. Just avoid potatoes—they make broth starchy and weird.
Strain and cool it fast—2 hours at room temp max—then fridge it. The fat will solidify on top so you can skim it off. Broth keeps 4-5 days refrigerated or 6 months frozen. I freeze mine in ice cube trays, then transfer to bags for easy portions.
Why You’ll Love This Recipe
- Set It & Forget: I toss the chicken backs, necks, and wings in the pot with onions and carrots, then let the slow cooker do the work.
- Rich & Deep: The collagen from the bones and wings creates a velvety, full-bodied broth that beats any store-bought version.
- Meal Prep Magic: I make a big batch on Sunday and use it all week—soups, risottos, even cooking grains taste better with it.
- Pennywise Comfort: Honestly, using scraps like backs and necks saves me a ton compared to buying pre-made, and it’s way more flavorful.
Step-by-Step Instructions for Chicken Broth
Here is my method for creating a rich, aromatic broth with deep, layered flavor.
Step 1: Prepare and Rinse the Chicken Bones
Begin by rinsing the 2 lb Chicken Backs, 1 lb Chicken Necks, and 1 lb Chicken Wings under cold water to remove any bone fragments or impurities. Pat them dry with paper towels—this prevents excess fat from clouding your broth later.
If the chicken wings still have tips attached, remove them now. I prefer to leave the skin on for added gelatin and body in the final broth. This step ensures clean, clear stock with maximum flavor extraction from the bones.
Step 2: Combine Aromatics and Spices
In a large stockpot, combine the rinsed chicken pieces with the 2 whole Yellow Onions (quarter them with the skin on for color), 3 whole Carrots (cut into large chunks), and 3 whole Celery Stalks (including the leafy tops for extra flavor).
Add the 6 cloves Garlic Cloves (unpeeled and smashed), 1 bunch Fresh Parsley Stems, 4 sprigs Fresh Thyme Sprigs, 2 pieces Bay Leaves, and 1 tbsp Black Peppercorns. The skin on the onions and garlic adds depth, while the whole spices prevent bitterness.
Step 3: Add Water and Begin the Simmer
Pour in the 4 cups Cold Water (or enough to cover all ingredients by about 1 inch). I always use cold water to start—this helps extract impurities gradually for a cleaner broth. Bring the mixture to a boil over medium-high heat, then immediately reduce to a gentle simmer.
A proper simmer should produce small, lazy bubbles that occasionally break the surface. Vigorous boiling will emulsify fat into the broth, making it cloudy. Skim off any foam or scum that rises to the top during the first 30 minutes of simmering.
Step 4: Simmer for Maximum Flavor Extraction
Partially cover the pot and maintain a gentle simmer for 4-6 hours. The longer simmer time extracts gelatin from the bones, giving your broth body and a luxurious mouthfeel. You’ll notice the liquid turn a rich golden color as the collagen breaks down.
Occasionally skim the surface to remove any fat or impurities. Don’t stir the broth—this can break up the vegetables and cloud the stock. The chicken pieces should fall apart easily when pressed with a spoon, indicating all flavor has been extracted.
Step 5: Strain and Cool the Broth
After simmering, carefully strain the broth through a fine-mesh sieve into a clean pot or large bowl. Discard all solids—they’ve given up all their goodness. Let the broth cool to room temperature, then refrigerate until the fat solidifies on top.
Once chilled, lift off the solidified fat with a spoon for a cleaner broth. Your stock should be rich, aromatic, and slightly gelatinous when cold. Store in airtight containers in the refrigerator for up to 5 days or freeze for longer storage.
Pro Tips For Making Chicken Broth
- Skimm the Fat: After simmering, chill the broth for 30 minutes and skim off the solidified fat with a spoon—I learned this the hard way when my first batches were greasier than I wanted.
- Roast the Bones: Toss the chicken backs, necks, and wings in a 400°F oven for 20 minutes until golden before simmering; it adds a depth of flavor that raw bones just can’t.
- Skip the Boil: Keep the broth at a gentle simmer, never a rolling boil, or it’ll turn cloudy and bitter—my grandmother swore by this, and she was right.
- Add Cold Water: Start with cold water covering the bones by 2 inches; it draws out impurities slowly for a cleaner broth, and yes, it actually changes the outcome.
Perfect Pairings for This Recipe
Soup Pairings
This broth shines in classic chicken noodle soup—just add 2 cups cooked egg noodles and shredded chicken. For a heartier version, I love making Italian stracciatella by beating 2 eggs with ¼ cup Parmesan and drizzling into simmering broth. 🍜
Grain Dishes
Use it as the cooking liquid for risotto instead of plain water—the depth of flavor is incredible. I also make quinoa or farro in broth for side dishes that taste anything but boring. A 1:1 ratio of broth to grain works perfectly.
Sauce Foundation
Reduce 2 cups broth by half to create an intense base for pan sauces. I deglaze my skillet with it after roasting chicken, then mount with butter for a restaurant-worthy finish. Works beautifully with mushroom sauces too.
Braising Liquid
For fall-apart braised chicken thighs, cover them halfway with broth, add 1 cup white wine, and simmer until tender. The gelatin in this stock helps create a luxurious, velvety sauce. I always add fresh thyme for extra aroma.
Comforting Sips
On chilly days, I heat 1 cup broth with a splash of lemon juice and a pinch of red pepper flakes for a soothing drink. Add cooked rice and a soft-boiled egg for a simple, nourishing meal. It’s my go-to when I need comfort fast. 💛
Nutrition Facts
Frequently Asked Questions
Can I use a slow cooker instead of a pot?
Yes! Combine all ingredients in your slow cooker and cook on low for 8-10 hours or high for 4-6 hours. This hands-off method works perfectly and often extracts even more gelatin from the bones.
Why does my broth turn out cloudy?
Cloudiness usually comes from boiling too vigorously or not skimming the foam. Always maintain a gentle simmer and remove impurities during the first 30 minutes. Using cold water to start also helps prevent this issue.
How do I store broth long-term?
Pour cooled broth into airtight containers and freeze for up to 6 months. For easy portions, use ice cube trays first, then transfer frozen cubes to a freezer bag.

- Jollof Rice Sauce Recipe: West African Tomato and Spice Infusion - September 25, 2026
- Japanese Rice Soup Recipe: Umami-Rich Comfort in a Bowl - September 25, 2026
- Homemade Cream Of Rice Recipe: Silk-Smooth Breakfast in Minutes - September 25, 2026