
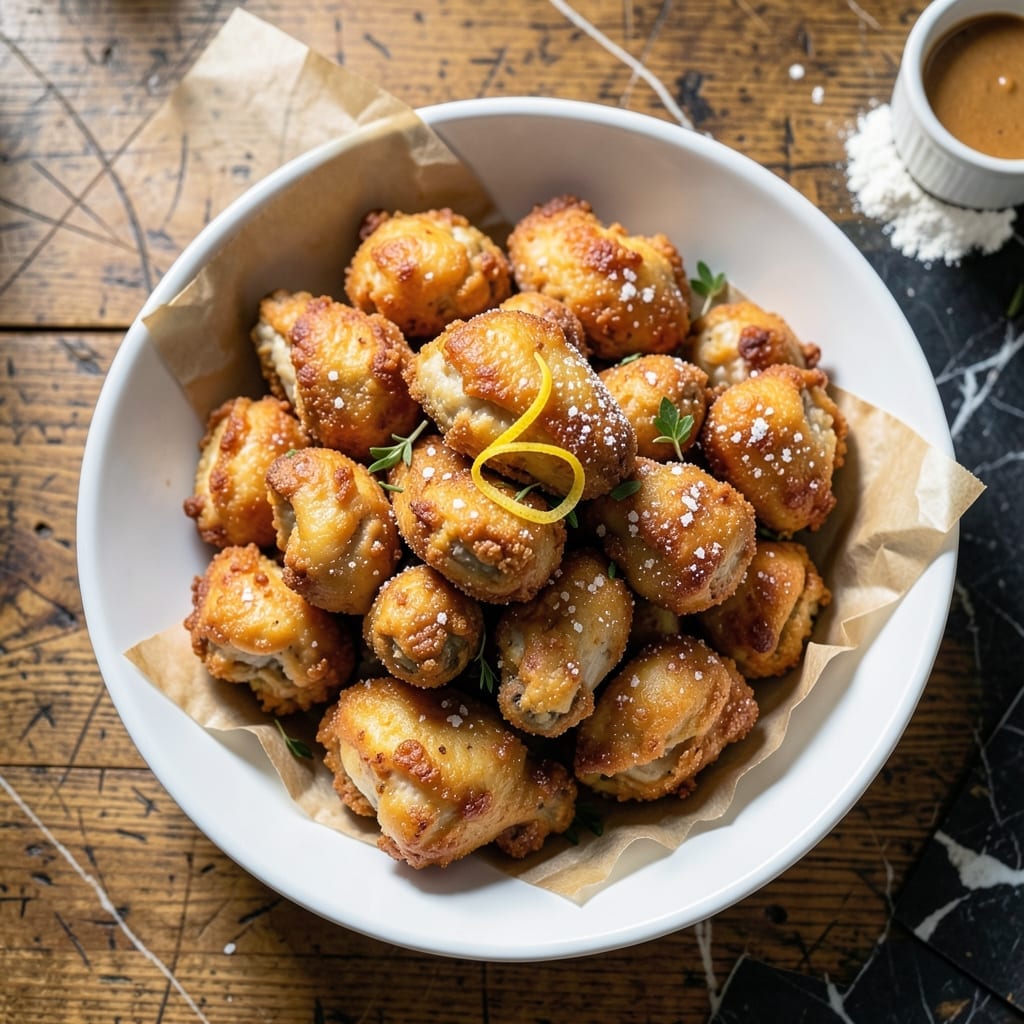
This recipe delivers on a promise many fail to keep: crispy exteriors with perfectly juicy centers every time.
I developed this method after countless attempts at fried chicken that came out dry or greasy. The secret lies in a double-coating technique and precise oil temperature control.
You’ll achieve golden, shatteringly crispy chunks with tender, moist meat inside. The coating stays put through cooking and serving, with no soggy spots in sight.
Serve hot with your favorite dipping sauce. The contrast between the crunchy outside and juicy interior makes these irresistible.
Ingredients for Chicken Chunks
Pantry staples and a few fresh items. That’s all you need for these irresistible bites.
| Ingredient | Amount | Notes |
|---|---|---|
| Boneless, Skinless Chicken Thighs 🍗 | 1 ½ lb | Cut into 1-inch chunks |
| Buttermilk 🥛 | 1 cup | Full-fat for best texture |
| All-Purpose Flour 🌾 | 1 ½ cups | Divided for coating layers |
| Cornstarch 🌽 | ½ cup | For extra crispiness |
| Baking Powder 🧂 | 1 tsp | Aluminum-free preferred |
| Salt 🧂 | 1 ½ tsp | Diamond Crystal kosher |
| Black Pepper 🌶️ | 1 tsp | Freshly ground for best flavor |
| Garlic Powder 🧄 | 1 tsp | Not garlic salt |
| Onion Powder 🧅 | 1 tsp | Adds depth to coating |
| Paprika 🌶️ | 1 tsp | Sweet or smoked variety |
| Cayenne Pepper 🔥 | ¼ tsp | Optional for heat |
| Vegetable Oil 🫒 | 4 cups | For deep frying, high smoke point |
| Large Egg 🥚 | 1 whole | For binding coating |
The chicken makes it. Thighs stay juicier than breasts—look for skinless, boneless at Whole Foods or your regular grocery store. Buttermilk is non-negotiable for that tender bite (the full-fat kind, not the low-fat stuff). The flour? King Arthur if you’re being fancy, but store brand works fine. Just make sure it’s fresh—old flour gives a stale taste.
No buttermilk? Whole milk plus a tablespoon of lemon juice gets you close. Out of cornstarch? Double the flour for the coating, though you’ll lose some crunch. Want more spice? Increase cayenne to ½ tsp. The paprika is flexible—smoked adds a nice depth, but sweet keeps it classic. Vegetable oil is ideal, but peanut oil works too if that’s what you’ve got.
Cook these right before serving—they lose crispiness fast. Leftovers? Reheat in a 400°F oven for 10 minutes to revive the crunch. The coating mix keeps in a jar for 2 weeks if you want to prep ahead.
Why You’ll Love This Recipe
- One Bowl Mix: I just toss everything straight into a bowl—no fancy prep, no extra dishes.
- Crispy Outside, Juicy Inside: The buttermilk and cornstarch combo gives that golden crunch with tender chicken every time.
- Freezer Friendly: I double the batch and freeze half for those nights I need dinner in a flash.
- Budget Stretcher: Boneless thighs are cheaper than breasts, and this recipe makes them taste like a million bucks.
Step-by-Step Instructions for Chicken Chunks
Here’s the method to achieve that perfect crunch with tender meat inside.
Step 1: Marinate the Chicken in Buttermilk
Cut the 1.5 lb Boneless, Skinless Chicken Thighs into 1-inch chunks and place them in a bowl. Pour in the 1 cup Buttermilk and toss to coat completely. The buttermilk not only tenderizes the meat but also helps the coating cling better.
Cover and refrigerate for at least 30 minutes, though I prefer 1 hour for maximum tenderness. The chicken should look pale and slightly swollen when it’s ready. Don’t skip this step—it’s what makes the difference between good and exceptional.
Step 2: Prepare the Dry Coating Mixture
In a large bowl, whisk together the 1.5 cups All-Purpose Flour, 0.5 cup Cornstarch, 1 tsp Baking Powder, 1.5 tsp Salt, 1 tsp Black Pepper, 1 tsp Garlic Powder, 1 tsp Onion Powder, 1 tsp Paprika, and 0.25 tsp Cayenne Pepper.
The cornstarch is the secret weapon here—it creates that ultra-crispy texture we’re after. The baking powder helps the coating puff slightly, adding to the crunch. Stir until all the spices are evenly distributed and the mixture looks uniform in color.
Step 3: Dredge and Double-Coat the Chicken
Remove the chicken from the buttermilk, letting excess drip off. Dredge each piece in the flour mixture, pressing gently to adhere. Dip back into the buttermilk, then into the flour mixture again. This double-coating ensures maximum crunch.
Place the coated pieces on a wire rack set over a baking sheet. This setup lets air circulate underneath, preventing sogginess. Let them rest for 10 minutes while you heat the oil—this helps the coating set and prevents it from sliding off during frying.
Step 4: Deep-Fry to Golden Perfection
Heat the 4 cups Vegetable Oil in a deep, heavy pot to 350°F. Use a thermometer for accuracy—this temperature is crucial for cooking through without burning the coating. The oil should be deep enough to submerge the chicken chunks completely.
Working in batches to avoid crowding, carefully lower the coated chicken into the hot oil. Fry for 6-8 minutes until golden brown and the internal temperature reaches 165°F. The pieces should float and bubble vigorously at first, then settle as they cook.
Step 5: Drain and Serve Immediately
Transfer the fried chicken chunks to a paper towel-lined plate to drain excess oil. The coating should be crisp and audibly crunch when you bite into it. Serve immediately while hot—the contrast between the crispy exterior and juicy interior is at its peak right out of the fryer.
If you need to keep them warm for a few minutes, place them on a wire rack in a 200°F oven. This prevents the coating from getting soggy from trapped steam. Always serve with your favorite dipping sauce on the side.
Pro Tips For Making Chicken Chunks
- Chill the Chicken: Soak the chicken in buttermilk for at least 4 hours—overnight if you can. I learned this the hard way after my first few batches turned out dry and tough.
- Double Dredge: Dip the chicken in the flour-cornstarch-baking powder mix, then back in the buttermilk, then once more in the flour. This extra step makes the crust shatteringly crisp.
- Hot Oil Only: Test the oil with a pinch of flour—if it sizzles immediately, it’s ready. After burning three batches, I finally figured out that lukewarm oil just makes greasy, sad chicken.
- Rest Before Frying: Let the dredged chicken rest for 10 minutes before frying. My grandmother swore by this, and she was right: it helps the coating stick and crisp up evenly.
Serving Suggestions for Leftovers
Dipping Sauce Pairings
These chunks beg for dipping. I always start with classic ranch—the cool creaminess contrasts the heat perfectly. For a tangy kick, try honey mustard with 3 tbsp Dijon and 2 tbsp honey. 💛
Side Dish Ideas
Crinkle-cut fries make a nostalgic pairing—use frozen for convenience. A simple coleslaw with vinegar dressing cuts through the richness. I love Ore-Ida fries for their consistent crispiness.
Fresh Accompaniments
Balance the fried richness with fresh elements. A cucumber-tomato salad with lemon dressing adds brightness. Pickled jalapeños bring heat and acidity that wake up your palate between bites.
Serving Style
Pile these on a platter with parchment paper for easy cleanup. I use white butcher paper for a rustic presentation. Serve with toothpicks for hassle-free grabbing at parties. 🔥
Family Meal Setup
For a cozy dinner, serve with mashed potatoes and steamed green beans. The potatoes soak up any extra sauce, while the beans add color. My family loves this simple, satisfying combo.
Game Day Spread
Create a build-your-own platter with various sauces and sides. Add buffalo sauce (mix ½ cup hot sauce with 2 tbsp melted butter) for spicy lovers. Include celery and carrot sticks for crunch.
Nutrition Facts
Frequently Asked Questions
Can I use chicken breast instead of thighs?
You can, but thighs stay juicier. If using breast, brine it first in 1 quart water + ¼ cup salt for 30 minutes to prevent dryness.
How do I keep them crispy for longer?
Place on a wire rack in a 200°F oven for up to 30 minutes. Avoid stacking or covering, which traps steam and makes them soggy.
Why did my coating fall off during frying?
Likely the oil wasn’t hot enough or you skipped the 10-minute rest after coating. Ensure oil reaches 350°F before frying.
Can I air-fry instead of deep-fry?
Yes! Cook at 375°F for 12-15 minutes, flipping halfway. Spray with oil for extra crispiness.

- Chuy’s Green Chili Rice Copycat Recipe: Spicy Southwest Flavor in Every Bite - September 25, 2026
- Beaten Rice Recipe: Fluffy Grains With Nutty Depth - September 25, 2026
- Machboos Rice Recipe: Bahraini Spiced One-Pot Tradition - September 25, 2026