
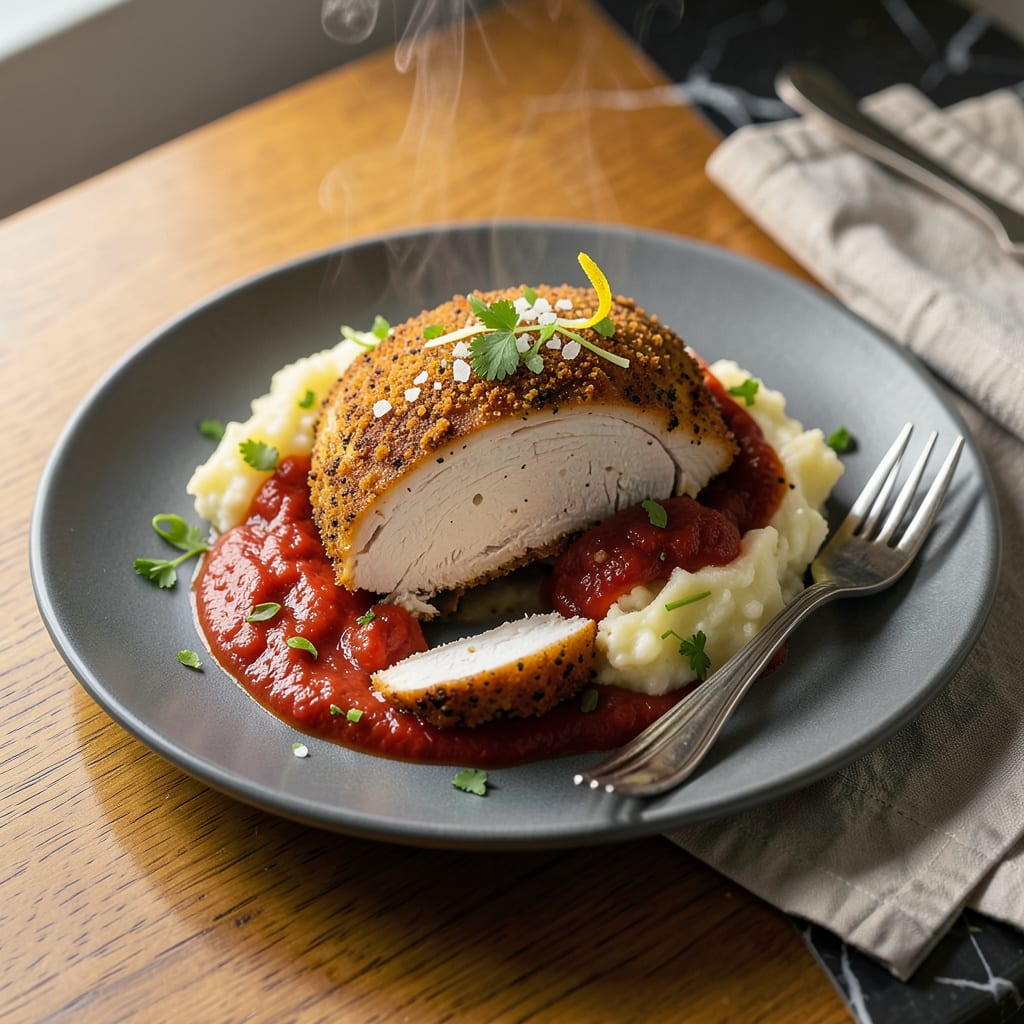
I’ll be real with you—baking powder on chicken breast sounds weird until you try it. This simple trick transforms bland, rubbery chicken into something with a crispy, golden crust that rivals fried chicken, without all the oil. I discovered this by accident when testing crispy skin techniques, and now it’s my go-to method for perfect chicken every time.
The science is simple: baking powder’s alkalinity breaks down proteins on the surface, allowing moisture to escape while creating that coveted crunch. It’s like brining and breading combined into one easy step. Just pat the chicken dry, sprinkle with baking powder (don’t overdo it—1 teaspoon per pound is plenty), and let it sit for 15 minutes before cooking. The results speak for themselves.
What you get is juicy chicken with a shatteringly crispy exterior that stays crunchy even after resting. No deep fryer, no complicated breading—just straightforward technique that works in the oven, air fryer, or skillet. I’ve tested this with everything from simple salt-and-pepper seasoning to elaborate spice rubs, and it never disappoints.
Serve it with mashed potatoes and green beans for comfort food, or slice it over salads for added texture. The crispy crust holds up to sauces too, whether you’re dipping in BBQ or drizzling with lemon butter. Here’s how to make chicken that’ll change your weeknight dinner game.
📚 In This Guide
- What You’ll Need
- Instructions
- Tips and Common Mistakes
What Youll Need
- ● Chicken breast: 2 boneless, skinless breasts (6–8 oz each) – patted very dry 🍗
- ● Baking powder: 1–2 tsp aluminum-free (key for crispiness, not baking soda!)
- ● Salt: 1 tsp kosher or sea salt (plus extra to taste)
- ○ Spices (optional): ½ tsp each garlic powder, paprika, or black pepper
- ● Oil: 1 tbsp high-smoke-point oil (avocado, grapeseed, or refined coconut oil)
- ● Mixing bowl (medium-sized)
- ● Paper towels (for drying chicken thoroughly)
- ● Wire rack + baking sheet (for airflow = extra crispiness!)
- ○ Meat mallet or rolling pin (optional, for even thickness)
- ● Instant-read thermometer (to hit 165°F safely)
- ● Tongs or spatula (for flipping)
Instructions
Here’s how to transform ordinary chicken breasts into crispy, golden perfection without frying.
Prepare the Chicken Breasts
Start with boneless, skinless chicken breasts that are evenly sized for consistent cooking. Pat them completely dry with paper towels – this is crucial because moisture prevents the baking powder from working its magic. I like to place the chicken between two layers of paper towels and press firmly to absorb all moisture.
Trim any excess fat or uneven edges. You want uniform thickness throughout each breast, about ½-inch thick. If your chicken breasts are particularly thick, consider slicing them horizontally to create thinner cutlets. This ensures they cook through evenly while developing that perfect crispy exterior.
Apply the Baking Powder Coating
Here’s the secret step: sprinkle baking powder generously over all surfaces of the chicken. I use about 1 teaspoon per pound of chicken, which might seem like a lot, but trust me. The baking powder will create that incredible crispy texture we’re after.
Rub the baking powder into the chicken with your fingers, making sure to coat every nook and cranny. You’ll notice the chicken starts to feel slightly tacky – that’s exactly what we want. This tackiness helps the seasonings adhere better and creates more surface area for crisping. Don’t worry about the taste; the baking powder flavor cooks off completely.
Season and Rest the Chicken
Now season the chicken breasts with salt and pepper, or your favorite seasoning blend. I like to use a mix of garlic powder, paprika, and onion powder for extra flavor. The baking powder coating will help these seasonings stick beautifully to the chicken surface.
Let the seasoned chicken rest at room temperature for 10-15 minutes before cooking. This short rest allows the baking powder to start working its magic. You’ll actually see the surface begin to dry out slightly – that’s the baking powder drawing out moisture, which is exactly what creates that amazing crispy texture when cooked.
Cook to Crispy Perfection
Heat a large skillet over medium-high heat and add just enough neutral oil to coat the bottom – about 2 tablespoons. When the oil shimmers and you see the first wisps of smoke, it’s ready. Add the chicken breasts and cook undisturbed for 5-7 minutes per side until deeply golden brown and crispy.
Resist the urge to move the chicken around – you want it to develop a good crust. You’ll know it’s ready to flip when the edges look crispy and the chicken releases easily from the pan. The internal temperature should reach 165°F when checked with an instant-read thermometer inserted into the thickest part.
Rest and Serve Immediately
Transfer the crispy chicken to a wire rack set over a plate (not directly to a plate, or the bottom will steam and lose crispiness). Let it rest for 5 minutes before serving. This brief rest allows the juices to redistribute throughout the meat while maintaining that perfect crispy exterior.
Serve immediately while still hot and crispy. The contrast between the golden, crunchy exterior and the juicy, tender interior is what makes this technique so special. I love serving this with a simple lemon wedge or a drizzle of honey for that perfect sweet-savory balance. The crispy texture will hold up beautifully for about 10 minutes after cooking, so time your sides accordingly.
Tips and Common Mistakes for Perfect Crispy Chicken Breast
This technique is all about the details—here’s what I’ve learned from making this countless times.
The Drying Step is Non-Negotiable: In Step 1, when you’re patting the chicken dry, really press those paper towels into every surface. I place the breasts between two layers and press down hard. Any remaining moisture will prevent the baking powder from creating that crispy crust we want. The drier the chicken, the better the baking powder works its magic.
Baking Powder Application: When applying the baking powder in Step 2, don’t be shy with that 1 teaspoon per pound. I’ve found that using slightly more (up to 1½ teaspoons per pound) creates even more crispiness without any bitter taste. Rub it in thoroughly until the chicken feels tacky—this is what creates all those beautiful crispy nooks and crannies.
Heat Control is Everything: For Step 4, medium-high heat is perfect, but watch your oil temperature carefully. If it starts smoking aggressively before you add the chicken, reduce the heat slightly. The oil should shimmer but not smoke heavily. This ensures the chicken gets that deep golden color in exactly 5-7 minutes per side without burning.
Resting Makes All the Difference: That 5-minute rest in Step 5 isn’t just about juices redistributing—it’s crucial for maintaining crispiness. If you cut into the chicken immediately, all the steam escapes and softens that perfect crust. I set a timer to ensure I wait the full 5 minutes before serving.
Pro Tips for Baking Powder On Chicken Breast
- This technique is all about the details—here’s what I’ve learned from making this countless times.
- The Drying Step is Non-Negotiable: In Step 1, when you’re patting the chicken dry, really press those paper towels in…
- Baking Powder Application: When applying the baking powder in Step 2, don’t be shy with that 1 teaspoon per pound. I’…
Frequently Asked Questions
Does baking powder make chicken breast taste bitter?
No—when used correctly (½–1 tsp per pound), baking powder is tasteless! The alkalinity breaks down proteins for crispiness without bitterness. Pro tip: Use aluminum-free baking powder to avoid any metallic aftertaste. Rinse the chicken after 15–30 minutes if you’re sensitive to flavors.
How long should I leave baking powder on chicken breast before cooking?
For maximum crispiness, let it sit 15–30 minutes at room temp (or up to 1 hour refrigerated). Too short? The crust won’t form. Too long? The texture may turn mealy. Pat dry before cooking for extra crunch!
Can I use baking soda instead of baking powder?
Yes, but adjust carefully! Baking soda is 3–4x stronger—use ¼ tsp per pound of chicken. It’s more alkaline, so don’t exceed 15 minutes or the meat may turn mushy. Always rinse after applying to neutralize the pH.
Why isn’t my chicken breast getting crispy with baking powder?
- Wet surface: Pat the chicken very dry before applying baking powder.
- Low heat: Cook at 375–425°F (air fryer/oven) or medium-high (stovetop).
- Overcrowding: Space pieces apart so steam escapes.
Is baking powder on chicken breast safe to eat?
The FDA classifies baking powder as GRAS (Generally Recognized as Safe). Just stick to the recommended amount (½–1 tsp/lb) and rinse if concerned. Those with sodium restrictions should opt for low-sodium brands.
Using baking powder on chicken breast is a game-changer for achieving that perfectly crispy crust without deep-frying! 🍗 With just a simple dry brine, you’ll lock in juiciness while creating a golden, crunchy exterior—all with minimal effort. Whether you’re meal prepping or whipping up a quick dinner, this trick delivers restaurant-quality results every time.
Ready to try it? Grab a chicken breast, sprinkle on that baking powder, and get cooking! For extra flavor, experiment with your favorite spices or herbs—check out our recipe ideas to take it to the next level. Happy crisping! 😊

- Jollof Rice Sauce Recipe: West African Tomato and Spice Infusion - September 25, 2026
- Japanese Rice Soup Recipe: Umami-Rich Comfort in a Bowl - September 25, 2026
- Homemade Cream Of Rice Recipe: Silk-Smooth Breakfast in Minutes - September 25, 2026