
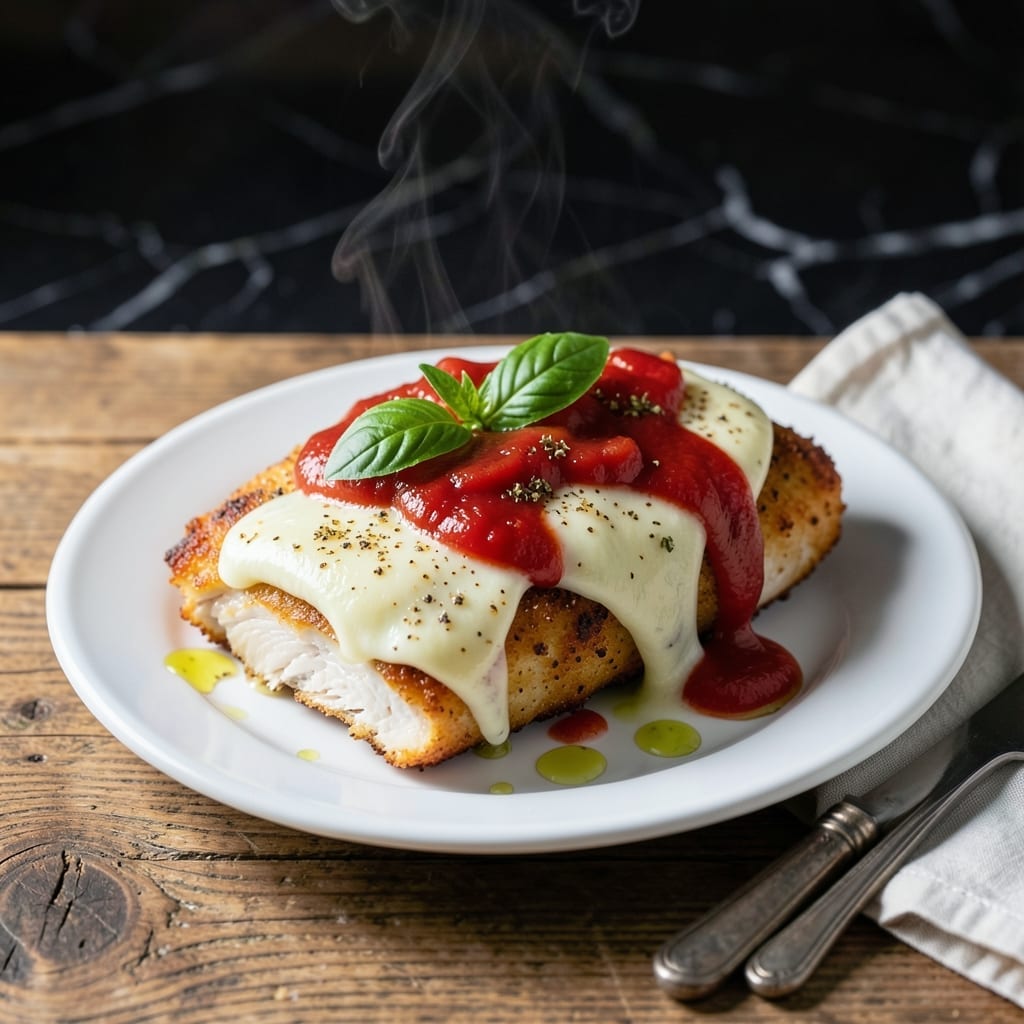
There’s an art to achieving crispy chicken cutlet parm that holds its texture under melted cheese and rich marinara. The foundation is a perfectly breaded cutlet, golden and crunchy, which only happens with the right technique and temperature.
I’ve refined this method over years of testing, focusing on a three-step breading process and precise frying to lock in that signature crunch. The key is maintaining heat consistency—both in the oil and later in the oven—to ensure the coating stays firm.
Layering the cutlet with marinara and mozzarella requires timing to prevent sogginess. The cheese should bubble and brown while the breading remains intact, creating that ideal balance of textures in every bite.
This approach delivers a dish that’s as satisfying as any restaurant version, with a crispy exterior and gooey, melty center. The result speaks for itself.
Ingredients for Chicken Cutlet Parm
Quality ingredients create that signature crunch and melty perfection in every bite.
| Ingredient | Amount | Notes |
|---|---|---|
| Chicken Breast Cutlets 🍗 | 1 ½ lb | Boneless, skinless, pounded to 1/4-inch thickness |
| All-Purpose Flour 🌾 | 1 cup | For initial dredging |
| Large Eggs 🥚 | 2 whole | Beaten for egg wash |
| Italian Breadcrumbs 🍞 | 2 cups | Panko for extra crispiness |
| Parmesan Cheese 🧀 | ½ cup | Freshly grated from wedge |
| Mozzarella Cheese 🧀 | 8 oz | Low-moisture, shredded |
| Marinara Sauce 🍅 | 2 cups | High-quality jarred or homemade |
| Olive Oil 🫒 | 1 cup | For frying cutlets |
| Garlic Powder 🧄 | 1 tsp | Added to breadcrumb mixture |
| Dried Oregano 🌿 | 1 tsp | For breading seasoning |
| Salt 🧂 | 1 tsp | Diamond Crystal kosher preferred |
| Black Pepper 🌶️ | ½ tsp | Freshly ground for best flavor |
| Fresh Basil Leaves 🌿 | ¼ cup | For final garnish |
The chicken cutlets must be uniformly thin—pound them to 1/4-inch thickness for even cooking and crispiness. For breadcrumbs, Panko from Kikkoman or Progresso delivers superior crunch. The Parmesan should be Parmigiano-Reggiano, freshly grated from a wedge (pre-shredded contains anti-caking agents that affect melt). Source your mozzarella from Whole Foods or Murray’s Cheese for optimal quality.
No Panko? Crush saltine crackers or stale bread for a similar texture. Short on marinara? San Marzano tomatoes crushed with garlic and olive oil make an excellent substitute. For a gluten-free version, replace flour with cornstarch and use gluten-free breadcrumbs. The olive oil must have a high smoke point—avocado oil at 500°F smoke point works if you’re concerned about burning.
Breaded cutlets keep 1-2 days in the fridge before cooking, but fry immediately for best texture. Assembled dish reheats well—store in airtight containers for up to 3 days. Freeze unbreaded cutlets for up to 3 months for future use.
Why You’ll Love This Recipe
- I’ll be real: they taste even better the next day in a sandwich, if they last that long.
- One Pan Wonder: I bread and bake these cutlets on a single sheet pan—no splatter, no mess, just crispy perfection.
- That Parm Crunch: The Italian breadcrumbs and Parmesan create a golden crust so good, I’ve caught my husband sneaking seconds straight from the pan.
- Weeknight MVP: Between us, this is my go-to for busy Tuesdays—ready in 30 and fancy enough for company.
Step-by-Step Instructions for Chicken Cutlet Parm
Master the technique for achieving crispy, golden breading and perfectly melted cheese layers.
Step 1: Bread the Chicken Cutlets with Seasoned Crumbs
Set up a breading station with three shallow dishes. Place the 1 cup all-purpose flour in the first, beat the 2 whole large eggs in the second, and combine the 2 cups Italian breadcrumbs, 0.5 cup Parmesan cheese, 1 tsp garlic powder, 1 tsp dried oregano, 1 tsp salt, and 0.5 tsp black pepper in the third.
Dredge each of the 1.5 lb chicken breast cutlets in the flour, shaking off excess. Dip into the egg wash, letting any excess drip off. Press firmly into the breadcrumb mixture, ensuring full coverage. The pressure helps the coating adhere and creates ridges for extra crispiness.
Step 2: Pan-Fry to Golden Perfection
Heat 1 cup olive oil in a large skillet over medium-high heat until shimmering but not smoking. Working in batches to avoid crowding, add the breaded cutlets. Fry for 3-4 minutes per side until deep golden brown and the internal temperature reaches 165°F.
Don’t move the cutlets for the first 2 minutes—this allows a crisp crust to form. When the edges appear golden and you hear a steady sizzle, flip carefully. The breading should release easily when properly crisped. Transfer to a paper towel-lined plate to drain excess oil.
Step 3: Layer with Sauce and Cheeses
Preheat the oven to 375°F. Spread 1 cup marinara sauce in the bottom of a baking dish. Arrange the fried cutlets in a single layer. Spoon the remaining 1 cup marinara sauce over each cutlet, then top with the 8 oz mozzarella cheese, dividing it evenly.
The sauce should coat the cutlets completely but not soak the breading. Sprinkle any leftover breadcrumb mixture over the cheese for added texture. This layering ensures every bite has the perfect ratio of crispy coating, tangy sauce, and melty cheese.
Step 4: Bake Until Bubbly and Browned
Bake for 10-12 minutes until the cheese is fully melted and beginning to bubble at the edges. For the final 2 minutes, switch the oven to broil to achieve a light golden brown on the cheese. Watch closely to prevent burning.
The dish is ready when the cheese stretches in long strands when pulled and the sauce is bubbling actively. The residual heat will continue melting the cheese slightly after removal from the oven.
Step 5: Rest and Garnish Before Serving
Let the dish rest for 5 minutes before serving. This allows the cheese to set slightly, making it easier to plate. Garnish with the 0.25 cup fresh basil leaves, either as whole leaves or torn for a rustic presentation.
The resting period helps the layers stabilize, preventing the sauce from running off when sliced. Serve immediately while the breading remains crisp and the cheese is at its melty peak. Each portion should showcase the distinct layers of crispy breading, rich sauce, and stretchy cheese.
Pro Tips For Making Chicken Cutlet Parm
- Pound the Cutlets: Use a meat mallet or rolling pin to even out the chicken breasts to ¼-inch thickness. I learned this the hard way—uneven pieces cook at different rates, leaving you with dry edges and raw centers.
- Double-Dredge for Crisp: Dip each cutlet in flour, egg, then breadcrumbs mixed with parmesan, then back in the egg and crumbs again. Sounds tedious, but it actually changes the outcome—your crust stays put through frying and baking.
- Skip the Cold Oil: Heat your oil in the pan until it shimmers before adding the cutlets. After burning three batches, I finally figured out that cold oil makes the breading soak up grease instead of crisping.
- Rest Before Baking: Let the breaded cutlets rest on a rack for 5-10 minutes before baking. My grandmother swore by this, and she was right: it keeps the coating from sliding off when the cheese melts.
Make-Ahead Tips for This Dish
Prep Breaded Cutlets Ahead
Bread your cutlets up to 2 days in advance and store them on a parchment-lined tray, uncovered, in the fridge. This keeps the coating dry and crisp. Cover with plastic wrap if storing longer to prevent drying out. 💡
Freeze Uncooked Cutlets
Freeze unbreaded cutlets between parchment paper in a ziplock bag for up to 3 months. Thaw overnight in the fridge before breading and frying. This is my go-to for quick weeknight meals.
Assemble and Refrigerate
Assemble the entire dish up to 1 day ahead, but don’t bake it yet. Cover tightly with foil and refrigerate. Bake straight from the fridge, adding 2-3 minutes to the cooking time.
Store Cooked Dish
Leftover chicken parm keeps in an airtight container in the fridge for 3 days. The breading softens slightly but reheats well. Avoid freezing assembled dishes as the texture suffers.
Reheat Properly
Reheat individual portions in a 375°F oven for 10-12 minutes until the cheese melts and the internal temperature hits 165°F. This restores the crispiness better than a microwave. ❄️
Revive the Crisp
For extra crispiness, place reheated cutlets under the broiler for 1-2 minutes at the end. Watch closely to avoid burning. I always finish with fresh basil to brighten the flavors.
Nutrition Facts
Frequently Asked Questions
Why do I need to pound the chicken thin?
Pounding to 1/4-inch thickness ensures even cooking and maximum crispiness. Thicker pieces may stay raw inside while the breading burns.
Can I use pre-shredded cheese?
It’s not recommended. Pre-shredded contains anti-caking agents that prevent proper melting. Freshly grate Parmigiano-Reggiano and low-moisture mozzarella for best results.
What if my breading falls off during frying?
This usually means the cutlets weren’t pressed firmly enough into the crumbs or the oil wasn’t hot enough. Ensure oil reaches 350-375°F and let the coating set for 2 minutes before flipping.
How do I keep the cutlets crispy under the sauce?
Fry until deep golden, then immediately layer with sauce and cheese. Bake just until cheese melts (10-12 minutes at 375°F) to prevent sogginess.

- Jollof Rice Sauce Recipe: West African Tomato and Spice Infusion - September 25, 2026
- Japanese Rice Soup Recipe: Umami-Rich Comfort in a Bowl - September 25, 2026
- Homemade Cream Of Rice Recipe: Silk-Smooth Breakfast in Minutes - September 25, 2026