
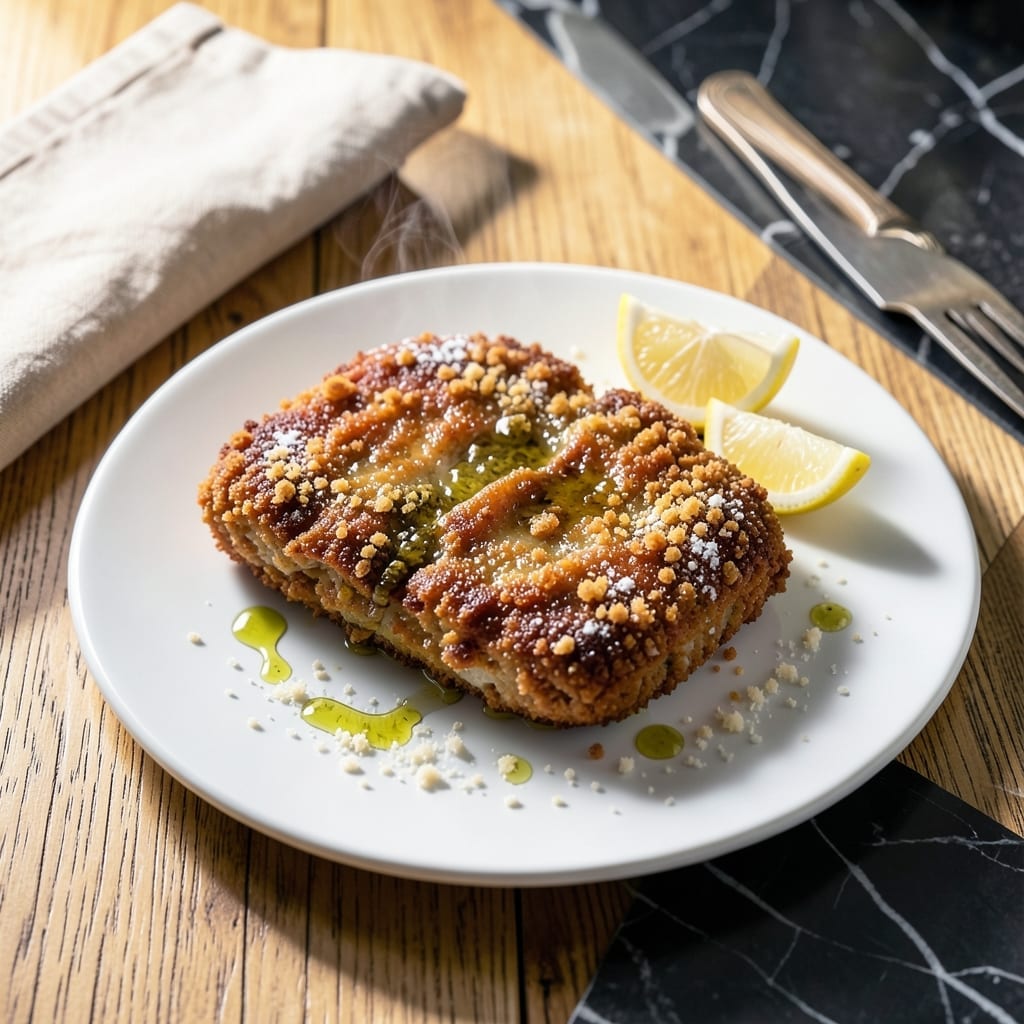
There’s a secret to achieving that perfect crispy coating on chicken cutlets, and it starts with a simple technique that locks in moisture while creating a golden crust.
This method combines breadcrumbs with grated parmesan for extra flavor and crunch. The key is pressing the coating firmly onto the chicken so it adheres properly during cooking.
When done right, you’ll have tender chicken inside with a shatteringly crispy exterior that stays intact from pan to plate. The parmesan adds a savory depth that elevates the dish.
Serve these cutlets hot for the best texture, with lemon wedges for a bright contrast to the rich, golden crust.
Ingredients for Chicken Cutlet
Simple ingredients transform into golden, crispy chicken with a savory parmesan crust.
| Ingredient | Amount | Notes |
|---|---|---|
| Chicken Breasts 🍗 | 1 ½ lb | Boneless, skinless, pounded to 1/4-inch thickness |
| All-Purpose Flour 🌾 | ½ cup | For initial dredging |
| Large Eggs 🥚 | 2 whole | Beaten for egg wash |
| Italian Breadcrumbs 🍞 | 1 ½ cups | Panko for extra crispiness |
| Parmesan Cheese 🧀 | ¾ cup | Freshly grated from block |
| Olive Oil 🫒 | ½ cup | For pan-frying, divided |
| Garlic Powder 🧄 | 1 tsp | For seasoning coating |
| Onion Powder 🧅 | 1 tsp | For added depth |
| Dried Oregano 🌿 | 1 tsp | For Italian flavor |
| Salt 🧂 | 1 tsp | Kosher or sea salt preferred |
| Black Pepper 🌶️ | ½ tsp | Freshly ground preferred |
| Lemon Wedges 🍋 | 4 pieces | For serving |
The chicken breasts must be pounded to an even thickness—1/4 inch ensures even cooking and maximum crispiness. Freshly grated Parmesan is non-negotiable here; pre-grated lacks the melt and flavor. For breadcrumbs, panko delivers superior crunch compared to standard. Most grocery stores carry both in the baking aisle, but Whole Foods has excellent organic options.
No panko? Regular breadcrumbs work in a pinch (just less crisp). Out of Parmesan? Pecorino Romano offers a sharper alternative at half the quantity. The olive oil should be neutral for frying—save the extra-virgin for finishing. If avoiding gluten, swap the flour for cornstarch and use gluten-free breadcrumbs. The egg wash can be replaced with buttermilk for extra tenderness.
Uncooked cutlets keep in the fridge for 1 day—press the coating on just before cooking. Leftovers stay crispy when reheated in a 400°F oven for 10 minutes. Serve immediately for that shatteringly crisp texture mentioned in the intro. Lemon wedges add the perfect bright contrast.
Why You’ll Love This Recipe
- 20-Minute Meal: I can have these golden cutlets on the table faster than takeout arrives. Just bread, fry, and serve.
- Crispy Perfection: That crunch from the Italian breadcrumbs and Parmesan? It’s the reason I make double batches.
- Sandwich or Salad: Honestly, I use leftovers for everything—stacked on a roll or sliced over greens.
- Budget Stretch: One pound of chicken breasts turns into four generous servings without breaking the bank.
Step-by-Step Instructions for Ultra Crispy Chicken Cutlets
Here’s the method that guarantees a golden, crunchy exterior with tender, juicy chicken every time.
Step 1: Prepare and Season the Chicken Breasts
Start by pounding the 1.5 lb chicken breasts to an even ¼-inch thickness between two sheets of plastic wrap. This ensures even cooking and prevents dry spots in thicker areas. I use the flat side of a meat mallet for consistent results.
Season both sides of the chicken generously with 1 tsp salt, 1 tsp garlic powder, 1 tsp onion powder, 1 tsp dried oregano, and 0.5 tsp black pepper. Press the seasoning into the meat so it adheres well. This step builds the flavor foundation for your cutlets.
Step 2: Set Up the Breading Station
Create an assembly line with three shallow dishes. Place the 0.5 cup all-purpose flour in the first dish. In the second, beat the 2 whole large eggs until well combined. For the third dish, mix the 1.5 cups Italian breadcrumbs with the 0.75 cup Parmesan cheese—this combination gives you that ultra-crispy Parmesan crust promised in the title.
The cheese should be freshly grated from a block for the best melt and texture. If it’s too finely grated, it might disappear into the breadcrumbs; aim for a medium shred. This mixture creates the signature crunch and savory depth for your cutlets.
Step 3: Bread the Chicken for Maximum Crispiness
Dredge each seasoned chicken breast in the flour, shaking off any excess. This thin layer helps the egg adhere to the meat. Next, dip it into the beaten eggs, letting any excess drip off. Finally, press the chicken firmly into the breadcrumb-Parmesan mixture, ensuring both sides are completely coated with an even, thick layer.
For extra crispiness, I press the breading onto the chicken with my palms, then flip and repeat. Place the breaded cutlets on a wire rack set over a baking sheet. This setup allows air circulation underneath, preventing sogginess before frying. Let them rest for 5 minutes to help the coating set.
Step 4: Pan-Fry to Golden Perfection
Heat ¼ cup olive oil in a large skillet over medium-high heat until it shimmers but doesn’t smoke—this is the ideal temperature for crispy breading. You want enough oil to come halfway up the sides of the cutlets. Carefully place two cutlets in the pan (don’t overcrowd) and cook for 3-4 minutes per side.
You’ll know they’re ready to flip when the edges are deep golden brown and crispy. The breading should release easily from the pan when properly cooked. If it sticks, let it cook a bit longer—it’s not ready yet. Add the remaining ¼ cup olive oil as needed between batches.
Step 5: Drain and Serve Immediately
Transfer the cooked cutlets to a paper towel-lined plate to drain any excess oil. The paper towels absorb surface grease without making the breading soggy. Serve immediately while hot and crispy—they lose their crunch as they cool.
Garnish with the 4 pieces lemon wedges for a bright, acidic contrast that cuts through the richness. Each serving should have a cutlet with a perfectly golden, audibly crisp exterior that gives way to juicy, well-seasoned chicken inside. The lemon also adds a fresh finishing touch to every bite.
Pro Tips For Making Chicken Cutlet
- Pound Evenly: Use a meat mallet to pound chicken breasts to 1/4-inch thickness—this guarantees even cooking and prevents dry, chewy bits. I learned this the hard way after pulling undercooked centers out of over-browned cutlets.
- Season the Flour: Mix salt and pepper into the all-purpose flour before dredging. Sounds simple, but it actually changes the outcome by seasoning every layer of the crust.
- Skip the Overcrowding: Fry cutlets in batches with space between them, or the oil temp drops and you’ll end up with greasy, soggy breading. After ruining a batch, I now use a thermometer to keep the oil at 350°F.
- Add Parmesan Early: Mix grated Parmesan into the breadcrumbs before coating for extra flavor and crispiness. Does it look weird? Yes. Does it work? Every single time.
Serving Suggestions for Leftovers
Classic Plating Style
Arrange 2 cutlets per plate slightly overlapping on a bed of baby arugula. The peppery greens provide a fresh contrast to the rich, crispy breading. I drizzle with a squeeze of lemon juice from the wedges for brightness.
Italian Family Meal
Serve with a side of spaghetti aglio e olio and a simple tomato salad. The garlic-infused pasta complements the Parmesan crust beautifully. This is how my nonna served it—always with extra lemon wedges on the side. 🍋
Lighter Option Pairing
For a refreshing contrast, pair with a shaved fennel and orange salad. The citrus notes in the salad echo the lemon garnish. A sprinkle of toasted pine nuts adds crunch that matches the cutlets’ texture.
Comfort Food Spread
Create a hearty plate with mashed potatoes and steamed green beans. The creamy potatoes soak up any crispy bits that fall off the cutlets. I always add a pat of butter to the potatoes for extra richness.
Quick Weeknight Dinner
Serve with roasted broccoli tossed in olive oil and garlic powder. The roasting time matches the cutlets’ cooking duration perfectly. This simple combo makes an easy, satisfying meal.
Add a sprinkle of red pepper flakes to both for a subtle kick. 🔥
Nutrition Facts
Frequently Asked Questions
What’s the best way to pound the chicken evenly?
Place chicken between plastic wrap and use a meat mallet’s flat side. Aim for ¼-inch thickness to ensure even cooking. This prevents dry spots and helps the breading adhere better.
Can I use regular breadcrumbs instead of panko?
Yes, but panko gives superior crunch. Regular breadcrumbs work in a pinch, though the texture will be less crispy. For best results, stick with panko or toast standard breadcrumbs lightly first.
How do I keep the breading from falling off?
Press the coating firmly onto the chicken and let it rest 5 minutes before frying. This helps the breading set. Also, ensure the oil is hot enough—medium-high heat is ideal.
Can I bake these instead of pan-frying?
Yes, bake at 400°F for 15-20 minutes, flipping halfway. Use a wire rack on a baking sheet for even crispiness. The texture won’t be as crispy, but it’s a healthier option.

- Jollof Rice Sauce Recipe: West African Tomato and Spice Infusion - September 25, 2026
- Japanese Rice Soup Recipe: Umami-Rich Comfort in a Bowl - September 25, 2026
- Homemade Cream Of Rice Recipe: Silk-Smooth Breakfast in Minutes - September 25, 2026