
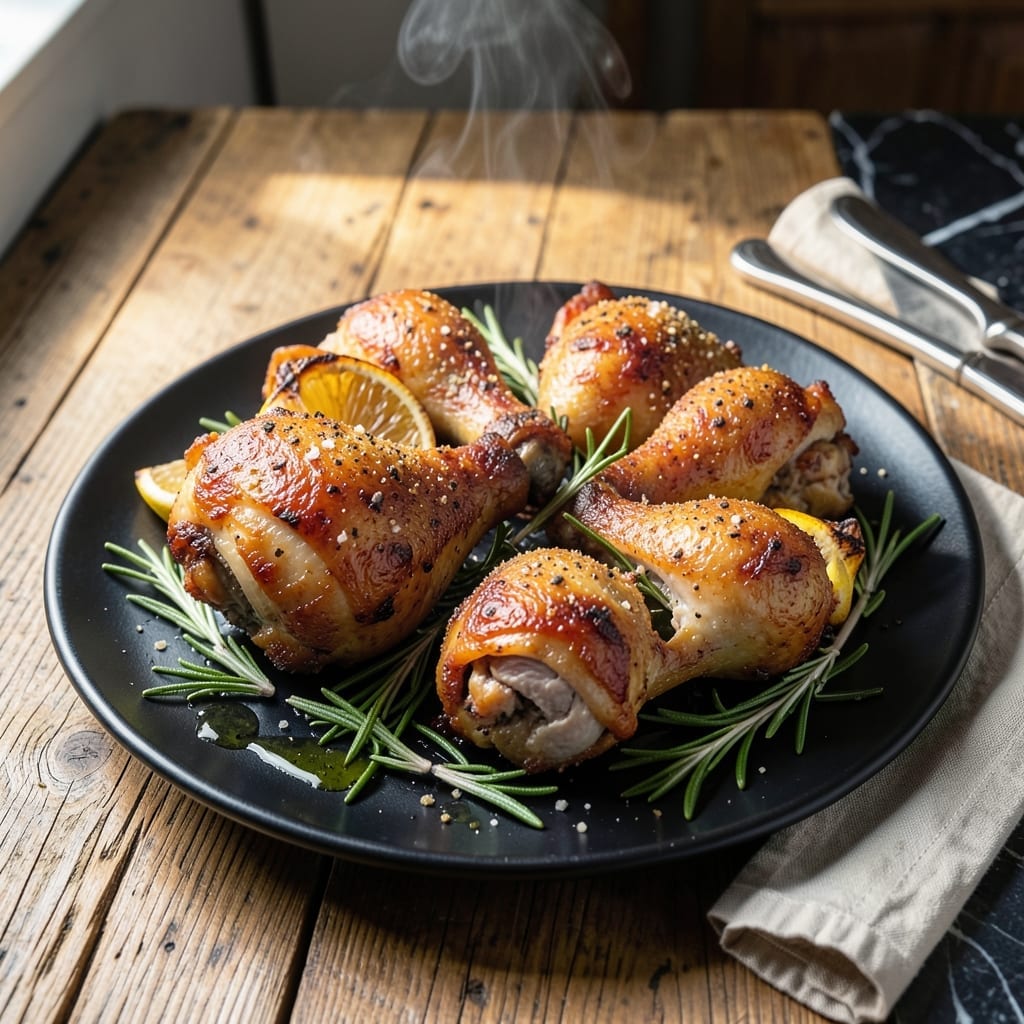
This oven-baked method delivers crispy skin and juicy meat every time without frying. I developed this technique after years of testing to achieve that perfect balance of texture and flavor.
The secret is high heat in the oven, which renders the fat and creates that shatteringly crispy exterior while keeping the inside tender. A simple dry rub enhances the natural flavor without overpowering it.
You’ll end up with drumsticks that have golden-brown skin and meat so succulent it nearly falls off the bone. The aroma alone will have everyone gathering in the kitchen well before dinner is ready.
Serve with your favorite sides for a complete meal that’s sure to become a family favorite. Here’s how to make them perfectly every time.
Ingredients for Chicken Drumsticks
Pantry staples and chicken drumsticks create this easy, flavor-packed dish.
| Ingredient | Amount | Notes |
|---|---|---|
| Chicken Drumsticks 🍗 | 3 lb | Skin-on, bone-in preferred |
| Olive Oil 🫒 | 2 tbsp | Extra-virgin for richness |
| Kosher Salt 🧂 | 1 ½ tsp | Diamond Crystal preferred |
| Black Pepper 🌶️ | 1 tsp | Freshly ground |
| Garlic Powder 🧄 | 1 tsp | Not garlic salt |
| Onion Powder 🧅 | 1 tsp | Fresh ground preferred |
| Smoked Paprika 🌶️ | 1 tsp | For depth of flavor |
| Dried Thyme 🍃 | ½ tsp | Crushed between fingers |
| Dried Oregano 🌿 | ½ tsp | Mediterranean variety |
| Cayenne Pepper 🔥 | ¼ tsp | Adjust for heat preference |
| Baking Powder 🧂 | 1 tsp | For extra crispiness |
The chicken is the star here. Look for plump drumsticks with skin that’s smooth and slightly moist—they crisp up best. Costco has great bulk packs, but your regular grocery store will work too. For the dry rub, I always grab my spices from the bulk section at Whole Foods (the turnover is faster, so they’re fresher). That baking powder trick? Game-changer for shatteringly crispy skin.
No smoked paprika? Regular paprika plus a pinch of liquid smoke gets you close. Fresh garlic can replace the powder at 1 clove per 1/4 teaspoon. Want more heat? Double the cayenne. If you’re out of thyme, poultry seasoning at half the amount works fine. The olive oil can be any neutral oil if that’s what you’ve got (vegetable, canola—whatever’s open).
The dry rub can be mixed ahead and stored for 2 weeks in a cool, dark place. Leftovers (if there are any) keep for 4 days in the fridge. Reheat in the oven to revive the crispiness—microwave turns the skin rubbery.
Why You’ll Love This Recipe
- I’ll be real: it’s my go-to for game nights, picnics, or just when the kids need something hearty.
- One Pan Wonder: Honestly, it’s just drumsticks, olive oil, and a few pantry staples—toss and bake, no fancy prep.
- Crave-Worthy Crust: The garlic powder and pepper create this crispy, savory skin that’s ridiculously good.
- Feeds a Crowd: I’ll be real: it’s my go-to for game nights, picnics, or just when the kids need something hearty.
Step-by-Step Instructions for Oven-Baked Chicken Drumsticks
Here’s my method for achieving perfectly crispy skin and juicy meat every time.
Step 1: Prep and Season the Chicken Drumsticks
Pat the 3 lb chicken drumsticks completely dry with paper towels. This is crucial—any moisture prevents crispy skin. I press down firmly to absorb all the liquid, especially around the joints where water tends to collect.
In a large bowl, toss the drumsticks with 2 tbsp olive oil until evenly coated. Then add 1.5 tsp kosher salt, 1 tsp black pepper, 1 tsp garlic powder, 1 tsp onion powder, 1 tsp smoked paprika, 0.5 tsp dried thyme, 0.5 tsp dried oregano, 0.25 tsp cayenne pepper, and 1 tsp baking powder. The baking powder is the secret to extra-crispy skin.
Rub the seasoning mixture thoroughly into every drumstick, making sure to get it under the skin and into all the crevices. Let them sit at room temperature for 15-20 minutes while you preheat the oven.
Step 2: Arrange on a Wire Rack for Even Crisping
Preheat your oven to 425°F. Position a wire rack over a rimmed baking sheet—this setup allows hot air to circulate all around the drumsticks, ensuring they crisp evenly on all sides rather than steaming in their own juices.
Arrange the drumsticks on the wire rack with a little space between each piece. I like to place them skin-side up for the initial cooking. The wire rack isn’t just for crispiness; it also prevents the drumsticks from sitting in rendered fat, which can make them greasy.
Don’t line the baking sheet with parchment or foil—you want any drippings to evaporate and contribute to the crispiness rather than pooling underneath.
Step 3: Roast at High Heat for Maximum Crisp
Place the baking sheet in the preheated oven and roast for 25 minutes. Then, flip each drumstick over and roast for another 20-25 minutes. You’ll start to see the skin turning deep golden brown and pulling away from the meat slightly.
About halfway through the second side’s cooking time, flip them once more to ensure even browning. The drumsticks are done when the internal temperature reaches 175°F and the skin is crispy to the touch. If they’re not crispy enough, pop them under the broiler for 2-3 minutes but watch them closely.
The baking powder in the seasoning mix reacts with the chicken’s natural juices to create tiny bubbles under the skin, giving you that extra-crispy texture you’re after.
Step 4: Rest and Serve Immediately
Remove the drumsticks from the oven and let them rest on the wire rack for 5 minutes. This short rest allows the juices to redistribute slightly while keeping the skin crispy. If you stack them or cover them, the steam will soften that perfect crisp you worked so hard to achieve.
Serve the drumsticks hot, straight from the oven. The skin should have an audible crunch when you bite into it, while the meat remains tender and juicy. I like to serve them with a simple green salad or roasted vegetables to balance the richness.
If you have leftovers (though they’re rarely left!), they reheat surprisingly well in a 400°F oven for 10-12 minutes, which helps revive the crispy skin better than a microwave.
Pro Tips For Making Chicken Drumsticks
- Pat Them Dry: I learned this the hard way—damp drumsticks steam instead of sear. Use paper towels to dry each piece thoroughly before seasoning, or you’ll end up with pale, soggy skin.
- High Heat First: Start with a screaming-hot pan or oven (425°F+) to get that skin crispy fast. After burning my first batch at lower temps, I now crank it up and finish at 375°F to cook through.
- Season Twice: Hit the drumsticks with salt and spices before cooking, then again right after flipping. Sounds like overkill, but garlic powder and pepper stick better to the second coat.
- Rest 5 Minutes: Pull them off the heat just shy of done—they’ll carry over to 165°F while resting. I skip this when I’m starving, but the juices stay put instead of running onto the plate.
Storing and Reheating This Dish
Refrigerator Storage
Let your drumsticks cool completely before storing—about 2 hours at room temperature. I use glass containers with snap-tight lids to maintain freshness. They’ll keep in the fridge at 40°F or below for up to 4 days without losing moisture. ❄️
Freezer Storage
For longer storage, wrap each drumstick individually in plastic wrap, then place in a gallon freezer bag. Squeeze out excess air to prevent freezer burn. They’ll stay flavorful for up to 3 months at 0°F.
Oven Reheating
To revive crispiness, preheat oven to 400°F and place drumsticks on a wire rack. Heat for 10-12 minutes until the skin is crisp and internal temp reaches 165°F. This method preserves texture better than any other. 🔥
Air Fryer Reheating
For a quicker option, arrange drumsticks in a single layer in your air fryer. Reheat at 375°F for 6-8 minutes, checking halfway through. The circulating hot air restores crispiness effectively.
Avoid the Microwave
Microwaving makes the skin rubbery and tough. If you must, use 50% power in 30-second bursts and cover with a damp paper towel. But honestly, the oven or air fryer gives far superior results.
Nutrition Facts
Frequently Asked Questions
Do I need to use a wire rack for crispy skin?
Yes, it’s essential for even crisping. A wire rack lets hot air circulate all around the drumsticks, preventing them from steaming in their own juices. Without it, the bottoms may turn soggy instead of crisp.
Can I use chicken thighs instead of drumsticks?
Bone-in, skin-on thighs work great with the same method and timing. They may take 5-10 minutes longer to reach 175°F internally. The crispy skin technique works the same.
Why is baking powder in the seasoning?
It’s the secret to extra-crispy skin. Baking powder raises the skin’s pH, helping it brown faster and creating tiny bubbles that make it shatteringly crisp. Don’t skip it!
What if my drumsticks aren’t crispy enough?
Pop them under the broiler for 2-3 minutes at the end, watching closely. Alternatively, increase oven temp to 450°F for the last 10 minutes. Both methods boost crispiness.

- Jollof Rice Sauce Recipe: West African Tomato and Spice Infusion - September 25, 2026
- Japanese Rice Soup Recipe: Umami-Rich Comfort in a Bowl - September 25, 2026
- Homemade Cream Of Rice Recipe: Silk-Smooth Breakfast in Minutes - September 25, 2026