
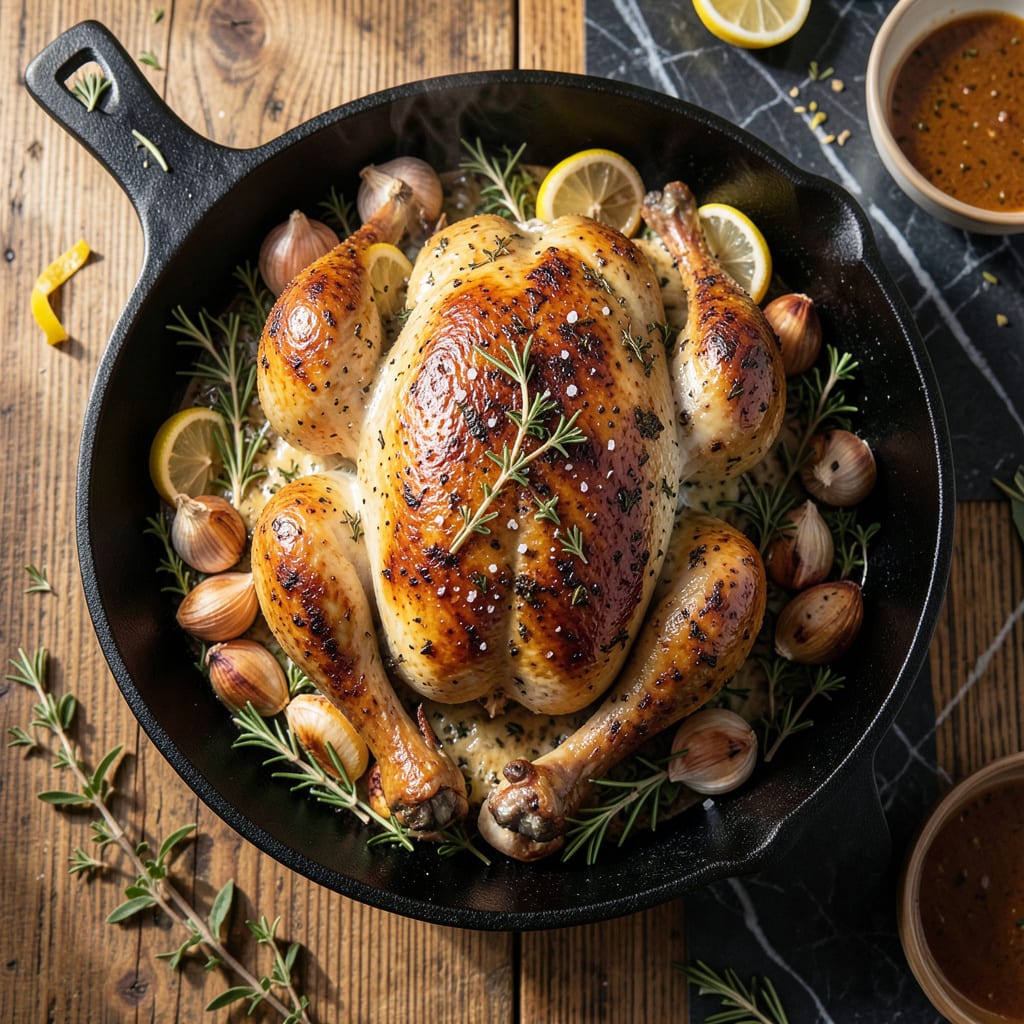
This dry roast method transforms chicken into a herb-crusted masterpiece with minimal effort. The key lies in a precise blend of spices and a slow roasting process that locks in juices.
You’ll achieve succulent meat with a golden, aromatic crust—every bite delivers bold flavor. Perfect for a centerpiece meal with simple prep and impressive results.
Ingredients for Chicken Dry Roast
A whole bird and herb blend create this golden, aromatic centerpiece with ease.
| Ingredient | Amount | Notes |
|---|---|---|
| Whole Chicken 🍗 | 1 whole | 3-4 lb, patted dry inside and out |
| Kosher Salt 🧂 | 1 ½ tbsp | Diamond Crystal preferred for texture |
| Freshly Ground Black Pepper 🌶️ | 1 tsp | Coarse grind for crust texture |
| Dried Thyme 🌿 | 2 tsp | Crushed between fingers to release oils |
| Dried Rosemary 🌿 | 2 tsp | Crushed between fingers to release oils |
| Dried Sage 🍃 | 1 tsp | Rubbed to activate flavor |
| Garlic Powder 🧄 | 2 tsp | Not garlic salt substitute |
| Onion Powder 🧅 | 2 tsp | Balances herb blend complexity |
| Smoked Paprika 🌶️ | 1 tsp | Adds depth to crust color |
| Unsalted Butter 🧈 | 4 tbsp | Melted for herb paste consistency |
| Fresh Lemon 🍋 | 1 whole | Zested and juiced for brightness |
| Fresh Parsley 🌿 | ¼ cup | Chopped for garnish finish |
[recipeingredientscaler]
The bird itself is critical—opt for 3-4 lb whole chicken with skin intact for optimal crisping. Diamond Crystal kosher salt provides the ideal texture for dry-brining overnight. For herbs, Penzeys offers exceptional quality, but any well-stocked spice aisle works. The butter should be high-fat European style for superior flavor in the crust. Always check the sell-by date on poultry—fresher birds yield better results.
Need to swap dried herbs? Fresh at triple the amount works but may darken the crust. No smoked paprika? Regular paprika plus pinch of cayenne mimics the depth. The lemon can be lime or orange for variation. For a dairy-free version, olive oil replaces butter effectively. If your bird is larger, scale the herb blend proportionally—1.5x for 5-6 lb chickens.
The dry-brined bird can rest uncovered in the fridge for 12-24 hours. Roast leftovers keep 3-4 days refrigerated, though the skin loses crispness. For make-ahead, brine the bird overnight, then roast the next day. Always bring chicken to room temperature 1 hour before cooking for even doneness.
Why You’ll Love This Recipe
- I’ll be real: a whole chicken costs less than takeout, and this tastes way better.
- One Pan Wonder: I just rub the chicken with salt, pepper, thyme, and rosemary, pop it in the oven, and let it do its thing.
- Herb-Crusted Perfection: That crispy skin infused with rosemary and thyme? Honestly, it’s the reason I make this every Sunday.
- Feeds the Gang: A whole chicken means leftovers for sandwiches, salads, or tacos—between us, it’s my secret meal prep hack.
Step-by-Step Instructions for Chicken Dry Roast
This method ensures a perfectly crisp skin and juicy meat with an aromatic herb crust.
Step 1: Prepare the Herb Butter and Season the Chicken
In a small bowl, combine the 4 tbsp unsalted butter with 2 tsp dried thyme, 2 tsp dried rosemary, 1 tsp dried sage, 2 tsp garlic powder, 2 tsp onion powder, and 1 tsp smoked paprika. Crush the herbs between your fingers as you add them to release their oils.
Rub the compound butter evenly over the entire surface of the whole chicken, including under the skin. Sprinkle the 1.5 tbsp kosher salt and 1 tsp freshly ground black pepper liberally over the bird, ensuring full coverage. The butter acts as a binder for the seasoning while adding richness to the crust.
Step 2: Add Aromatic Elements and Truss
Zest the fresh lemon directly over the chicken, then cut the lemon in half and place both halves inside the cavity. This infuses the meat with bright citrus notes during roasting. The acidity also helps tenderize the flesh from within.
Tuck the wings under the body and tie the legs together with kitchen twine to create a compact shape. This promotes even cooking and prevents the extremities from over-browning. Place the chicken breast-side up on a wire rack set in a roasting pan to allow air circulation on all sides.
Step 3: Roast at High Temperature
Preheat your oven to 425°F. Roast the chicken on the middle rack for 1 hour to 1 hour 15 minutes, depending on size. Begin checking for doneness after 50 minutes—the skin should be deep golden brown and the juices should run clear when you pierce the thickest part of the thigh.
I recommend rotating the pan 180 degrees halfway through cooking to ensure even browning. The high heat creates a beautiful Maillard reaction on the skin while sealing in the juices. Avoid opening the oven door unnecessarily during the first 45 minutes to maintain consistent temperature.
Step 4: Rest and Garnish
Transfer the chicken to a cutting board and let it rest for 15-20 minutes before carving. This crucial step allows the muscle fibers to relax and the juices to redistribute, ensuring moist meat throughout. Tent the chicken loosely with foil to keep it warm.
Chop the 0.25 cup fresh parsley and sprinkle it over the chicken just before serving. The fresh herb adds a vibrant color contrast and a clean, bright finish to the rich, savory flavors. Carve the chicken and serve with the pan juices spooned over the top.
Pro Tips For Making Chicken Dry Roast
- Pat It Dry: Use paper towels to thoroughly dry the chicken skin before seasoning—I learned this the hard way after my first few attempts came out soggy instead of crisp.
- Start Hot: Crank the oven to 425°F for the first 20 minutes, then drop to 375°F to finish. This guarantees golden, crackling skin without drying out the meat.
- Season Under Skin: Gently loosen the skin and rub some of the salt, pepper, thyme, and rosemary directly onto the meat. It actually changes the outcome, infusing flavor deep into the bird.
- Rest Before Carving: Let the chicken rest 10-15 minutes after roasting, tented loosely with foil. Sounds weird, but it works: all the juices stay inside where they belong.
Essential Equipment for This Dish
Roasting Pan Essentials
Invest in a heavy-duty stainless steel roasting pan with a rack—I use All-Clad for even heat distribution. The rack elevates the bird, allowing hot air to circulate underneath for crispy skin. A 12×16-inch pan accommodates a 4 lb chicken with room for vegetables. 💡
Precision Thermometers
An instant-read thermometer is non-negotiable for perfect doneness. I swear by my ThermoWorks Mk4—it gives accurate readings in 2-3 seconds. Check the thickest part of the thigh, avoiding bone, for 165°F. A leave-in probe thermometer helps monitor temperature throughout cooking.
Herb Preparation Tools
A mortar and pestle crushes dried herbs effectively, releasing their essential oils. For fresh herbs, use a sharp chef’s knife—Wüsthof makes reliable options. Zest your lemon with a Microplane for fine, even strands without the bitter pith. These tools make a noticeable difference in flavor extraction.
Kitchen Twine and Brushes
Use 100% cotton kitchen twine to truss the chicken securely. I prefer unbleached twine for a natural look. A silicone pastry brush spreads the herb butter evenly without absorbing flavors. Avoid nylon brushes, as they can melt at high temperatures.
Resting and Carving
After roasting, transfer the chicken to a wooden cutting board for resting. The wood is gentle on your knives and adds a rustic touch to presentation. Use a long, sharp carving knife for clean slices—I recommend Mercer Culinary for budget-friendly quality.
Nutrition Facts
Frequently Asked Questions
What’s the best way to check for doneness?
Use an instant-read thermometer in the thickest part of the thigh. It should read 165°F without touching bone. The juices should also run clear when pierced.
Can I use fresh herbs instead of dried?
Yes, but use triple the amount since fresh herbs are less concentrated. Finely chop them and mix with butter for an even coating.
Why rest the chicken after roasting?
Resting for 15-20 minutes lets juices redistribute throughout the meat. Skipping this step can result in dry, tough chicken.
Can I roast at a lower temperature for longer?
Not recommended for this method. The 425°F oven creates the crispy skin and seals in moisture. Lower temps won’t give the same results.

- Jollof Rice Sauce Recipe: West African Tomato and Spice Infusion - September 25, 2026
- Japanese Rice Soup Recipe: Umami-Rich Comfort in a Bowl - September 25, 2026
- Homemade Cream Of Rice Recipe: Silk-Smooth Breakfast in Minutes - September 25, 2026