
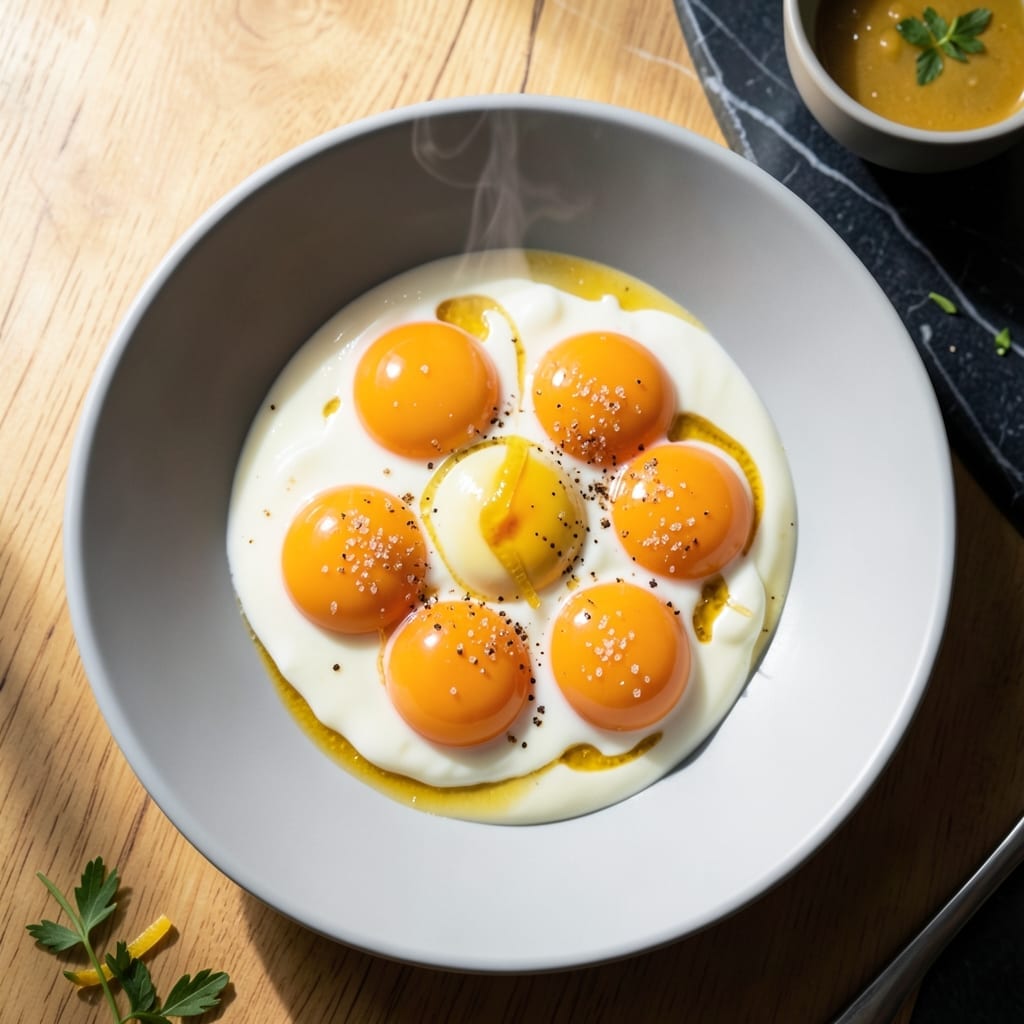
This custard recipe transforms simple egg yolks into a rich, velvety masterpiece that redefines home cooking. The process is straightforward yet yields results that rival any fine dining experience.
The key lies in gentle heat and constant attention, allowing the yolks to thicken gradually without curdling. A touch of sugar enhances their natural richness, while vanilla adds aromatic depth.
What emerges is a smooth, golden custard with a texture so delicate it melts on the tongue. The flavor is pure, unadulterated egg yolk goodness with just enough sweetness to balance the richness.
Serve chilled for a refreshing dessert or warm as a luxurious sauce. This dish proves that simplicity, when executed with care, creates extraordinary results.
Ingredients for Chicken Egg Yolk
These high-quality ingredients create a luxurious custard with minimal effort and maximum flavor.
| Ingredient | Amount | Notes |
|---|---|---|
| Large Egg Yolks 🥚 | 8 whole | Fresh, room temperature preferred |
| Granulated Sugar 🍚 | ½ cup | Fine grain for smooth texture |
| Whole Milk 🥛 | 2 cups | Full-fat for creaminess |
| Heavy Cream 🥛 | 1 cup | Cold, not ultra-pasteurized |
| Pure Vanilla Extract 🌿 | 2 tsp | High-quality for best flavor |
| Unsalted Butter 🧈 | 2 tbsp | Cut into small pieces |
| Salt 🧂 | ¼ tsp | Fine sea salt preferred |
| Ground Nutmeg 🌰 | 0.125 tsp | Freshly grated for intensity |
| Cornstarch 🌾 | 1 tbsp | For thickening stability |
| Cold Water 💧 | 2 tbsp | For cornstarch slurry |
The egg yolks are the foundation—fresh, high-quality eggs from pasture-raised chickens yield the richest color and flavor. Whole milk and heavy cream provide the necessary fat for that velvety texture. Look for organic dairy at Whole Foods or your local co-op for superior results. The vanilla extract should be pure, not imitation, for authentic aromatic depth.
No whole milk? Half-and-half works in a pinch (use 1.5 cups half-and-half plus 0.5 cup water). For a lighter version, 2% milk plus extra cream maintains richness. The cornstarch can be replaced with arrowroot powder at equal amounts. If avoiding dairy entirely, coconut milk (full-fat, canned) substitutes well for both milk and cream.
Custard keeps 3-4 days refrigerated in an airtight container. For best texture, press plastic wrap directly onto the surface to prevent a skin from forming. Do not freeze—the texture separates upon thawing. Serve chilled or gently reheated in a double boiler.
Why You’ll Love This Recipe
- One-Bowl Wonder: I just whisk the yolks, sugar, milk, and cream in one bowl—no fancy tools, no mess.
- Velvety Dream: The vanilla and heavy cream turn the egg yolks into this ridiculously smooth, rich custard.
- Brunch Superstar: Honestly, it’s my go-to for lazy Sunday brunches or when I need a crowd-pleasing dessert.
- Pantry MVP: Between us, I always have these ingredients on hand, so I can make it even on a whim.
Step-by-Step Instructions for Rich and Velvety Custard
This method ensures a silky-smooth texture with the perfect balance of sweetness and richness.
Step 1: Whisk Yolks and Sugar to Ribbon Stage
In a large mixing bowl, combine the 8 whole Large Egg Yolks and 0.5 cup Granulated Sugar. Using a hand mixer or whisk, beat vigorously for 3-4 minutes until the mixture turns pale yellow and thickens slightly.
You’re aiming for the ribbon stage—when you lift the whisk, the mixture should fall in a thick ribbon that holds its shape for a few seconds before dissolving. This step incorporates air, which gives the custard its light, velvety texture.
Step 2: Heat Dairy and Infuse Flavors
In a heavy saucepan, combine the 2 cups Whole Milk, 1 cup Heavy Cream, and 0.25 tsp Salt. Place over medium heat and warm until small bubbles form at the edges—do not boil.
Remove from heat and stir in the 2 tsp Pure Vanilla Extract and 0.125 tsp Ground Nutmeg. Let the mixture steep for 5 minutes to allow the flavors to meld. The dairy should be hot but not scalding when you proceed to the next step.
Step 3: Temper the Egg Mixture
Slowly pour the hot dairy mixture into the egg yolk mixture while whisking constantly. This tempering process prevents the eggs from curdling. Continue whisking until the mixture is smooth and fully combined.
Return the entire mixture to the saucepan. Add the 2 tbsp Unsalted Butter, cut into small pieces, and stir until melted. The mixture should now have a glossy appearance and a consistent pale yellow color.
Step 4: Thicken with Cornstarch Slurry
In a small bowl, mix the 1 tbsp Cornstarch with 2 tbsp Cold Water to create a smooth slurry. Stir this into the custard mixture in the saucepan.
Return the saucepan to medium-low heat and cook, stirring constantly with a wooden spoon or silicone spatula, for 5-7 minutes until the custard thickens enough to coat the back of the spoon. Do not let it boil, or the custard may curdle.
Step 5: Strain and Chill for Optimal Texture
Immediately strain the custard through a fine-mesh sieve into a clean bowl to remove any cooked bits of egg or cornstarch. This ensures a perfectly smooth texture.
Press plastic wrap directly onto the surface of the custard to prevent a skin from forming. Chill in the refrigerator for at least 4 hours, or until completely cold. The custard will continue to thicken as it cools, resulting in a rich, velvety finish.
Pro Tips For Making Chicken Egg Yolk
- Temper the Yolks: Slowly drizzle the hot milk into the yolk-sugar mixture while whisking constantly—my first batch scrambled when I dumped it all in at once.
- Use Room-Temp Eggs: Pull your eggs out 30 minutes before starting; cold yolks resist blending smoothly with sugar, leaving you with grainy custard.
- Skip Low-Fat Dairy: I learned this the hard way—whole milk and heavy cream are non-negotiable for that rich, velvety texture. Skim milk just won’t cut it.
- Strain the Mixture: After mixing, run it through a fine-mesh sieve to remove any stray bits of cooked egg or sugar lumps—sounds tedious, but it guarantees a silky finish.
Pro Cooking Tips for This Recipe
Tempering Technique
Always temper your yolks by slowly adding the hot dairy mixture while whisking constantly. This prevents curdling and ensures a smooth texture. I use a fine stream and keep whisking for at least 2 minutes to fully incorporate. 💡
Heat Control
Maintain medium-low heat during thickening to avoid scalding. The custard should coat the back of a spoon but never reach a boil. I recommend a heavy-bottomed saucepan for even heat distribution.
Slurry Integration
Mix your cornstarch slurry thoroughly before adding it to the custard. Stir constantly as it thickens to prevent lumps. The process takes about 5-7 minutes—patience is key here.
Straining for Perfection
Strain the finished custard through a fine-mesh sieve to remove any cooked bits. This extra step guarantees that silky-smooth texture we all love. I never skip this, even for quick batches.
Chilling Method
Press plastic wrap directly onto the custard surface before chilling to prevent a skin from forming. Refrigerate for at least 4 hours—the texture improves as it cools. 🔥
Tool Recommendations
A silicone spatula works best for stirring as it scrapes the pan cleanly. For whisking, I prefer a balloon whisk—it incorporates air beautifully. Both are kitchen essentials worth investing in.
Nutrition Facts
Frequently Asked Questions
Can I use only egg yolks for this?
Yes, this recipe is designed specifically for yolks only. The 8 egg yolks create the rich, velvety texture that defines this custard. Using whole eggs would change the consistency and flavor.
What if my custard curdles?
If curdling occurs, immediately remove from heat and whisk vigorously. For prevention, ensure slow tempering and maintain medium-low heat. Straining afterward can help smooth out minor lumps.
Can I make this ahead of time?
Prepare up to 2 days in advance. Store in an airtight container with plastic wrap pressed directly on the surface to prevent a skin from forming.
How do I know when it’s thick enough?
The custard is ready when it coats the back of a spoon and leaves a clean path when you run your finger through it. This typically takes 5-7 minutes of stirring.

- Jollof Rice Sauce Recipe: West African Tomato and Spice Infusion - September 25, 2026
- Japanese Rice Soup Recipe: Umami-Rich Comfort in a Bowl - September 25, 2026
- Homemade Cream Of Rice Recipe: Silk-Smooth Breakfast in Minutes - September 25, 2026