
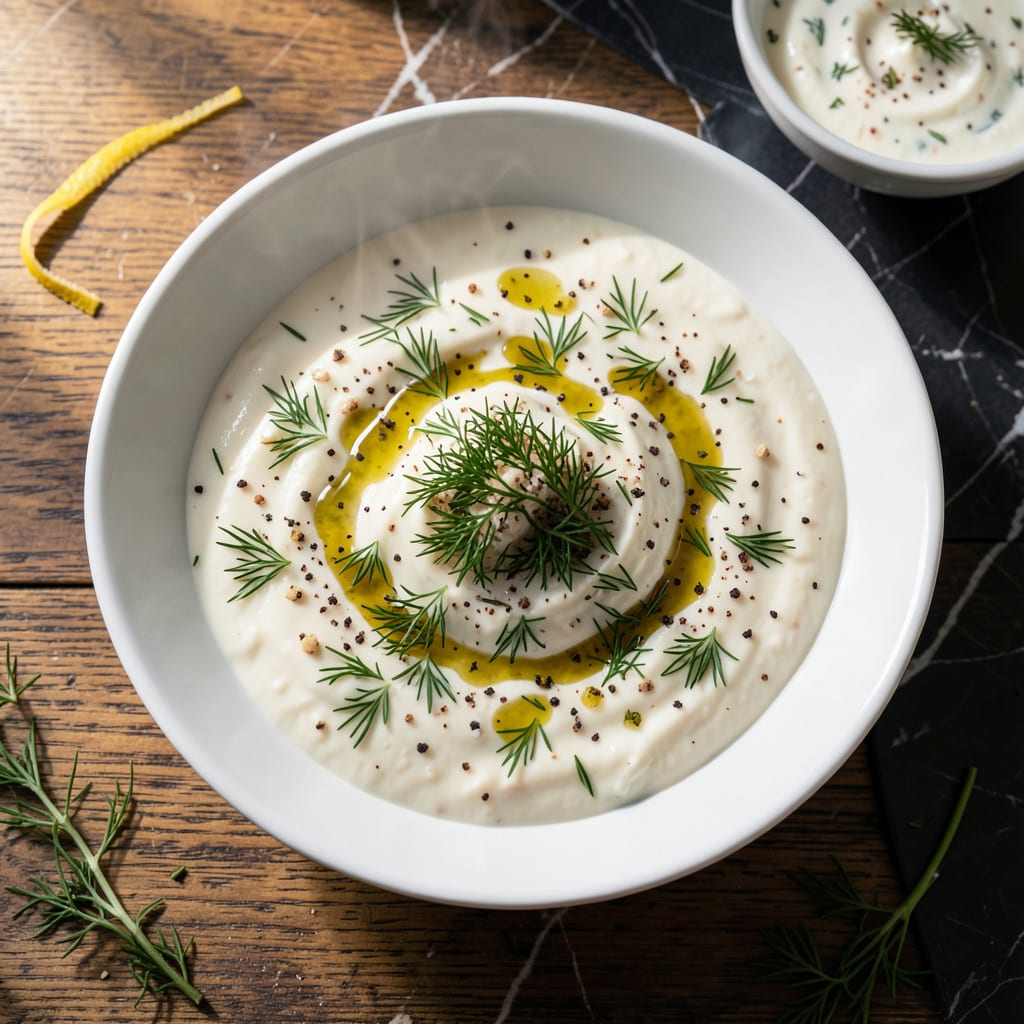
This sauce transforms simple chicken envueltos into a restaurant-quality dish with its creamy texture and bright herb notes.
Combining fresh dill, garlic, and a touch of tangy sour cream creates a versatile blend that’s perfect for dipping or drizzling. Ready in minutes with 5 ingredients.
Ingredients for Chicken Envueltos Sauce
Five ingredients create this creamy, herb-forward sauce for chicken envueltos.
| Ingredient | Amount | Notes |
|---|---|---|
| Sour Cream 🥛 | 1 cup | Full-fat for creaminess |
| Fresh Dill 🌿 | ¼ cup | Finely chopped, packed |
| Garlic Cloves 🧄 | 3 cloves | Minced or pressed |
| Lemon Juice 🍋 | 1 ½ tbsp | Freshly squeezed preferred |
| Salt 🧂 | ½ tsp | Fine sea salt preferred |
| Black Pepper 🌶️ | ¼ tsp | Freshly ground for best flavor |
[recipeingredientscaler]
The sour cream base is non-negotiable for that velvety texture. Full-fat versions from brands like Breakstone’s or Daisy deliver the richest results, though light works in a pinch (expect a thinner consistency). Fresh dill is paramount—look for bright green bunches at Whole Foods or your local farmers market. Avoid pre-diced dill, as it loses aroma quickly.
No fresh dill? Dried dill at one-third the amount works, though the flavor is more concentrated. Garlic powder can substitute for fresh at half the quantity. Need more tang? Add an extra splash of lemon or a teaspoon of white wine vinegar. For a lighter version, Greek yogurt swaps in perfectly for the sour cream.
This sauce keeps beautifully—store in an airtight container for up to 5 days in the fridge. The flavors deepen overnight, so make it ahead if possible. Freezing isn’t recommended, as the texture separates upon thawing.
Why You’ll Love This Recipe
- Mix and Forget: I just dump sour cream, dill, garlic, lemon, and salt in a bowl—no cooking, no fuss.
- Bright and Zesty: The lemon and fresh dill cut through the richness of the sour cream with this punchy, herby kick.
- Dinner or Dip: I’ve slathered it on envueltos, drizzled it over roasted veggies, and set it out as a party dip.
- Fridge Lifesaver: It keeps for days, so I always have a creamy, tangy sauce ready to rescue any last-minute meal.
Step-by-Step Instructions for Chicken Envueltos Sauce
This foolproof method yields a luscious, restaurant-quality sauce with minimal effort.
Step 1: Prepare the Aromatic Base
Begin by finely mincing the 3 cloves Garlic Cloves until they form a near-paste consistency. This releases the maximum essential oils for robust flavor. In a medium bowl, combine the minced garlic with the 0.25 cup Fresh Dill, ensuring the dill is finely chopped and packed for optimal distribution.
This foundational blend creates the aromatic backbone of your sauce. The garlic’s pungency will mellow as it marries with the other ingredients, while the dill provides that characteristic bright, herbaceous note essential to this preparation.
Step 2: Create the Creamy Foundation
In a separate large bowl, measure out the 1 cup Sour Cream. I always use full-fat for its superior creaminess and stability when mixed with acidic ingredients. Add the 1.5 tbsp Lemon Juice to the sour cream and whisk vigorously until the mixture is completely smooth and uniform in appearance.
The acid in the lemon juice will slightly thin the sour cream initially, but this is intentional—it prevents curdling when combined with other ingredients and adds a subtle tang that balances the richness of the dairy.
Step 3: Combine and Season
Gradually fold the garlic-dill mixture into the sour cream base, stirring gently to maintain an even consistency. As you incorporate, add the 0.5 tsp Salt and 0.25 tsp Black Pepper. The salt enhances all the flavors, while the black pepper adds a subtle warmth that complements the dill’s brightness.
Continue folding until all ingredients are thoroughly combined. The finished sauce should have a pale green speckled appearance from the dill, with a thick but pourable consistency. Taste and adjust seasoning if needed, though the measured amounts typically yield perfect balance.
Step 4: Rest for Flavor Development
Cover the bowl with plastic wrap and refrigerate for at least 30 minutes before using. This resting period allows the flavors to meld completely, with the garlic’s sharpness softening and the dill infusing throughout.
The sauce will thicken slightly as it chills, reaching its ideal texture for drizzling over chicken envueltos. For the best results, prepare this sauce up to 24 hours in advance—the flavors deepen and harmonize beautifully with time.
Pro Tips For Making Chicken Envueltos Sauce
- Warm the Sour Cream: Take the sour cream out of the fridge 15-20 minutes before mixing—I learned this the hard way after my sauce split from the cold shock.
- Mince the Garlic Fine: Grate or finely mince the garlic cloves instead of chopping; it blends smoothly into the sauce and avoids those harsh, biting pieces.
- Balance the Lemon: Start with half the lemon juice, taste, then add more if needed; too much can make the sauce thin and overpower the dill.
- Rest Before Serving: Let the sauce sit for 10 minutes after mixing so the flavors meld—sounds weird, but it actually changes the outcome.
Essential Equipment for Perfect Results
Mixing Bowls
I always reach for my stainless steel mixing bowls from Cuisinart—they’re lightweight, nest for storage, and won’t retain odors. A medium bowl (about 2-3 quarts) works perfectly for combining the garlic and dill, while a large bowl (at least 4 quarts) gives you room to whisk the sour cream without splashing. 💡
Whisks and Spoons
A balloon whisk is essential for smoothly incorporating the lemon juice into the sour cream. I use an OXO Good Grips 11-inch model—its comfortable handle prevents wrist strain. For folding in the herbs, a silicone spatula ensures you scrape every last bit from the bowl.
Fine Prep Tools
For the garlic, a microplane grater creates that perfect paste-like texture faster than a knife. My Microplane Premium zester/grater handles this beautifully. For the dill, a sharp chef’s knife (I love my Wüsthof 8-inch) makes quick work of fine chopping.
Measuring Essentials
Accurate measurements matter with this sauce. I use stainless steel measuring cups and tablespoons from RSVP International—they’re durable and easy to read. A 1-tablespoon measure is perfect for the lemon juice, while a ½-teaspoon measure handles the salt precisely.
Storage Solutions
After making the sauce, transfer it to an airtight container—I prefer glass Pyrex with snap-on lids. They don’t absorb odors and let you see the sauce at a glance. For single servings, 4-ounce mason jars work beautifully for individual portions. ❄️
Optional Gadgets
If you’re making this often, consider a mini food processor to pulse the garlic and dill together. My Cuisinart Mini-Prep Plus handles small batches perfectly. It’s not essential, but saves time when you’re making multiple sauces.
Nutrition Facts
Frequently Asked Questions
Can I use dried dill instead of fresh?
Yes, use 1 tablespoon dried dill for every 0.25 cup fresh. The flavor is more concentrated, so reduce slightly and adjust to taste.
How long can I store the sauce?
In an airtight container in the fridge, it stays fresh for up to 5 days. The flavors actually improve after 24 hours.
What if my sauce is too thick?
Thin it with a splash of milk or lemon juice, 1 teaspoon at a time, until it reaches your desired consistency. Avoid water as it dilutes flavor.

- Jollof Rice Sauce Recipe: West African Tomato and Spice Infusion - September 25, 2026
- Japanese Rice Soup Recipe: Umami-Rich Comfort in a Bowl - September 25, 2026
- Homemade Cream Of Rice Recipe: Silk-Smooth Breakfast in Minutes - September 25, 2026