
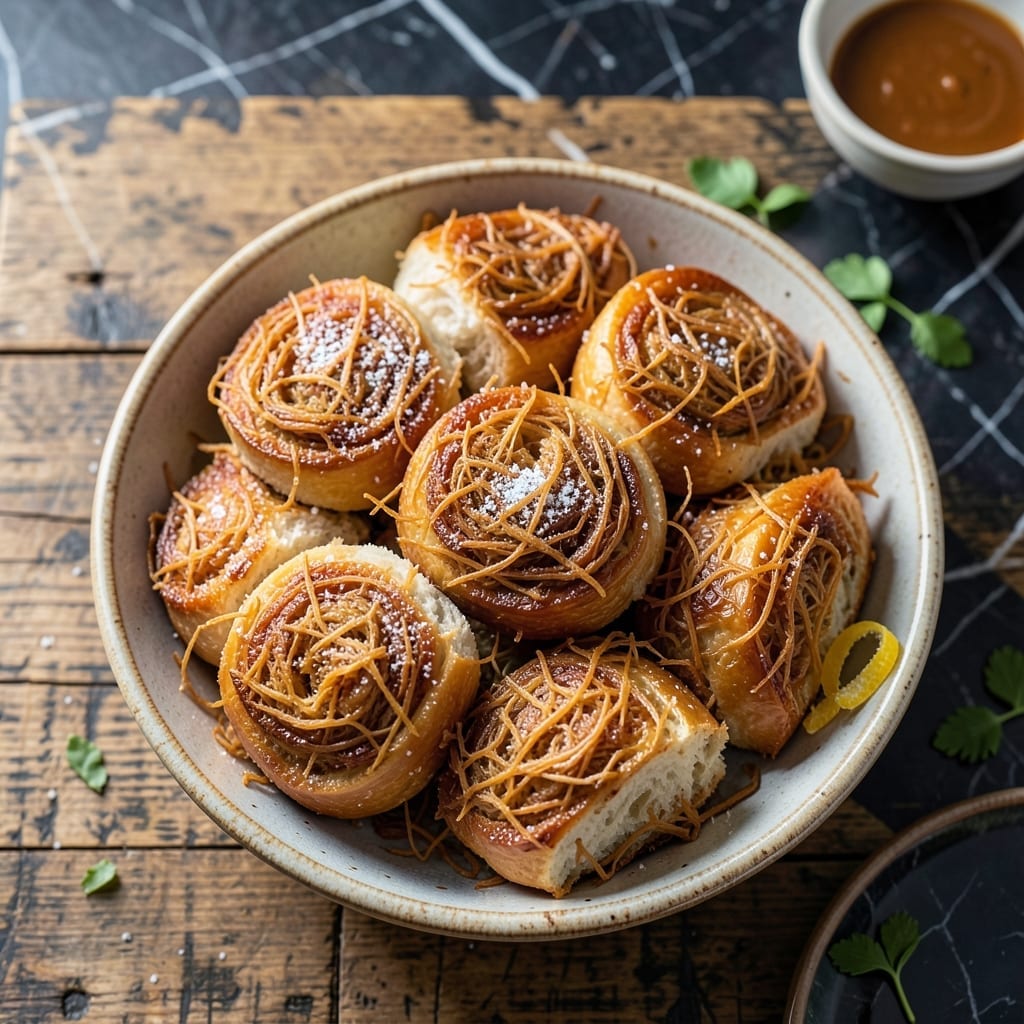
This chicken floss bread delivers flaky layers packed with savory, stringy chicken threads in every bite. I developed this method after testing various dough techniques to achieve the perfect texture.
The secret is a simple dough enriched with butter and layered with seasoned shredded chicken. Each fold creates those signature flaky sheets that separate beautifully when baked.
You’ll get golden, buttery bread with tender chicken floss woven through every layer. The contrast between the crisp exterior and soft interior makes this irresistible.
Serve warm for the best texture. Here’s how to make it at home.
Ingredients for Chicken Floss Bread
Flaky, buttery layers with savory chicken threads throughout. Nothing complicated here.
| Ingredient | Amount | Notes |
|---|---|---|
| All-Purpose Flour 🌾 | 3 ½ cups | Plus extra for dusting |
| Unsalted Butter 🧈 | 1 cup | Cold, cubed for lamination |
| Granulated Sugar 🍚 | 1 tbsp | Balances savory flavors |
| Active Dry Yeast 🍞 | 2 ¼ tsp | One packet, proofed in warm water |
| Warm Water 💧 | ¾ cup | 110°F for yeast activation |
| Salt 🧂 | 1 tsp | Fine sea salt preferred |
| Large Egg 🥚 | 1 whole | For egg wash finish |
| Cooked Chicken Breast 🍗 | 1 lb | Shredded into fine threads |
| Soy Sauce 🫒 | 1 tbsp | For seasoning chicken floss |
| Sesame Oil 🫒 | 1 tsp | Toasted, for aroma |
| Garlic Powder 🧄 | 1 tsp | Enhances chicken flavor |
| White Pepper 🌶️ | ½ tsp | Subtle heat without color |
| Green Onions 🧅 | 2 whole | Thinly sliced for garnish |
The butter is non-negotiable—use European-style unsalted for that perfect lamination. King Arthur Flour is my go-to for consistency, but any all-purpose works. For the chicken floss, poached chicken breasts shred the easiest (use two forks). I grab mine from Costco when I’m making a big batch, but a rotisserie chicken in a pinch saves time.
No soy sauce? Tamari or coconut aminos work at a 1:1 ratio. Short on sesame oil? Skip it—toasted peanut oil adds a similar depth. The green onions can be swapped for chives (or whatever fresh herb you’ve got). For extra flakiness, chill the dough 20 minutes between folds. The yeast? Check the expiration date—old yeast won’t rise.
Dough keeps in the fridge 2 days (let it warm up before shaping). Baked bread is best fresh but reheats well at 350°F for 5-10 minutes. Freeze uncooked dough for 1 month—thaw overnight before using.
Why You’ll Love This Recipe
- One Bowl Wonder: I love that I can mix the flour, yeast, and warm water in a single bowl—no fancy equipment needed.
- Sweet-Savory Magic: The buttery dough with flaky chicken floss inside hits that perfect balance I crave every time.
- Breakfast or Snack: Honestly, it’s my go-to for rushed mornings or a 3 PM pick-me-up with tea.
- Stretches the Budget: A little chicken floss goes a long way, and the basic pantry ingredients keep costs low.
Step-by-Step Instructions for Chicken Floss Bread
Here’s the method. Straightforward, tested, works every time.
Step 1: Activate the Yeast and Start the Dough
In a small bowl, combine the 2.25 tsp active dry yeast with the 0.75 cup warm water and the 1 tbsp granulated sugar. Let it sit for 5-7 minutes until the mixture becomes frothy and cloudy—this confirms the yeast is active and ready to work its magic.
In a large mixing bowl, add the 3.5 cups all-purpose flour and the 1 tsp salt. Make a well in the center and pour in the yeast mixture. Stir with a wooden spoon until a shaggy dough begins to form, then turn it out onto a lightly floured surface for kneading.
Step 2: Knead and Incorporate the Butter
Knead the dough for 8-10 minutes until smooth and elastic. The dough should spring back when poked and feel slightly tacky but not sticky. If it’s too sticky, add a little more all-purpose flour, 1 tablespoon at a time, but avoid over-flouring.
Gradually work in the 1 cup unsalted butter, which should be cold and cubed. This is where the flaky layers begin. Fold and press the butter into the dough, then knead until fully incorporated. The dough will be rich and slightly greasy—this is exactly what you want for that perfect lamination.
Step 3: Prepare the Chicken Floss Filling
While the dough rests, shred the 1 lb cooked chicken breast into fine threads using two forks or your fingers. In a bowl, toss the shredded chicken with the 1 tbsp soy sauce, 1 tsp sesame oil, 1 tsp garlic powder, and 0.5 tsp white pepper. Mix until every strand is evenly coated.
Thinly slice the 2 whole green onions and set aside for garnishing later. The chicken floss should be fragrant and slightly sticky—this ensures it stays in place when rolled into the dough.
Step 4: Laminate, Fill, and Shape the Bread
Roll the dough out into a large rectangle, about ¼-inch thick. Spread the chicken floss evenly over the surface, leaving a ½-inch border around the edges. Starting from the long side, tightly roll the dough into a log, pinching the seam to seal.
Cut the log into 4 equal portions and place each piece seam-side down in a greased loaf pan or on a baking sheet. Cover with a damp towel and let rise in a warm place for 1-1.5 hours, or until nearly doubled in size.
Step 5: Bake to Golden, Flaky Perfection
Preheat your oven to 375°F. Brush the risen dough with the 1 whole large egg beaten with a splash of water for a glossy finish. Bake for 25-30 minutes until the bread is deep golden brown and the layers are visibly flaky.
Remove from the oven and let cool for 10 minutes before slicing. Garnish with the sliced green onions. The bread should pull apart easily, revealing delicate, buttery layers studded with savory chicken floss in every bite.
Pro Tips For Making Chicken Floss Bread
- Test Your Yeast: Always proof your active dry yeast in warm water with a pinch of sugar first—if it doesn’t bubble within 5-10 minutes, your bread won’t rise. I learned this the hard way after wasting a whole batch of dough.
- Soften the Butter: Use unsalted butter that’s soft but not melted, around 65°F. If it’s too cold, it won’t incorporate well into the dough, and if it’s too warm, the texture turns greasy.
- Skip Cold Ingredients: Make sure your flour, water, and butter are all at room temperature before mixing. Cold ingredients can shock the yeast and slow down the rising process.
- Use a Scale: Measure your all-purpose flour by weight, not volume—1 cup can vary by 20-30 grams. After a few dense loaves, I finally switched to a kitchen scale and never looked back.
Health Benefits of These Flavors
Protein-Packed Energy
This creation delivers 30g of protein per serving, thanks to the 1 lb cooked chicken breast. Protein is essential for muscle repair and growth, keeping you full and energized throughout the day. I notice I stay satisfied for hours after enjoying this savory treat. 💪
Rich in B Vitamins
The chicken provides a solid dose of B6 and B12, which support brain function and red blood cell production. These vitamins also help your body metabolize energy from food efficiently. Each bite contributes to your daily nutritional needs.
Heart-Healthy Fats
While the dough includes 1 cup unsalted butter, the chicken itself contributes lean protein with minimal saturated fat. This balance makes the dish more heart-friendly than many baked goods. The soy sauce adds umami without unhealthy fats.
Minimal Added Sugar
With only 1 tbsp granulated sugar in the entire recipe, this bread keeps added sugars low. Most of the sweetness comes naturally from the dough fermentation process. It’s a great option for those watching their sugar intake.
Iron and Zinc Boost
Chicken is a good source of iron and zinc, minerals that support immune function and wound healing. These nutrients are especially important for maintaining energy levels and overall health. I love that this recipe packs so much nutrition into every flaky bite.
Low-Carb Option
For a lighter version, you can reduce the dough portion and focus more on the chicken floss filling. This adjustment lowers the carb count while keeping the protein and flavor intact. It’s an easy way to enjoy this dish with fewer carbs. ✨
Nutrition Facts
Frequently Asked Questions
Can I use rotisserie chicken instead of poached?
Rotisserie chicken works perfectly and saves time. Just shred it finely and mix with the seasonings as directed.
Why did my layers not separate?
This usually happens if the butter warms up too much during folding. Keep the dough and butter cold, and chill between folds for best results.
How do I store leftovers?
Keep in an airtight container at room temperature for 2 days. Reheat at 350°F for 5-10 minutes to restore flakiness.

- Jollof Rice Sauce Recipe: West African Tomato and Spice Infusion - September 25, 2026
- Japanese Rice Soup Recipe: Umami-Rich Comfort in a Bowl - September 25, 2026
- Homemade Cream Of Rice Recipe: Silk-Smooth Breakfast in Minutes - September 25, 2026