
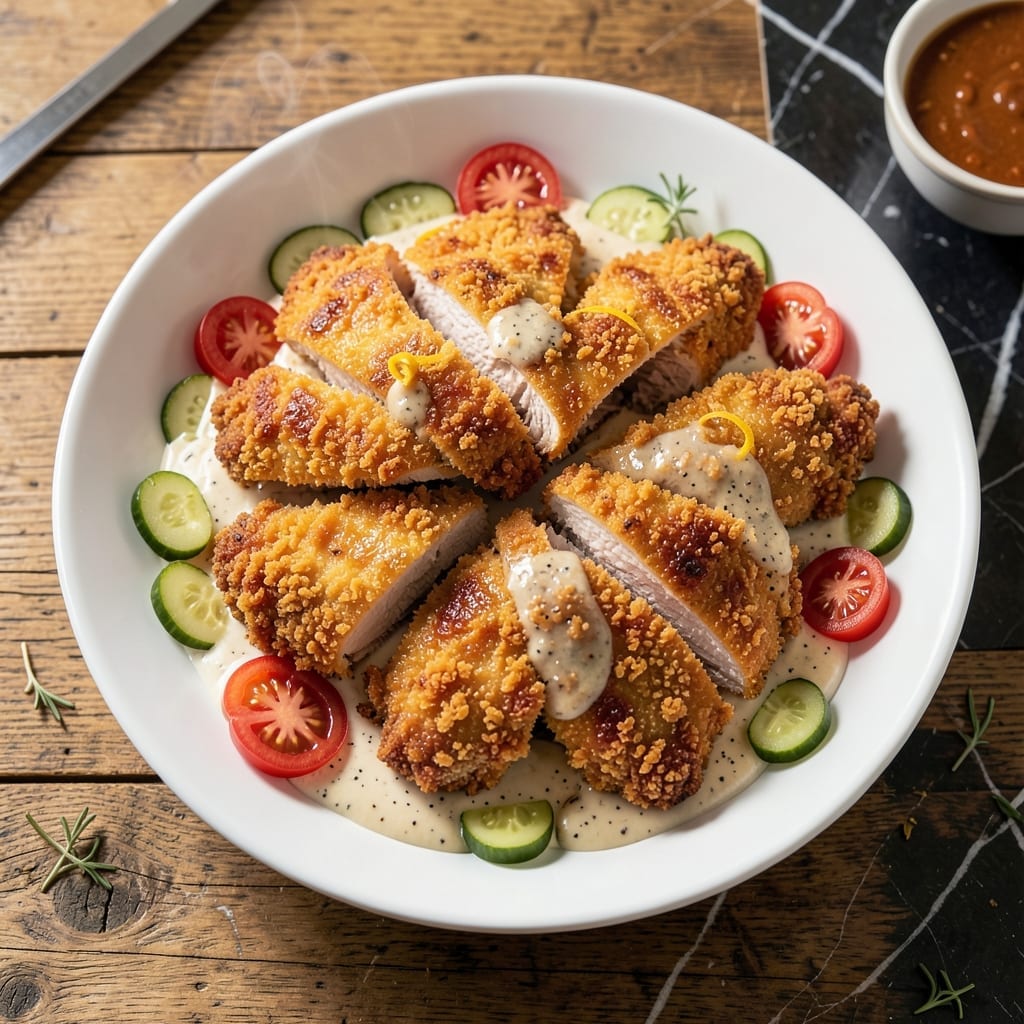
This chicken fried chicken delivers a crispy, golden coating that gives way to juicy meat in every bite. The secret lies in a buttermilk marinade that tenderizes the chicken while infusing rich flavor.
The breading process uses a double-dip method—flour, then egg wash, then flour again—for maximum crunch. Each piece is fried to a perfect golden brown, locking in moisture and creating that signature texture.
What results is a dish that satisfies the craving for comfort food with a satisfying crunch and tender interior. The buttermilk marinade ensures the chicken stays moist, even after frying.
Serve hot with mashed potatoes or as a sandwich for the ultimate Southern-style meal. Here’s how to make it perfectly every time.
Ingredients for Chicken Fried Chicken Breast
Crispy, golden perfection starts with just a dozen quality ingredients. Nothing complicated, everything essential.
| Ingredient | Amount | Notes |
|---|---|---|
| Chicken Breast 🍗 | 1 ½ lb | Boneless, skinless, pounded to 1/2-inch thickness |
| Buttermilk 🥛 | 2 cups | Full-fat for best tenderness |
| All-Purpose Flour 🌾 | 2 ½ cups | Divided for breading process |
| Large Eggs 🥚 | 2 whole | Beaten for egg wash |
| Salt 🧂 | 2 tsp | Diamond Crystal kosher preferred |
| Black Pepper 🌶️ | 1 tsp | Freshly ground for maximum flavor |
| Paprika 🌶️ | 1 tbsp | Sweet or smoked variety |
| Garlic Powder 🧄 | 1 tsp | Not garlic salt |
| Onion Powder 🧅 | 1 tsp | Freshly ground preferred |
| Cayenne Pepper 🔥 | ¼ tsp | Adjust for heat preference |
| Vegetable Oil 🫒 | 4 cups | For deep frying, high smoke point |
| Hot Sauce 🌶️ | 1 tbsp | Optional for marinade kick |
The chicken breast quality is non-negotiable. Air-chilled, all-natural from Whole Foods or Costco yields superior texture. Pound to uniform thickness for even cooking—those pre-sliced cutlets save time but often lack the moisture retention of whole breasts. Buttermilk should be full-fat (trust me on this) for the most tenderizing effect. The flour must be all-purpose; cake flour lacks the structure for proper crisp.
No buttermilk? Whole milk plus 1 tbsp vinegar per cup works in a pinch. For gluten-free breading, rice flour or cornstarch at a 1:1 ratio delivers comparable crunch. Fresh eggs are ideal, but aquafaba (3 tbsp per egg) makes this vegan-adaptable. The spices can be adjusted—smoked paprika adds depth if you’ve got it. Skip the cayenne entirely if serving heat-sensitive palates.
Marinate the chicken 4-12 hours for maximum tenderness. Fried chicken stays crisp in a 200°F oven for 30 minutes if holding. Leftovers? They’ll keep 3-4 days refrigerated, though the coating softens. Freeze uncooked breaded pieces on a tray before bagging for 1 month storage.
Why You’ll Love This Recipe
- I’ll be real: chicken breast is affordable, and this recipe stretches it into a meal that feels way more indulgent than the cost.
- One Pan Magic: I love that I only need a skillet, a bowl for the buttermilk soak, and one plate for the flour—no fancy equipment, just straight to crispy perfection.
- That Buttermilk Bite: Honestly, the tangy buttermilk marinade makes the chicken so juicy inside while the flour crust gets that golden crunch.
- Crowd Pleaser: Between us, this is my go-to for Sunday supper, game day snacks, or even a fancy-ish weeknight dinner that feels like a treat.
Step-by-Step Instructions for Chicken Fried Chicken Breast
Master the technique for achieving a golden crust while preserving the moisture within.
Step 1: Marinate the Chicken in Buttermilk
Begin by pounding the 1.5 lb chicken breast to an even ½-inch thickness using a meat mallet. This ensures even cooking and prevents dry spots in the final product. Place the pounded chicken in a large bowl.
Pour the 2 cups buttermilk over the chicken, then add the 1 tbsp hot sauce. The buttermilk’s acidity tenderizes the meat while the hot sauce adds subtle depth. Ensure each piece is fully submerged. Cover and refrigerate for at least 4 hours, or ideally overnight for maximum flavor penetration and juiciness.
Step 2: Prepare the Seasoned Flour Dredge
In a shallow dish, combine 2 cups all-purpose flour with the 2 tsp salt, 1 tsp black pepper, 1 tbsp paprika, 1 tsp garlic powder, 1 tsp onion powder, and 0.25 tsp cayenne pepper. Whisk thoroughly to distribute the seasonings evenly throughout the flour. This blend creates the signature flavor profile and golden color.
Reserve the remaining 0.5 cup all-purpose flour for later use in the breading process. The division ensures proper consistency at each stage—too much flour in the initial dredge can create a gummy coating rather than a crisp one.
Step 3: Create the Breading Station and Coat
Set up a breading station with three shallow dishes. Place the seasoned flour in the first, beat the 2 whole large eggs in the second, and add the reserved 0.5 cup all-purpose flour to the third. This three-step process guarantees a thick, craggy crust that stays put during frying.
Remove the chicken from the buttermilk, letting any excess drip off. Dredge each piece in the seasoned flour, pressing firmly to adhere. Shake off any loose flour, then dip in the beaten eggs. Finally, coat in the plain flour. Place the breaded chicken on a wire rack and let it rest for 10 minutes—this helps the coating set before frying.
Step 4: Deep-Fry to Golden Perfection
Heat the 4 cups vegetable oil in a deep, heavy-bottomed pot or Dutch oven over medium-high heat to 350°F. Use a deep-fry thermometer for accuracy—oil that’s too cool will create a greasy coating, while oil that’s too hot will burn the outside before the inside cooks.
Carefully lower the breaded chicken into the hot oil, working in batches to avoid overcrowding. Fry for 6-8 minutes per side until the coating is deep golden brown and the internal temperature reaches 165°F. The crust should be crisp and audibly crackling when removed. Drain on a wire rack set over a paper towel-lined tray to maintain crispiness.
Pro Tips For Making Chicken Fried Chicken Breast
- Pound the Breasts: Use a meat mallet to pound the chicken breasts to an even 1/2-inch thickness—I learned this the hard way after cooking thick pieces that stayed raw inside while the coating burned.
- Brine First: Soak the chicken in salted buttermilk for at least 2 hours, or overnight if you have time. Sounds weird, but it works: the meat stays juicy even after frying.
- Double Dredge: Dip the chicken in flour, then egg, then flour again. After burning three batches, I finally figured out this is the only way to get that thick, craggy crust that actually stays put.
- Rest Before Frying: Let the dredged chicken rest on a wire rack for 10 minutes before frying—my grandmother swore by this, and she was right: it helps the coating adhere better and prevents flaking.
Essential Equipment for This Recipe
Deep Fryer Setup
For home cooks, I recommend a 5-6 quart Dutch oven like Lodge Enameled Cast Iron for even heat distribution. Its heavy base prevents hot spots that can burn your breading. Fill it no more than ½ full with oil to allow room for displacement when adding chicken. 🔥
Temperature Control
A deep-fry thermometer is non-negotiable—I use the CDN ProAccurate for its quick response time. Maintain oil at 350°F throughout frying. Any lower and you’ll get greasy coating; higher risks burning before the chicken cooks through.
Breading Station
Use three shallow glass pie plates for your flour, egg wash, and final coat. The wide surface makes dredging easier. I keep a bench scraper nearby to clean my work surface between batches—it’s a game-changer for keeping your kitchen tidy.
Draining Solution
A wire cooling rack set over a baking sheet is ideal for draining. This setup allows air circulation on all sides, preventing the underside from getting soggy. Line the baking sheet with parchment paper for easy cleanup afterward.
Safety Essentials
Always keep a fire extinguisher rated for grease fires nearby—never use water on a grease fire. I also recommend long heat-resistant gloves and a splatter screen to protect against hot oil splashes during frying.
Optional Upgrades
For serious frying, consider a countertop deep fryer like the Cuisinart CDF-200 for precise temperature control. Its built-in filter system makes oil reuse simpler between batches. A Spider strainer is perfect for safely lowering and removing chicken from hot oil.
Nutrition Facts
Frequently Asked Questions
Can I use chicken tenders instead of whole breasts?
Yes, chicken tenders work perfectly and cook faster. Reduce frying time to 4-5 minutes per side since they’re thinner. Pound them to ½-inch thickness for even cooking.
Why did my breading fall off during frying?
This usually happens if the chicken wasn’t dry before dredging or didn’t rest after breading. Pat pieces dry after marinating and let breaded chicken rest for 10 minutes before frying.
What oil works best for frying?
Use oils with a high smoke point like vegetable, peanut, or canola. Maintain oil at 350°F throughout. Avoid olive oil as it can burn at frying temperatures.
How do I keep it crispy after cooking?
Drain on a wire rack, not paper towels, to prevent steam from softening the crust. Keep warm in a 200°F oven for up to 30 minutes if needed.

- Jollof Rice Sauce Recipe: West African Tomato and Spice Infusion - September 25, 2026
- Japanese Rice Soup Recipe: Umami-Rich Comfort in a Bowl - September 25, 2026
- Homemade Cream Of Rice Recipe: Silk-Smooth Breakfast in Minutes - September 25, 2026