
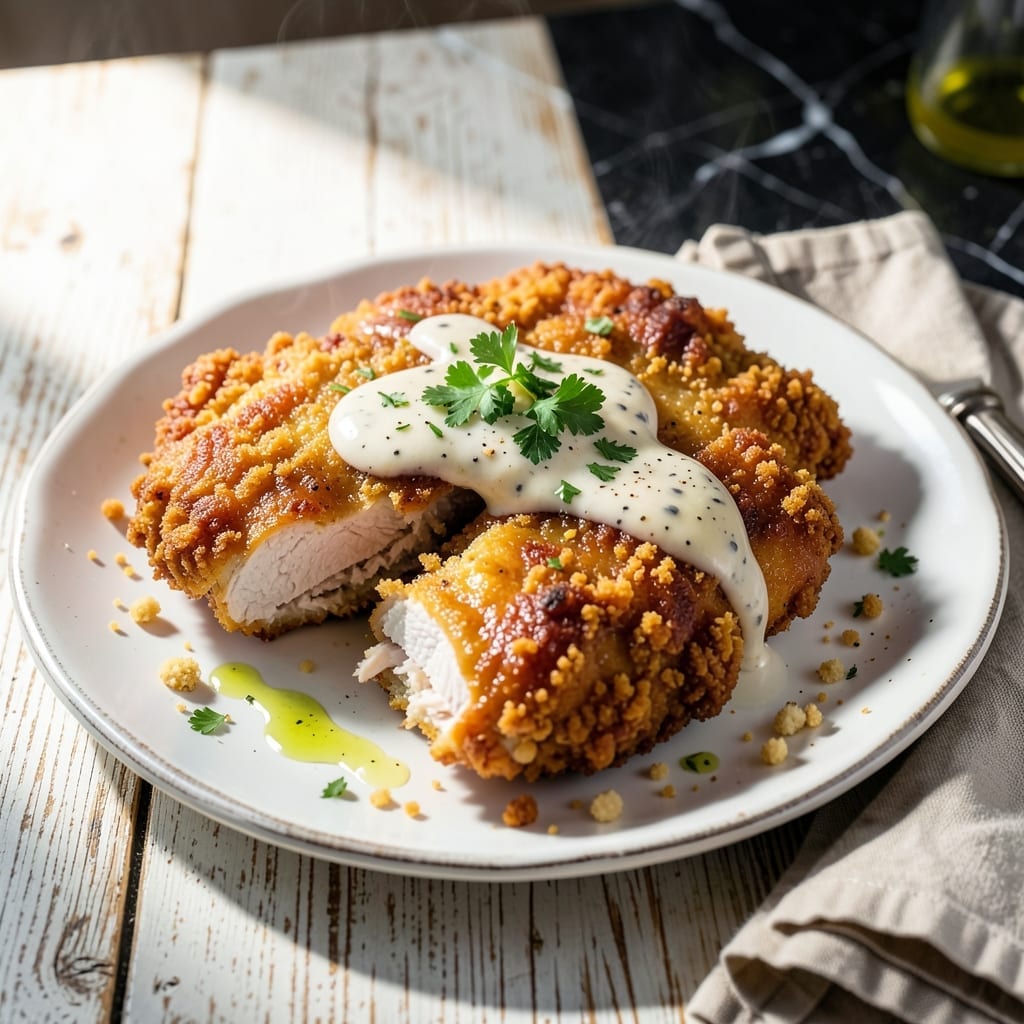
There’s something timeless about golden, crispy cutlets served with rich country gravy. This dish brings Southern comfort to any dinner table with its perfect balance of textures and flavors.
I developed this method after testing countless variations to achieve that ideal crust—thick, crunchy, and full of seasoned flavor. The secret is in the double-dredging process and maintaining the right oil temperature throughout cooking.
The country gravy ties everything together, creating a creamy, pepper-flecked sauce that’s perfect for smothering. Each bite delivers tender chicken encased in that signature crispy coating, with gravy that soaks into every ridge and crevice.
Serve with mashed potatoes and green beans for a complete meal. Here’s how to make this classic right in your own kitchen.
Ingredients for Chicken Fried Chicken
Pantry staples and fresh chicken. Nothing fancy, just Southern comfort on a plate.
| Ingredient | Amount | Notes |
|---|---|---|
| Chicken Breast Cutlets 🍗 | 1 ½ lb | Boneless, skinless, pounded to 1/4-inch thickness |
| All-Purpose Flour 🌾 | 2 cups | Divided for dredging and gravy |
| Large Eggs 🥚 | 2 whole | Beaten for egg wash |
| Whole Milk 🥛 | ½ cup | For egg wash mixture |
| Kosher Salt 🧂 | 1 ½ tsp | Diamond Crystal preferred |
| Black Pepper 🌶️ | 1 tsp | Freshly ground for best flavor |
| Paprika 🌶️ | 1 tsp | Sweet or smoked variety |
| Garlic Powder 🧄 | 1 tsp | Not garlic salt |
| Onion Powder 🧅 | 1 tsp | Fine ground preferred |
| Vegetable Oil 🫒 | 1 ½ cups | For frying, high smoke point |
| Whole Milk 🥛 | 2 cups | For country gravy |
| Chicken Broth 🍲 | 1 cup | Low-sodium preferred |
| All-Purpose Flour 🌾 | ¼ cup | For gravy roux |
| Black Pepper 🌶️ | 1 tbsp | For gravy, freshly cracked |
The chicken is the star—boneless, skinless breasts pounded thin are non-negotiable for even cooking and that perfect crisp. Costco or Sam’s Club sell family packs that work great. For the flour, White Lily if you’re going for authenticity (it’s what Southern grandmas use), but King Arthur all-purpose works just fine. The seasonings are simple—just make sure your paprika isn’t ancient (sniff test: if it smells like nothing, it’s time to replace).
No buttermilk for the wash? Whole milk with a tablespoon of vinegar works in a pinch. Want extra crunch? Swap half the flour for crushed cornflakes in the second dredge. For the gravy, 2% milk can replace whole if needed (just add a pat of butter to compensate). If you’re out of chicken broth, bouillon cubes dissolved in hot water saves the day. The pepper in the gravy is key—don’t skimp.
Fry in batches to keep the oil hot—350°F to 375°F is the sweet spot. Leftovers? Keep the chicken and gravy separate. They’ll stay 3-4 days in the fridge, but honestly, this is best eaten fresh. To reheat, oven at 350°F for 10-15 minutes beats the microwave every time (keeps the crust crisp).
Why You’ll Love This Recipe
- One Pan Wonder: I love that everything comes together with just a few bowls and a skillet—no complicated setup.
- Crispy Perfection: That golden crust from the flour and egg wash? It shatters just right with every bite.
- Family Approved: I’ve served this for weeknight dinners and Sunday suppers—always a hit with kids and adults alike.
- Budget Friendly: Chicken breast cutlets stretch far, and the ingredients are pantry staples I always have on hand.
Step-by-Step Instructions for Chicken Fried Chicken
Here’s the method that delivers perfectly crispy cutlets with rich country gravy every time.
Step 1: Season and Dredge the Chicken
In a shallow dish, combine the 2 cups All-Purpose Flour, 1.5 tsp Kosher Salt, 1 tsp Black Pepper, 1 tsp Paprika, 1 tsp Garlic Powder, and 1 tsp Onion Powder. I whisk this vigorously to ensure the spices distribute evenly throughout the flour.
Pat the 1.5 lb Chicken Breast Cutlets completely dry with paper towels—this is non-negotiable for crispy results. Dredge each piece in the seasoned flour, pressing firmly so it adheres well. Shake off any excess. This first coating creates a base that helps the egg wash stick better.
Step 2: Dip and Double-Coat for Extra Crunch
In another shallow dish, beat the 2 whole Large Eggs with the 0.5 cup Whole Milk until fully combined. Dip each floured cutlet into the egg mixture, letting any excess drip off. Then return it to the seasoned flour for a second coating.
This double-dredging technique is what gives you that signature shatteringly crisp crust. Press the cutlet into the flour again, then shake off the excess. Place the coated cutlets on a wire rack while you heat the oil—this prevents the crust from getting soggy before frying.
Step 3: Fry to Golden Perfection
Heat the 1.5 cups Vegetable Oil in a large, heavy skillet over medium-high heat until it reaches 350-365°F. To test, drop a pinch of flour into the oil—if it sizzles immediately, it’s ready. Carefully place the cutlets in the hot oil, being careful not to crowd the pan.
Fry for 4-5 minutes per side until they’re deep golden brown and the internal temperature reaches 165°F. The crust should be crisp enough that it audibly crunches when you press it with tongs. Transfer the fried cutlets to a wire rack set over a paper towel-lined tray to drain.
Step 4: Make the Country Gravy
Carefully pour off all but ¼ cup of the frying oil from the skillet. Place it over medium heat and whisk in the 0.25 cup All-Purpose Flour. Cook for 1-2 minutes, stirring constantly, until the mixture turns a light golden color—this creates a roux that will thicken your gravy.
Gradually whisk in the 2 cups Whole Milk and 1 cup Chicken Broth, then add the 1 tbsp Black Pepper. Continue whisking until the gravy is smooth and thick enough to coat the back of a spoon, about 5-7 minutes. Taste and adjust seasoning if needed.
Step 5: Serve Immediately
Spoon the hot gravy over the crispy cutlets just before serving. The contrast between the peppery, creamy gravy and the crunchy crust is what makes this dish special. I always serve this with mashed potatoes to soak up every last bit of that rich country gravy.
Work quickly here—the cutlets are best served immediately while they’re still at their crispiest. If you need to hold them, place them on a wire rack in a 200°F oven for up to 15 minutes, but they’ll lose some of their crunch.
Pro Tips For Making Chicken Fried Chicken
- Pound the Cutlets: Use a meat mallet to pound the chicken breasts to an even 1/2-inch thickness—this guarantees they cook through at the same rate and stay tender instead of drying out.
- Rest the Coated Chicken: After dredging in flour and egg wash, let the cutlets rest for 10 minutes before frying. The coating adheres better and forms a crisper crust.
- Skip Cold Chicken: Let the cutlets sit at room temperature for 15 minutes before cooking. Cold chicken straight from the fridge lowers the oil temp too much and leads to greasy breading.
- Double-Dip for Crisp: For extra crunch, repeat the flour-egg-flour dredge on each piece. It adds a minute to prep but creates that signature thick, shatteringly crisp crust.
Make-Ahead Tips for This chicken fried chicken
Prep Ahead Strategy
You can prep the chicken the night before by pounding, seasoning, and completing the first flour dredge. Store the floured cutlets in an airtight container in the fridge. This actually improves the crust’s adhesion. I’ve found this step saves 20-30 minutes on cooking day. ⏰
Gravy Base Prep
Mix the dry gravy ingredients (0.25 cup flour and 1 tbsp black pepper) in a small bowl. Keep the 2 cups whole milk and 1 cup chicken broth measured and ready in the fridge. This way, you can start the gravy immediately after frying.
Morning Assembly
In the morning, beat the 2 eggs with 0.5 cup milk and keep it chilled. When ready to cook, complete the double-dredge process. The cold egg wash helps create an extra crispy crust. I always let the coated chicken rest for 10 minutes before frying.
Oil Temperature Trick
Set up your frying station in advance. Place a deep-fry thermometer in the skillet with 1.5 cups vegetable oil. Preheating the oil while you finish coating the chicken ensures it reaches 350-365°F by the time you’re ready to fry.
Reheating Success
For leftovers, store chicken and gravy separately in the fridge for up to 3 days. Reheat chicken on a wire rack in a 375°F oven for 10-12 minutes to restore crispness, then warm the gravy on the stovetop. This method works surprisingly well. 💪
Nutrition Facts
Frequently Asked Questions
What’s the best oil for frying?
Use vegetable oil or peanut oil for best results. Their high smoke points (400°F+) handle the 350-365°F needed for crispy results. Avoid olive oil—it burns at these temps.
Can I use chicken thighs instead of breasts?
Yes! Thighs stay juicier and their higher fat content creates extra crispiness. Pound them to 1/4-inch thickness and cook to 175°F internal temp. They may need 1-2 minutes longer per side.
Why did my gravy turn out lumpy?
Whisk constantly while adding liquid to the roux. If lumps form, strain through a fine-mesh sieve. For prevention, ensure the roux is smooth before adding milk and chicken broth.
How do I keep the coating from falling off?
Pat chicken completely dry before dredging. Let the double-coated pieces rest 10 minutes before frying so the coating adheres. Use medium-high heat to avoid excessive bubbling.

- Jollof Rice Sauce Recipe: West African Tomato and Spice Infusion - September 25, 2026
- Japanese Rice Soup Recipe: Umami-Rich Comfort in a Bowl - September 25, 2026
- Homemade Cream Of Rice Recipe: Silk-Smooth Breakfast in Minutes - September 25, 2026