
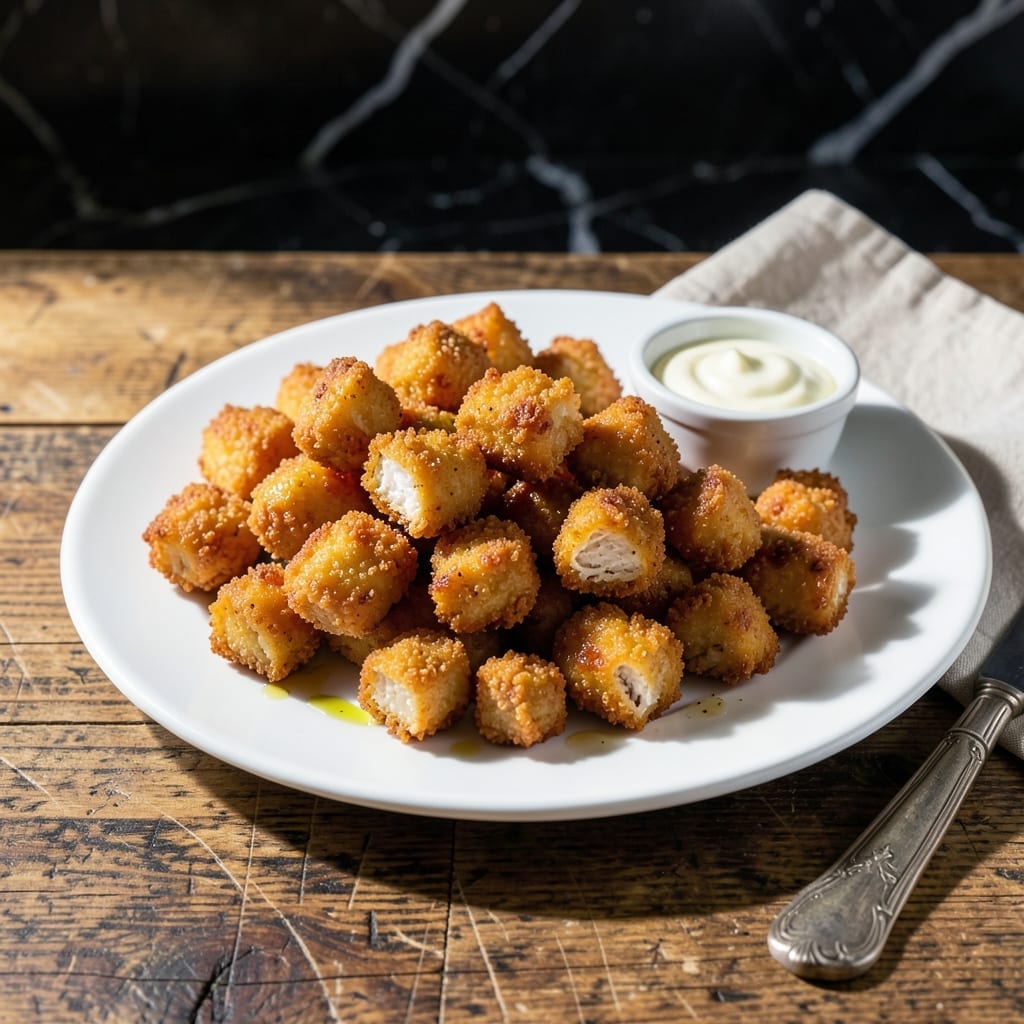
There’s an art to achieving crispy golden chicken with a juicy center, and this method delivers every time. No shortcuts, just precise technique.
I developed this recipe after years of testing batter consistencies and frying temperatures. The key is maintaining oil temperature between 350-375°F to ensure even cooking without greasiness.
Each bite offers a perfect contrast: shatteringly crispy exterior giving way to tender, juicy chicken inside. The seasoned coating adds just the right amount of flavor.
Serve hot with lemon wedges or your favorite dipping sauce. The results speak for themselves.
Ingredients for Chicken Fritta
Precise ingredients deliver shatteringly crispy results with juicy centers every single time.
| Ingredient | Amount | Notes |
|---|---|---|
| Boneless Skinless Chicken Breasts 🍗 | 1 ½ lb | Cut into 1-inch pieces |
| All-Purpose Flour 🌾 | 1 ½ cups | For dredging chicken |
| Cornstarch 🌾 | ½ cup | For extra crispiness |
| Large Eggs 🥚 | 2 whole | Beaten for batter |
| Whole Milk 🥛 | ½ cup | For tender batter |
| Garlic Powder 🧄 | 1 tbsp | For seasoning coating |
| Onion Powder 🧅 | 1 tbsp | For depth of flavor |
| Paprika 🌶️ | 1 tbsp | Sweet or smoked variety |
| Salt 🧂 | 1 tsp | Kosher or sea salt preferred |
| Black Pepper 🌶️ | ½ tsp | Freshly ground preferred |
| Vegetable Oil 🫒 | 4 cups | For deep frying |
| Dried Parsley 🌿 | 1 tbsp | For garnish |
| Lemon Wedges 🍋 | 4 pieces | For serving |
The chicken quality is non-negotiable for optimal texture. Boneless, skinless chicken breasts from Whole Foods or a trusted butcher ensure consistent size and freshness. Uniform 1-inch pieces guarantee even cooking. For the vegetable oil, peanut oil offers superior heat tolerance (500°F smoke point), but standard vegetable oil performs adequately at the required 350-375°F range.
Substitutions require careful consideration. Chicken thighs can replace breasts but require adjusted cooking time due to higher fat content. For a gluten-free version, swap all-purpose flour with rice flour or cornstarch at one-to-one ratio. Buttermilk can replace whole milk for added tang, though the batter may thicken slightly. Avoid pre-ground spices—they lose potency faster.
Prepared chicken maintains crispness for 1-2 hours when kept warm in an oven. Store leftovers in an airtight container for up to 3 days—reheat in an oven or air fryer to revive texture. The seasoning blend can be pre-mixed and stored for 1 month in a cool, dark place.
Why You’ll Love This Recipe
- I’ll be real: I make extra just so I can sneak a piece cold from the fridge the next day.
- 20-Minute Meal: I can get this from raw chicken to golden fritta faster than ordering takeout.
- Crispy Outside, Juicy Inside: The cornstarch in the batter gives that shatter-crisp shell while keeping the chicken impossibly tender.
- Family Approved: Honestly, it’s the only chicken dish my picky nephew asks for by name.
Step-by-Step Instructions for Chicken Fritta
Master this professional technique for achieving crispy golden exteriors with tender, juicy centers every time.
Step 1: Prepare and Season the Chicken
Begin by cutting the 1.5 lb boneless skinless chicken breasts into uniform 1-inch pieces. Consistency in size ensures even cooking and prevents smaller pieces from over-browning while larger ones remain undercooked.
Pat the chicken dry thoroughly with paper towels. This critical step removes excess moisture that would otherwise cause the coating to slip off during frying. I always take an extra moment here—it makes a noticeable difference in the final texture.
Step 2: Create the Dredging Station
In a shallow dish, combine the 1.5 cups all-purpose flour, 0.5 cup cornstarch, 1 tbsp garlic powder, 1 tbsp onion powder, 1 tbsp paprika, 1 tsp salt, and 0.5 tsp black pepper. Whisk until fully incorporated. The cornstarch is the secret to that extra-crispy texture.
In a separate bowl, beat the 2 whole large eggs with the 0.5 cup whole milk until smooth. This egg wash acts as the glue that helps the flour mixture adhere to the chicken, creating that essential protective crust that locks in juices.
Step 3: Bread and Rest the Chicken
Working in batches, dredge each piece of chicken in the flour mixture, pressing gently to ensure full coverage. Shake off any excess—thick clumps will burn before the chicken cooks through. Then dip into the egg wash, allowing any excess to drip off.
Return each piece to the flour mixture for a second coating. Place the breaded chicken on a wire rack set over a baking sheet. Let it rest for 10 minutes—this allows the coating to set, preventing it from falling off during the frying process.
Step 4: Fry to Golden Perfection
Heat the 4 cups vegetable oil in a deep, heavy-bottomed pot to 350°F. Use a thermometer for accuracy—oil that’s too cool will create greasy results, while oil that’s too hot will burn the exterior before the interior cooks.
Fry the chicken in batches to avoid crowding the pot, which would lower the oil temperature. Cook for 4-5 minutes until golden brown and the internal temperature reaches 165°F. The pieces should float and sizzle steadily when first added.
Transfer to a wire rack or paper towels to drain. The double-coating technique ensures the exterior remains crisp even after draining, while the interior stays remarkably juicy.
Step 5: Serve Immediately with Garnishes
Sprinkle the hot chicken with 1 tbsp dried parsley while it’s still glistening from the fryer. The parsley adds a touch of color and subtle herbal note that complements the rich flavors.
Serve immediately with the 4 pieces lemon wedges on the side. The acidity from the lemon cuts through the richness and enhances the juiciness of the chicken. These bites are best enjoyed fresh from the fryer when the contrast between the crispy exterior and tender interior is most pronounced.
Pro Tips For Making Chicken Fritta
- Pound the Chicken: Use a meat mallet to evenly flatten the breasts to 1/2-inch thickness—this guarantees even cooking and prevents dry, chewy edges.
- Chill the Dredge: After coating the chicken in flour, egg, and cornstarch, let it rest in the fridge for 10 minutes; the coating clings better and fries crispier.
- Skip the Overcrowding: Fry in batches with at least an inch of space between pieces, or the oil temperature drops and you’ll end up with soggy, greasy chicken.
- Use Cold Milk: Whole milk straight from the fridge in the egg wash creates a thicker, stickier batter that holds the breading like glue—I learned this the hard way after too many bare spots.
Essential Equipment for This Dish
Deep Fryer Setup
For consistent results, I recommend a 5-quart Dutch oven like Lodge for even heat distribution. The heavy base prevents hot spots that can burn your coating. Fill it with 4 cups oil, leaving at least 2 inches of space at the top to prevent dangerous overflow when adding chicken.
Temperature Control
A deep-fry thermometer is non-negotiable for precision—I use Taylor’s for its accuracy. Clip it to the pot side and monitor constantly, as oil temperature drops when you add cold chicken. Adjust your burner to maintain 350-375°F throughout cooking.
Draining Station
Set up a wire rack over a baking sheet for draining. This allows air circulation on all sides, keeping the coating crispy while excess oil drips away. Avoid paper towels directly under the rack—they can create steam that makes the bottom soggy. 🔥
Tongs for Safety
Use 12-inch stainless steel tongs with a locking mechanism for safe handling. The length keeps your hands away from hot oil splatter. I prefer OXO’s for their comfortable grip and durability during long frying sessions.
Cooling Rack
After frying, transfer to a cooling rack to maintain crispiness. A stainless steel rack won’t warp under heat. Keep it near your frying station for efficiency—every second counts when you’re working with hot oil.
Cleanup Tools
Have a silicone brush and paper towels ready for quick cleanup between batches. I keep a metal strainer nearby to skim any stray batter bits from the oil, which can burn and affect flavor. 💡
Nutrition Facts
Frequently Asked Questions
What oil works best for frying?
Use oils with high smoke points like vegetable, peanut, or canola. Peanut oil (500°F smoke point) gives the cleanest flavor. Avoid olive oil—it burns at frying temps.
How do I keep the coating from falling off?
Pat chicken completely dry before dredging and let breaded pieces rest 10 minutes before frying. This helps the coating adhere properly during cooking.
Can I bake instead of fry?
Yes, but texture differs. Bake at 400°F for 15-20 minutes on a wire rack. The coating won’t be as crispy, but it’s a healthier alternative.
Why did my fritta turn out greasy?
Oil temperature was likely too low. Maintain 350-375°F and fry in small batches to prevent temperature drops. Greasy results mean the oil wasn’t hot enough.

- Soupy Rice Recipe: Broth-Soaked Grains With Rustic Depth - September 25, 2026
- Rice Paper Pancakes Recipe: Crispy Vietnamese Breakfast Delight - September 25, 2026
- Rice A Roni Pork Fried Rice Recipe: Quick Wok-Style Meal with Savory Bites - September 25, 2026