
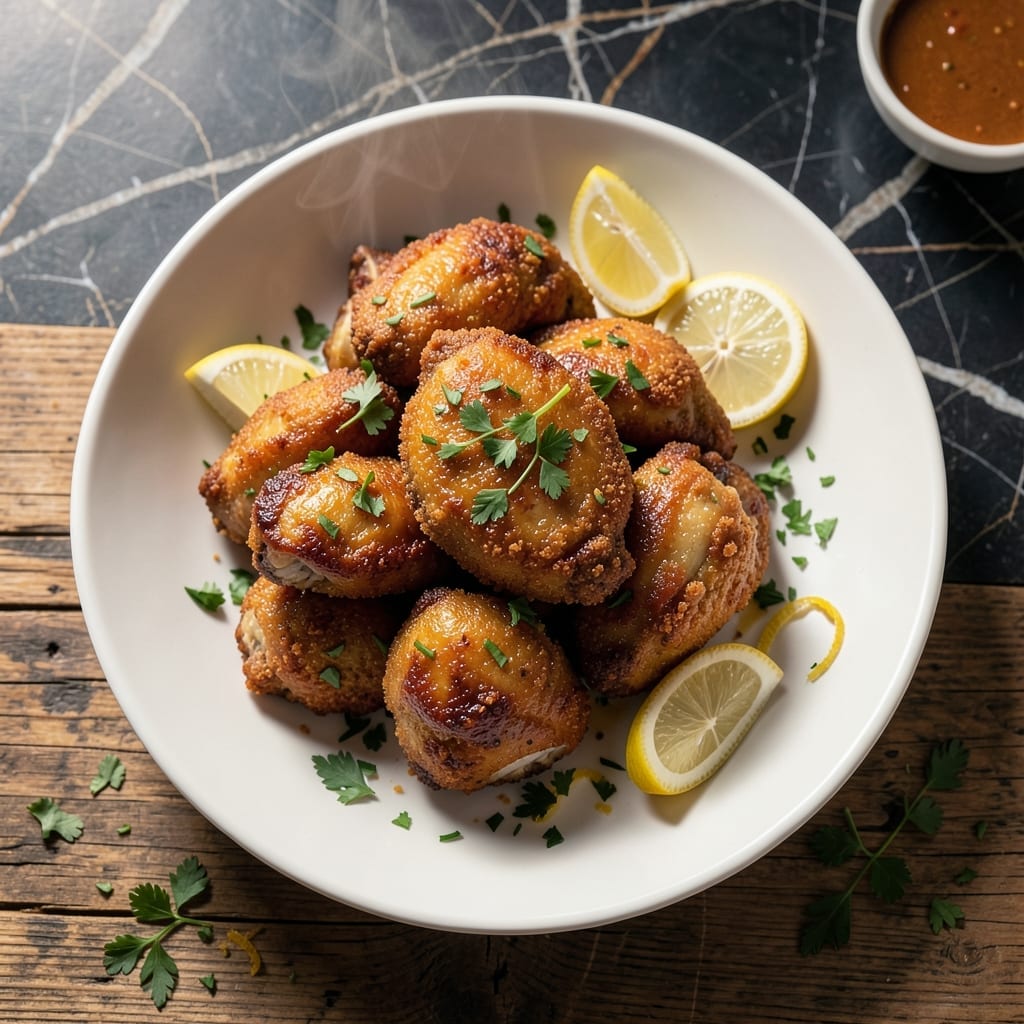
This double-coated chicken fry delivers an unmatched crunch in every bite, thanks to a carefully spiced flour mixture that creates a golden, crispy exterior.
I developed this method after testing countless variations, finding that the double-dredge technique locks in moisture while ensuring maximum crispiness. The secret lies in the resting period between coatings.
The result is juicy chicken encased in a shatteringly crispy shell, with each piece packed with flavor from the spiced flour blend. The aroma alone will draw everyone to the table.
Serve hot with your favorite dipping sauce for a meal that satisfies every craving for something both hearty and irresistibly crunchy.
Ingredients for Chicken Fry
Double-dredged chicken with a spiced flour coating. Crispy, juicy, and utterly irresistible.
| Ingredient | Amount | Notes |
|---|---|---|
| Chicken Thighs 🍗 | 2 lb | Boneless, skinless, cut into strips |
| All-Purpose Flour 🌾 | 2 cups | Divided for double-dredging |
| Cornstarch 🌾 | ½ cup | For extra crispiness |
| Paprika 🌶️ | 1 tbsp | Sweet or smoked variety |
| Garlic Powder 🧄 | 1 tbsp | Freshly ground preferred |
| Onion Powder 🧅 | 1 tbsp | Fine powder for even coating |
| Salt 🧂 | 1 tsp | Kosher or sea salt |
| Black Pepper 🌶️ | 1 tsp | Freshly ground preferred |
| Cayenne Pepper 🔥 | ½ tsp | Adjust for heat preference |
| Large Eggs 🥚 | 2 whole | Beaten for egg wash |
| Buttermilk 🥛 | 1 cup | Full-fat for richness |
| Vegetable Oil 🫒 | 3 cups | For deep frying |
| Fresh Parsley 🌿 | ¼ cup | Chopped, for garnish |
The chicken thighs are key here—boneless, skinless give you that perfect juicy interior without the chew. Costco has great bulk options, but any supermarket will work. For the flour, all-purpose is standard, but if you’ve got self-rising, skip the salt. The cornstarch is what takes the crunch to the next level (don’t skip it).
No buttermilk? Whole milk with a tablespoon of vinegar works in a pinch. Swap cayenne for chili powder at half the amount if you want less heat. The paprika can be smoked or sweet—both add great color. If you’re fresh out of garlic powder, granulated garlic at one-third the amount gets you close. Fresh parsley is ideal, but dried works too (just use less).
Fry in batches so the oil stays hot—350°F is the sweet spot. Leftovers keep 2-3 days in the fridge, but they’re best fresh. Reheat in the oven to keep them crispy. Never store in the oil—it’ll get soggy.
Why You’ll Love This Recipe
- Weeknight Hero: I can get this from fridge to table in 25 minutes flat—just coat, fry, and devour.
- Crispy Perfection: The cornstarch and paprika combo gives that golden, crunchy crust with juicy thighs inside.
- Feeds Everyone: Honestly, it’s my go-to for picky eaters, game days, or even a solo dinner with leftovers for lunch.
- Budget Winner: Chicken thighs stay cheap, and a little flour and spices stretch to feed four without breaking the bank.
Step-by-Step Instructions for Chicken Fry
This method delivers ultra-crispy, golden-brown chicken with a perfectly seasoned crunch every time.
Step 1: Prepare and Season the Spiced Flour
In a large bowl, whisk together 2 cups All-Purpose Flour, 0.5 cup Cornstarch, 1 tbsp Paprika, 1 tbsp Garlic Powder, 1 tbsp Onion Powder, 1 tsp Salt, 1 tsp Black Pepper, and 0.5 tsp Cayenne Pepper until fully combined. The cornstarch is key here—it creates that extra-crispy coating that sets this apart from regular fried chicken.
I always taste a pinch of the mixture to check the seasoning. You should taste the warmth of the spices with a slight kick from the cayenne. If it needs more heat, add another pinch of cayenne, but remember the flavor will concentrate slightly during frying.
Step 2: Create the Egg Wash and Dredge the Chicken
In a separate bowl, whisk together the 2 whole Large Eggs and 1 cup Buttermilk until smooth. This mixture acts as the glue for your double-dredging process, which is what gives that incredible crunch.
Pat the 2 lb Chicken Thighs dry with paper towels—this is crucial for the coating to adhere properly. Dip each piece first into the flour mixture, pressing gently to ensure full coverage. Then dunk it into the buttermilk mixture, letting any excess drip off. Finally, return it to the flour mixture for a second coating. Place the coated pieces on a wire rack set over a baking sheet.
Step 3: Heat the Oil and Fry to Golden Perfection
Pour the 3 cups Vegetable Oil into a deep, heavy-bottomed pot or Dutch oven. Heat over medium-high heat until the oil reaches 350°F on a deep-fry thermometer. If you don’t have a thermometer, test the oil by dropping in a pinch of flour—it should sizzle immediately and rise to the surface.
Working in batches to avoid crowding the pan, carefully lower 3-4 pieces of chicken into the hot oil. Fry for 8-10 minutes, turning occasionally, until the coating is deep golden brown and the internal temperature of the chicken reaches 165°F. The oil temperature will drop when you add the chicken, so maintain it between 325-350°F throughout frying.
Step 4: Drain and Serve Immediately
Transfer the fried chicken to a clean wire rack or paper towel-lined plate to drain excess oil. This keeps the coating crispy rather than soggy. Let the chicken rest for 2-3 minutes before serving—this allows the juices to redistribute and the coating to set.
Sprinkle with 0.25 cup Fresh Parsley just before serving for a pop of color and freshness. The parsley cuts through the richness and adds a nice herbal note. Serve immediately while the coating is at its crispiest. This dish doesn’t hold well, so fry in batches and serve as you go.
Pro Tips For Making Chicken Fry
- Dry the Thighs: Pat the chicken thighs very dry with paper towels before dredging—I learned this the hard way after my first batch turned soggy instead of crispy.
- Double Dredge: Dip the thighs in flour, then a cornstarch-heavy mix (about 2 parts flour to 1 part cornstarch) for extra crunch. Sounds weird, but it works.
- Hot Oil Only: Wait until the oil is shimmering (350°F if you have a thermometer) before adding the chicken, or you’ll end up with greasy, undercooked pieces.
- Rest Before Serving: Let the fried thighs rest on a wire rack for 5 minutes after cooking to keep the crust crisp instead of steaming under a plate.
Storing and Reheating This Dish
Refrigerator Storage
Let your chicken fry cool completely before storing—I spread pieces on a wire rack for 30 minutes to prevent sogginess. Transfer to an airtight container with paper towels between layers to absorb moisture. It stays fresh for 2-3 days at 40°F or below. ❄️
Freezer Storage
For longer storage, freeze in a single layer on a baking sheet first, then transfer to a freezer bag. This prevents pieces from sticking together. It keeps well for up to 1 month without losing too much crispness. I always label with the date to track freshness.
Oven Reheating
Preheat your oven to 400°F and place chicken on a wire rack over a baking sheet. Heat for 10-12 minutes, flipping halfway through. This method restores the most crispness, though it won’t be as fresh as day one. 🔥
Air Fryer Reheating
My favorite quick method: Arrange pieces in a single layer in the air fryer basket. Reheat at 375°F for 5-6 minutes, shaking the basket halfway. The circulating air helps recapture that golden crunch without drying out the chicken.
Avoid the Microwave
While it’s the fastest option, microwaving turns the coating soggy. If you must, use 50% power for 1-2 minutes and pat dry with paper towels afterward. Honestly, it’s worth the extra effort to use the oven or air fryer.
Nutrition Facts
Frequently Asked Questions
Can I use chicken breast instead of thighs?
Yes, but thighs stay juicier. If using breasts, brine them first in saltwater for 30 minutes to prevent dryness. Cook to 165°F internal temperature.
Why does the coating fall off during frying?
Usually means the chicken wasn’t dry before dredging or the oil wasn’t hot enough. Pat pieces thoroughly and maintain 350°F oil temperature. Let coated chicken rest 5-10 minutes before frying.
Can I bake instead of fry?
For a lighter version, bake at 425°F for 20-25 minutes on a wire rack. Spray with oil first for crispiness. The texture won’t be identical but still delicious.
How can I make it extra crispy?
Add 1/4 cup more cornstarch to the flour mix. Double-fry: fry once at 325°F for 6 minutes, rest 5 minutes, then fry again at 375°F until golden.

- Jollof Rice Sauce Recipe: West African Tomato and Spice Infusion - September 25, 2026
- Japanese Rice Soup Recipe: Umami-Rich Comfort in a Bowl - September 25, 2026
- Homemade Cream Of Rice Recipe: Silk-Smooth Breakfast in Minutes - September 25, 2026