
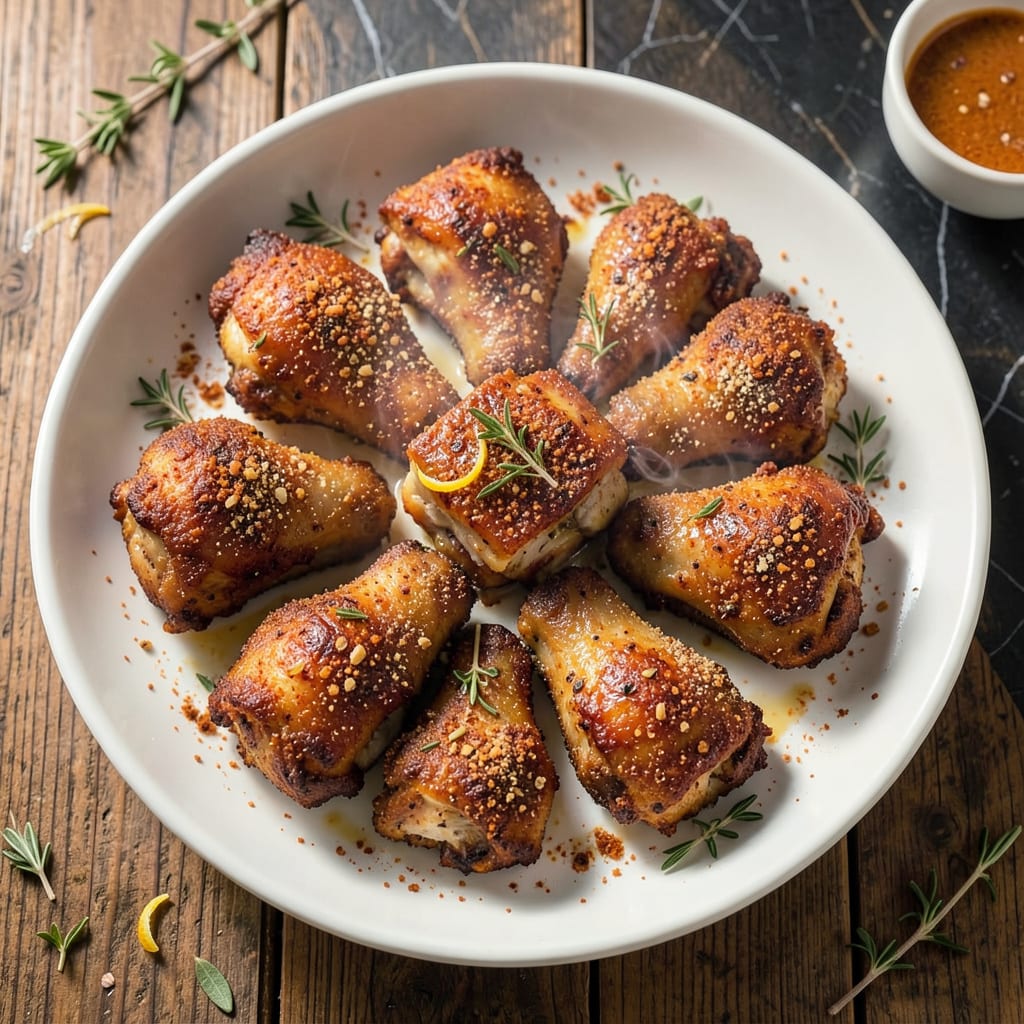
This method delivers crispy chicken without the mess of deep frying. I developed this oven-roasting technique to achieve golden, crunchy results every time.
The secret is a two-step process: coating the chicken in a spiced flour mixture, then roasting at high heat. This creates a restaurant-quality texture with minimal effort and maximum flavor.
Ingredients for Chicken Fry Roast
These are the key components for achieving that restaurant-quality crispy texture at home.
| Ingredient | Amount | Notes |
|---|---|---|
| Chicken Thighs 🍗 | 2 lb | Boneless, skin-on preferred |
| All-Purpose Flour 🌾 | 1 ½ cups | For crispy coating |
| Cornstarch 🌾 | ¼ cup | Ensures extra crunch |
| Paprika 🌶️ | 2 tbsp | Sweet or smoked variety |
| Garlic Powder 🧄 | 1 tbsp | Freshly ground preferred |
| Onion Powder 🧅 | 1 tbsp | Fine, even texture |
| Dried Thyme 🍃 | 1 tsp | Crushed between fingers |
| Salt 🧂 | 1 ½ tsp | Diamond Crystal kosher preferred |
| Black Pepper 🌶️ | 1 tsp | Freshly ground for best flavor |
| Cayenne Pepper 🔥 | ½ tsp | Adjust for heat preference |
| Buttermilk 🥛 | 1 cup | For marinating chicken |
| Vegetable Oil 🫒 | 2 tbsp | High smoke point for roasting |
[recipeingredientscaler]
The chicken thighs are essential here—bone-in, skin-on yields the crispiest results, though boneless works too. Costco and Whole Foods carry high-quality options. For the flour, King Arthur all-purpose is a reliable choice. The cornstarch is non-negotiable; it’s what gives that extra crunch. Look for paprika with vibrant color—dull spice means old spice.
No buttermilk? Plain yogurt thinned with milk works in a pinch. For a gluten-free version, rice flour plus cornstarch at a 1:1 ratio replaces the all-purpose. If you’re out of cayenne, red pepper flakes at half the amount will do. The oil can be any neutral variety, but avoid olive oil—its smoke point is too low for high-heat roasting.
Marinate the chicken in buttermilk for at least 4 hours (overnight is ideal). The spice mix can be prepped 1 week ahead and stored in an airtight container. Leftovers keep for 3-4 days in the fridge, though they’re best fresh from the oven.
Why You’ll Love This Recipe
- One Pan Wonder: I toss the thighs in flour and spices, then roast—no fuss, no extra dishes.
- Crispy & Spiced: That paprika and garlic crust on juicy thighs? Ridiculously good.
- Weeknight Hero: Honestly, it’s my go-to for busy evenings when I need dinner fast.
- Budget Friendly: Chicken thighs stretch far, and the pantry staples keep costs low.
Step-by-Step Instructions for Chicken Fry Roast
Here’s the proven method for achieving maximum crunch without the deep fryer.
Step 1: Marinate the Chicken Thighs
Place the 2 lb chicken thighs in a large bowl and pour the 1 cup buttermilk over them. Ensure each piece is fully coated. I press down gently to submerge all the chicken, which tenderizes the meat and helps the coating adhere better.
Cover and refrigerate for at least 1 hour, or up to 4 hours for deeper flavor penetration. The buttermilk’s acidity breaks down proteins, guaranteeing juicy, flavorful chicken with every bite.
Step 2: Prepare the Spiced Coating
In a large bowl, whisk together the 1.5 cups all-purpose flour, 0.25 cup cornstarch, 2 tbsp paprika, 1 tbsp garlic powder, 1 tbsp onion powder, 1 tsp dried thyme, 1.5 tsp salt, 1 tsp black pepper, and 0.5 tsp cayenne pepper until evenly combined. The cornstarch is the secret to extra crispiness.
Crush the dried thyme between your fingers as you add it to release its aromatic oils. This spice blend creates a flavorful crust that’s both savory and slightly smoky, with a gentle heat from the cayenne.
Step 3: Coat the Chicken Thoroughly
Remove the chicken thighs from the buttermilk, allowing excess to drip off. Dredge each piece in the flour mixture, pressing firmly to create an even, thick coating. I like to use one hand for wet ingredients and one for dry to keep things clean.
Place the coated chicken on a wire rack set over a baking sheet. This setup allows air to circulate around each piece, preventing soggy spots. Let the chicken rest for 10 minutes to help the coating set before cooking.
Step 4: Roast to Crispy Perfection
Preheat your oven to 425°F. Place the wire rack with chicken in the oven and drizzle the 2 tbsp vegetable oil evenly over the top. The high heat and oil ensure a crispy exterior without deep frying.
Roast for 20-25 minutes, then flip each piece and roast for another 15-20 minutes until the coating is deep golden brown and the internal temperature reaches 165°F. The chicken should be crispy on the outside and juicy on the inside.
Pro Tips For Making Chicken Fry Roast
- Dry the Thighs: Pat the chicken thighs completely dry with paper towels before coating—this guarantees a crispier crust and prevents the flour from clumping.
- Use Both Flours: Mix equal parts all-purpose flour and cornstarch for the coating; the cornstarch adds extra crunch that all-purpose alone can’t deliver.
- Skip the Overcrowding: Fry in batches so each piece has space—I learned this the hard way after ending up with steamed chicken instead of crispy.
- Rest Before Serving: Let the chicken rest 5 minutes after frying to lock in the juices; it stays hot longer than you’d expect and tastes far better.
Troubleshooting Great chicken fry roast
Coating Not Sticking
If your coating slides off during cooking, the buttermilk marinade likely wasn’t long enough. I always marinate for at least 1 hour, but 4 hours is ideal. Also, pat the chicken dry before dredging—excess moisture prevents the flour from adhering properly. 💡
Soggy Bottoms
This happens when chicken sits in its own juices. Always use a wire rack on a baking sheet, never place pieces directly on the pan. I also flip halfway through cooking at the 20-minute mark to ensure even crispiness on both sides.
Uneven Browning
Hot spots in your oven can cause this. Rotate your baking sheet 180 degrees halfway through cooking. For consistent results, I position my rack in the center of the oven and avoid overcrowding the pan.
Dry Chicken
Overcooking is the usual culprit. Use a meat thermometer and pull the chicken when it hits exactly 165°F internally. I check the thickest piece first. Also, don’t skip the 10-minute rest after coating—it helps retain moisture.
Bland Flavor
Your spice mix might need more punch. I double the garlic powder and paprika for extra flavor. Also, ensure your spices are fresh—old spices lose potency. Adding ½ tsp more salt to the coating mix often solves this. 🌶️
Oil Smoking
If you see smoke, your oven might be too hot. Reduce temperature to 400°F and use an oil with a higher smoke point like avocado oil instead of vegetable oil. I also avoid opening the oven door unnecessarily during cooking.
Nutrition Facts
Frequently Asked Questions
Can I use chicken breasts instead of thighs?
Yes, but thighs stay juicier. If using breasts, reduce cooking time to 15-18 minutes per side at 425°F to prevent drying out.
Why use both flour and cornstarch?
Flour provides structure while cornstarch creates an ultra-crispy crust. The combo ensures maximum crunch without deep frying.
How do I keep it crispy after cooking?
Place cooked pieces on a wire rack (not a plate) to prevent steam buildup. Serve immediately for best texture.
Can I make this gluten-free?
Substitute the flour with 1:1 gluten-free flour blend plus extra cornstarch. The texture will be slightly different but still crispy.

- Jollof Rice Sauce Recipe: West African Tomato and Spice Infusion - September 25, 2026
- Japanese Rice Soup Recipe: Umami-Rich Comfort in a Bowl - September 25, 2026
- Homemade Cream Of Rice Recipe: Silk-Smooth Breakfast in Minutes - September 25, 2026