
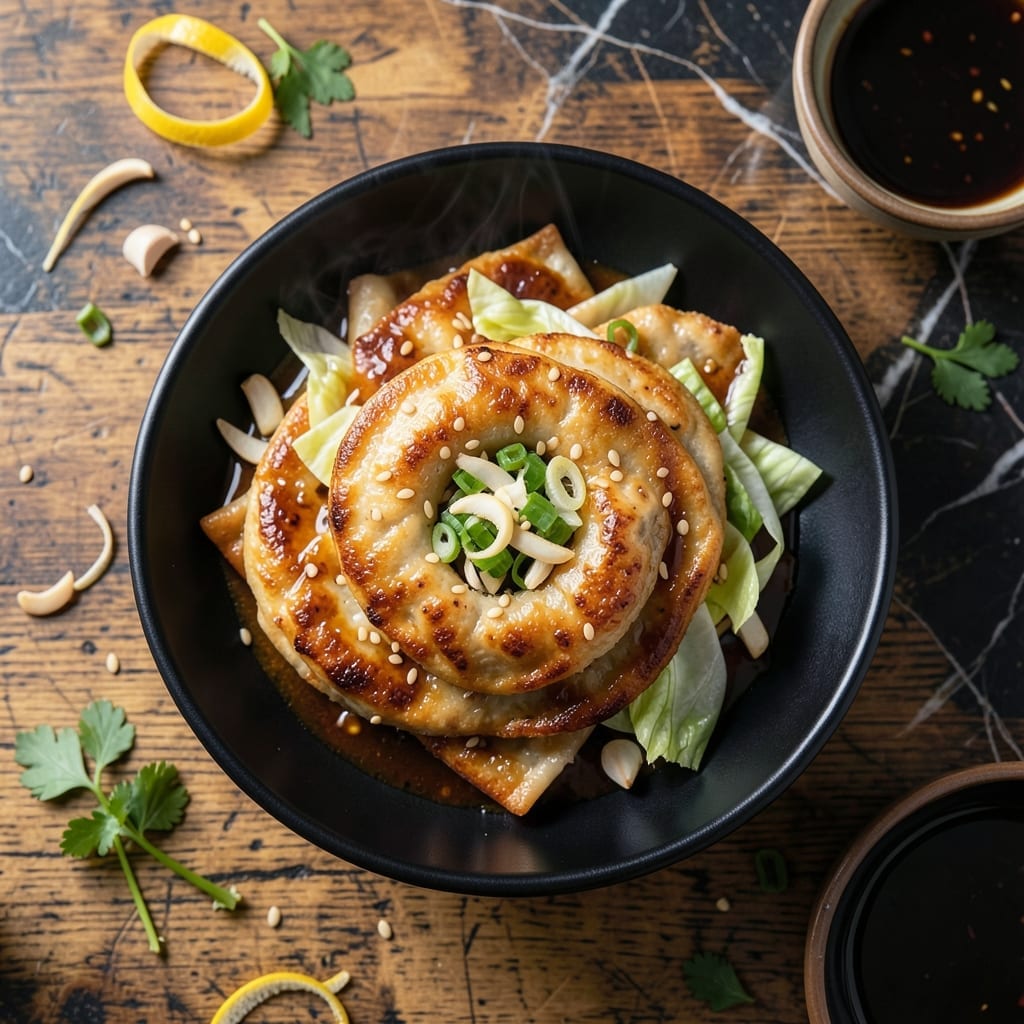
I’ve spent years perfecting this pan-fried chicken gyoza recipe to achieve the ideal balance of textures.
The secret is a precise folding technique combined with a hot pan to create crispy golden bottoms while keeping the filling juicy. Each dumpling gets a perfect sear before steaming locks in the moisture.
You’ll love how the thin wrappers develop a shatteringly crispy crust while encasing a flavorful chicken filling that stays remarkably juicy with every bite. The combination of textures makes these irresistible.
This method delivers restaurant-quality results at home with simple ingredients and careful timing.
Ingredients for Chicken Gyoza
Simple ingredients, precise technique. Restaurant-quality dumplings at home with ease.
| Ingredient | Amount | Notes |
|---|---|---|
| Ground Chicken 🍗 | 1 lb | Prefer thigh meat for juiciness |
| Napa Cabbage 🥬 | 2 cups | Finely shredded, salted and drained |
| Garlic Cloves 🧄 | 4 cloves | Minced for maximum flavor |
| Fresh Ginger 🌿 | 1 tbsp | Grated or finely minced |
| Green Onions 🧅 | 4 whole | Thinly sliced, white and green parts |
| Soy Sauce 🫒 | 2 tbsp | Low-sodium preferred for balance |
| Sesame Oil 🫒 | 1 tsp | Toasted for depth of flavor |
| Rice Vinegar 🍚 | 1 tbsp | Or substitute with apple cider vinegar |
| Gyoza Wrappers 🥟 | 40 pieces | Round, store-bought or homemade |
| Neutral Oil 🫒 | 3 tbsp | For pan-frying, high smoke point |
| Salt 🧂 | ½ tsp | Diamond Crystal kosher preferred |
| Black Pepper 🌶️ | ¼ tsp | Freshly ground for best results |
| Water 💧 | ½ cup | For steaming dumplings |
The ground chicken is non-negotiable for juiciness—thigh meat has the fat content to stay moist during cooking. Napa cabbage (not regular green) adds sweetness without overpowering. Look for fresh, bright leaves at Asian markets or well-stocked grocers. The wrappers matter too; Nasoya brand holds up well to frying without tearing. If you’re making your own, keep them thin but sturdy.
Out of Napa cabbage? Regular cabbage at half the amount works, but drain it well to avoid soggy fillings. No rice vinegar? Apple cider vinegar at the same ratio is fine. For a vegetarian twist, swap chicken for shitake mushrooms (finely chopped). The sesame oil can be skipped if needed, but it adds that signature aroma—Kadokawa brand is my go-to for authentic flavor.
Fillings can be prepped a day ahead—store in an airtight container in the fridge. Wrappers stay fresh for 1 week unopened, 3 days once opened. Cooked gyoza freeze beautifully for up to 3 months; reheat from frozen in a dry pan for crispy results.
Why You’ll Love This Recipe
- Minimal Chopping Required: I just throw everything in the food processor—ground chicken, cabbage, ginger, and garlic—done in two minutes flat.
- Flavor Bomb: The combination of fresh ginger and garlic with the chicken gives that authentic, punchy taste you crave from restaurant gyoza.
- Freezer Friendly: I make a big batch on Sunday and freeze half for those nights I’m too tired to cook.
- Budget Stretcher: Ground chicken and napa cabbage go a long way, and honestly, it’s way cheaper than takeout.
Step-by-Step Instructions for Chicken Gyoza
Master the technique for perfect texture contrast—crisp bottoms with tender, juicy fillings every time.
Step 1: Prepare the Filling with Proper Seasoning Balance
In a large bowl, combine the 1 lb Ground Chicken, 2 cups Napa Cabbage, 4 cloves Garlic Cloves, 1 tbsp Fresh Ginger, 4 whole Green Onions, 2 tbsp Soy Sauce, 1 tsp Sesame Oil, 1 tbsp Rice Vinegar, 0.5 tsp Salt, and 0.25 tsp Black Pepper. The cabbage should already be salted and drained to prevent a watery filling.
Mix gently but thoroughly—overworking the chicken will make the filling dense. I use my hands for this, as they give better control than a spoon. The mixture should be sticky and cohesive, with the aromatics evenly distributed. Let it rest for 10 minutes to allow the flavors to meld.
Step 2: Fill and Pleat the Dumplings with Precision
Place a gyoza wrapper in your palm and add 1 tablespoon of filling to the center. Avoid overfilling—this is the most common mistake that leads to bursting during cooking. Use your finger to moisten the edge of the wrapper with water, then fold in half to create a half-moon shape.
Pinch the center to seal, then make 3-4 pleats on each side, pressing firmly to secure. The pleats not only look professional but also create more surface area for crisping. Arrange the finished dumplings on a parchment-lined tray under a damp towel to prevent drying.
Step 3: Pan-Fry to Develop a Golden Crust
Heat 1 tablespoon Neutral Oil in a large non-stick skillet over medium-high heat. Arrange the dumplings in a single layer, not touching, and cook undisturbed for 2-3 minutes until the bottoms turn golden brown. You’ll hear a gentle sizzle—this is the sound of crisping perfection.
Resist the urge to peek too soon. The dumplings are ready to flip when they release easily from the pan with a gentle nudge. Use a thin spatula to avoid tearing the delicate wrappers.
Step 4: Steam to Ensure Juicy Centers
Once the bottoms are crisp, add 0.5 cup Water to the pan and immediately cover with a tight-fitting lid. The water will sizzle violently—this is normal. Steam for 4-5 minutes until the water has mostly evaporated and the wrappers appear translucent.
This dual cooking method guarantees the contrast you’re after: the steam cooks the filling through while preserving moisture, while the initial fry creates that coveted crisp base. Remove the lid and cook for another 1 minute to evaporate any remaining liquid and re-crisp the bottoms.
Step 5: Serve Immediately for Maximum Texture
Transfer the gyoza to a serving plate, crispy-side up. The bottoms should be a deep golden brown with a slight sheen from the rendered fat. If any stick, don’t force them—add a splash of water and let them release naturally.
Serve with a dipping sauce of your choice, but I recommend a simple mix of soy sauce and rice vinegar to complement the rich filling. The ideal gyoza will have a satisfying crunch when bitten, followed by a burst of juicy, flavorful filling.
Pro Tips For Making Chicken Gyoza
- Salt the Cabbage: Finely chop the Napa cabbage, sprinkle with 1 teaspoon of salt, and let it sit for 10 minutes—then squeeze out every last drop of water. I learned this the hard way after my first few gyozas turned into soggy dumplings.
- Chill the Filling: After mixing the ground chicken with the veggies and aromatics, pop it in the fridge for 15-20 minutes. Makes the filling way easier to fold, and the gyozas hold their shape better when cooking.
- Skip the Overcrowding: Cook gyozas in batches with at least an inch between each one, or they’ll steam instead of crisp. Sounds obvious, but I still have to remind myself every time.
- Use a Lid: After browning the bottoms, add a splash of water and cover with a lid for 3-4 minutes—this steams the tops perfectly while keeping the bottoms crispy. My grandmother swore by this, and she was right.
Perfect Pairings for These Flavors
Dipping Sauces
I love a classic gyoza sauce: mix 3 tbsp soy sauce, 1 tbsp rice vinegar, 1 tsp sesame oil, and ½ tsp chili oil for a perfect balance of salty, tangy, and spicy. The chili oil adds just enough heat without overpowering the delicate filling. 💫
Fresh Accompaniments
A simple cucumber salad with rice vinegar and a pinch of sugar provides a cooling contrast. Thinly slice 1 cup cucumber and toss with 1 tbsp vinegar and ½ tsp sugar. The crisp texture complements the gyoza beautifully.
Beverage Pairings
For beer, a light Japanese lager like Sapporo or Asahi cleanses the palate between bites. The carbonation cuts through the richness while enhancing the savory notes. I also enjoy a cold sake with these dumplings. 🍺
Side Dishes
Miso soup with tofu and wakame makes a light, warming companion. The umami flavors in miso complement the soy-based filling. For a heartier option, serve with steamed jasmine rice to soak up any extra dipping sauce.
Garnish Ideas
Sprinkle with toasted sesame seeds and finely chopped green onions for color and texture. A drizzle of sriracha adds a modern kick. These small touches elevate the presentation and add layers of flavor.
Nutrition Facts
Frequently Asked Questions
Can I use ground turkey instead of chicken?
Yes, ground turkey works well as a substitute. Use the same 1 lb amount and follow the recipe as written. Turkey may be slightly leaner, so add an extra 1 tsp of oil to keep the filling moist.
How do I prevent gyoza from sticking to the pan?
Use a non-stick skillet and ensure it’s hot before adding oil. Don’t move the dumplings for the first 2-3 minutes—this gives them time to form a crisp crust. If needed, add a splash of water to release stubborn pieces.
Can I bake gyoza instead of pan-frying?
Baking works but won’t give the same crispy texture. Brush with oil and bake at 400°F for 15-20 minutes, flipping halfway. For best results, finish with a quick pan-fry to crisp the bottoms.
How do I store leftover cooked gyoza?
Let them cool completely, then store in an airtight container in the fridge for up to 3 days. Reheat in a dry pan over medium heat for 2-3 minutes to restore crispiness.

- Jollof Rice Sauce Recipe: West African Tomato and Spice Infusion - September 25, 2026
- Japanese Rice Soup Recipe: Umami-Rich Comfort in a Bowl - September 25, 2026
- Homemade Cream Of Rice Recipe: Silk-Smooth Breakfast in Minutes - September 25, 2026