
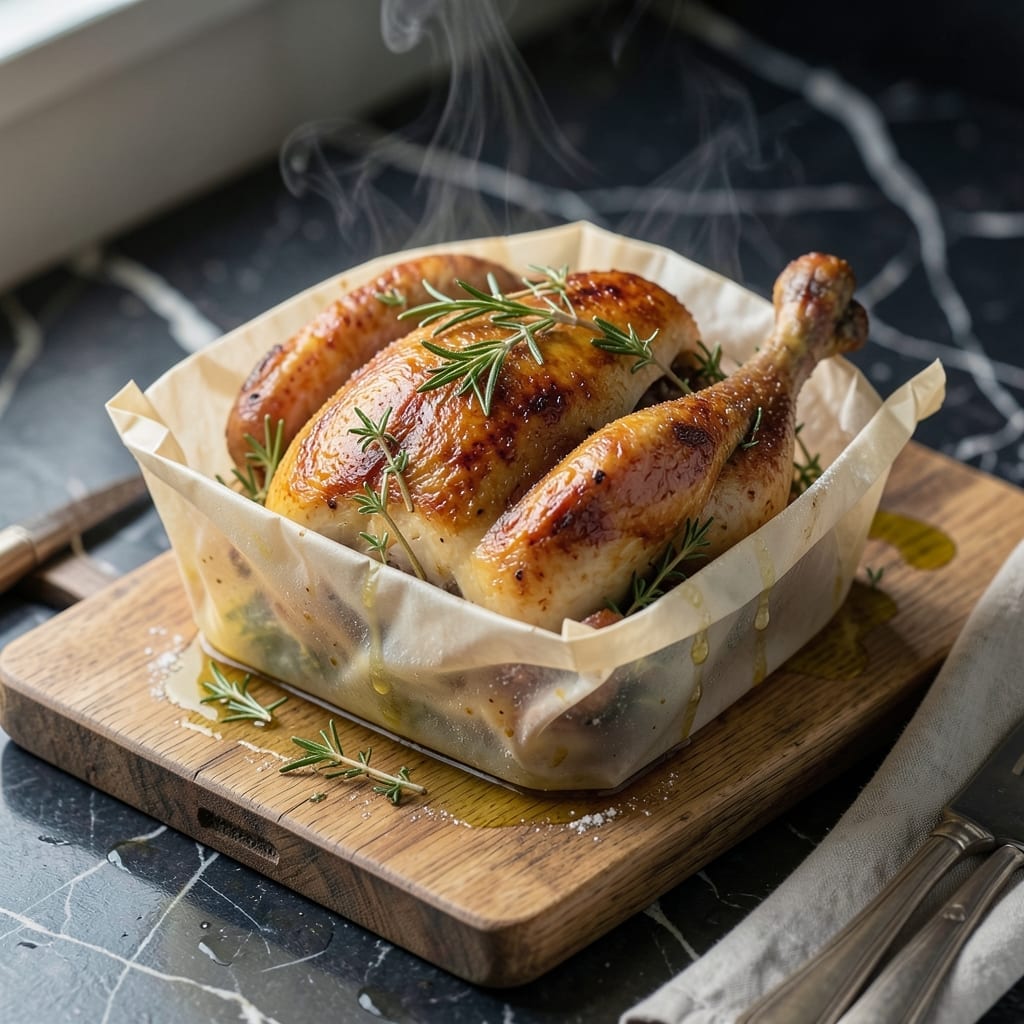
This oven bag method transforms chicken into a juicy, tender masterpiece with almost no effort. The bag locks in moisture while allowing flavors to meld beautifully, ensuring the meat stays succulent throughout the cooking process.
I developed this technique after years of struggling with dry, overcooked chicken. The oven bag creates a self-basting environment, so the meat cooks evenly without drying out. It’s a foolproof way to achieve consistent results every single time.
What you get is chicken so moist it falls off the bone, infused with whatever herbs or seasonings you choose. The bag also makes cleanup effortless—no scrubbing pans or dealing with stuck-on residue.
Perfect for busy weeknights or feeding a crowd. Here’s how to do it right.
Ingredients for Chicken in an Oven Bag
Nothing fancy here—just a chicken, some herbs, and a bag to work its magic.
| Ingredient | Amount | Notes |
|---|---|---|
| Whole Chicken 🍗 | 1 whole | About 4 lb, giblets removed |
| Oven Bag 🛍️ | 1 bag | Large size, for roasting |
| All-Purpose Flour 🌾 | 2 tbsp | For dusting bag interior |
| Unsalted Butter 🧈 | 4 tbsp | Melted for basting |
| Fresh Rosemary 🌿 | 2 tbsp | Chopped, or 2 tsp dried |
| Fresh Thyme 🌿 | 2 tbsp | Chopped, or 2 tsp dried |
| Garlic Cloves 🧄 | 4 cloves | Minced for stuffing |
| Lemon 🍋 | 1 whole | Sliced for cavity |
| Yellow Onion 🧅 | 1 whole | Quartered for cavity |
| Kosher Salt 🧂 | 1 ½ tsp | Diamond Crystal preferred |
| Black Pepper 🌶️ | 1 tsp | Freshly ground for best flavor |
| Dry White Wine 🍷 | ½ cup | Or substitute chicken broth |
| Carrots 🥕 | 3 whole | Peeled, cut into chunks |
| Celery Stalks 🥬 | 3 whole | Cut into chunks for aroma |
The chicken is the star here. Look for a 4-pound bird with smooth, unblemished skin—Whole Foods and Costco both carry great options. Fresh herbs make a difference, but dried work in a pinch (just cut the amount by half). The oven bag is non-negotiable—Reynolds brand is what I always grab. Don’t skip the flour in the bag; it prevents bursting and thickens the juices slightly.
No white wine? Chicken broth with a splash of vinegar does the trick. Fresh out of thyme? Poultry seasoning at half the amount works. Want more citrus? Add an orange slice alongside the lemon. The butter can be swapped for olive oil if you’re avoiding dairy, but butter adds that classic richness. Plugrá or Kerrygold are my go-tos for unsalted.
Leftovers keep in the fridge for 3-4 days—perfect for sandwiches. The chicken freezes beautifully for up to 3 months (slice before freezing for easier portions). I always make extra broth with the carcass—waste not, want not (and it’s worth the extra minute).
Why You’ll Love This Recipe
- No-Mess Magic: The oven bag locks in juices while keeping my sheet pan spotless—no scrubbing, just flavor.
- Buttery Herb Heaven: That melt-in-your-mouth combination of butter and fresh rosemary clinging to every bite? I make extra just to snack on the crispy skin.
- Sunday Supper Shortcut: It feels fancy enough for company but takes less effort than my weekday pasta. Honestly, I serve it for birthdays now.
- Leftovers for Days: One whole chicken means sandwiches, soups, and salads for three days—my wallet and my lunchbox thank me.
Step-by-Step Instructions for Chicken in an Oven Bag
Here’s the foolproof method I use for juicy, flavor-packed chicken every single time.
Step 1: Prep the Oven Bag and Aromatics
Shake the 2 tbsp All-Purpose Flour inside the Oven Bag until it coats the interior evenly. This prevents sticking and helps thicken the juices. Place the bag in a roasting pan or baking dish.
Combine the 2 tbsp Fresh Rosemary, 2 tbsp Fresh Thyme, 4 cloves Garlic Cloves, 1 whole Lemon (sliced), 1 whole Yellow Onion (quartered), 3 whole Carrots (peeled and chunked), and 3 whole Celery Stalks (chunked) in a bowl. These will infuse the chicken with incredible aroma as it cooks.
Step 2: Season and Stuff the Chicken
Pat the 1 whole Whole Chicken dry inside and out with paper towels. Rub the cavity and skin with 1.5 tsp Kosher Salt and 1 tsp Black Pepper, ensuring even coverage. Stuff the cavity with half of the aromatic mixture, then tie the legs together with kitchen twine.
Place the remaining aromatics in the bottom of the floured oven bag. This creates a flavor bed for the chicken to rest on. Position the chicken breast-side up on top of the aromatics inside the bag.
Step 3: Add Liquids and Seal
Pour the 0.5 cup Dry White Wine into the bag around the chicken—this adds moisture and depth of flavor. Drizzle the 4 tbsp Unsalted Butter (melted) over the chicken skin. The butter will baste the bird as it roasts, ensuring crisp, golden skin.
Seal the oven bag tightly with the provided tie. Cut six ½-inch slits in the top to allow steam to escape—this prevents the bag from bursting and helps the skin brown. The slits should be just large enough to release steam without deflating the bag.
Step 4: Roast to Perfection
Preheat your oven to 350°F. Place the pan with the oven bag in the center rack and roast for 1 hour 30 minutes to 1 hour 45 minutes. The chicken is done when an instant-read thermometer inserted into the thickest part of the thigh (not touching bone) reads 165°F.
You’ll know it’s ready when the juices run clear and the skin is golden brown. The aroma filling your kitchen will be incredible—herby, buttery, and rich. Let the chicken rest in the bag for 10 minutes before opening to allow the juices to redistribute.
Step 5: Serve and Enjoy
Carefully open the oven bag, avoiding the hot steam. Transfer the chicken to a cutting board and let it rest for an additional 5 minutes before carving. The meat should be fall-off-the-bone tender, and the skin crisp and flavorful.
Strain the pan juices and serve them alongside the carved chicken. The result is a moist, aromatic bird with a rich, savory sauce that ties the whole dish together. This method guarantees juicy meat without the fuss of basting or turning.
Pro Tips For Making Chicken In An Oven Bag
- Preheat the Bag: Toss 1 tablespoon of flour in the oven bag and shake it around before adding the chicken—this prevents sticking and makes cleanup a breeze.
- Butter Under Skin: Slide your fingers under the chicken skin and smear softened butter mixed with minced rosemary directly on the meat. I learned this the hard way—it keeps the breast juicy while the skin crisps up.
- Skip the Overcrowding: Resist the urge to stuff the bag with extra veggies—just the chicken, herbs, and maybe a lemon or two. Too much inside steams instead of roasts.
- Wait Before Carving: Let the chicken rest in the bag for 15 minutes after pulling it from the oven. Sounds weird, but it works: the juices redistribute and the meat stays moist.
Pro Cooking Tips for This Dish
Bag Selection Matters
I always use Reynolds Oven Bags—they’re designed specifically for roasting and can handle the heat without melting. The large size fits a 4 lb chicken perfectly. Cheaper generic brands often have thinner material that can tear or burst during cooking. 🔥
Flour is Non-Negotiable
Don’t skip the 2 tbsp All-Purpose Flour inside the bag. It prevents sticking and creates a light roux with the juices, giving you a built-in gravy. I use King Arthur Flour for consistent results. Without it, the bag may burst from steam pressure.
Slit Placement Precision
Cut exactly six ½-inch slits in the top of the bag. Any more and you lose too much moisture; any fewer and the bag might burst. Space them evenly—I use kitchen shears for clean cuts. This allows proper steam release while maintaining the self-basting environment.
Thermometer is Key
Invest in an instant-read thermometer like ThermoWorks ThermaPen. Check the thickest part of the thigh, avoiding bone, for 165°F. The breast may register higher, but the dark meat determines doneness. I check at the 1 hour 30 minute mark.
Resting Technique
Let the chicken rest in the sealed bag for 10 minutes after removing from the oven. Then open carefully—the steam is extremely hot. Transfer to a cutting board and rest uncovered for 5 more minutes before carving to retain maximum juiciness.
Pan Juice Gold
The liquid in the bag is liquid gold. Strain it through a fine-mesh sieve to remove solids. I skim off excess fat with a gravy separator. The resulting jus is perfect for drizzling over carved chicken or serving on the side. 💡
Nutrition Facts
Frequently Asked Questions
What temperature should I use?
Roast at 350°F for even cooking. This moderate heat allows the chicken to cook through without drying out while the bag locks in moisture.
Can I use a turkey instead?
Yes, but adjust cooking time. A 12-14 lb turkey will need about 2.5-3 hours at 350°F. Always check internal temp reaches 165°F.
Why did my bag burst?
This usually happens without flour coating or proper steam vents. Always shake 2 tbsp flour in the bag first and cut six ½-inch slits in the top.
Do I need to baste the chicken?
No! The oven bag creates a self-basting environment. The butter and juices circulate naturally, keeping the meat moist without manual basting.

- Jollof Rice Sauce Recipe: West African Tomato and Spice Infusion - September 25, 2026
- Japanese Rice Soup Recipe: Umami-Rich Comfort in a Bowl - September 25, 2026
- Homemade Cream Of Rice Recipe: Silk-Smooth Breakfast in Minutes - September 25, 2026