
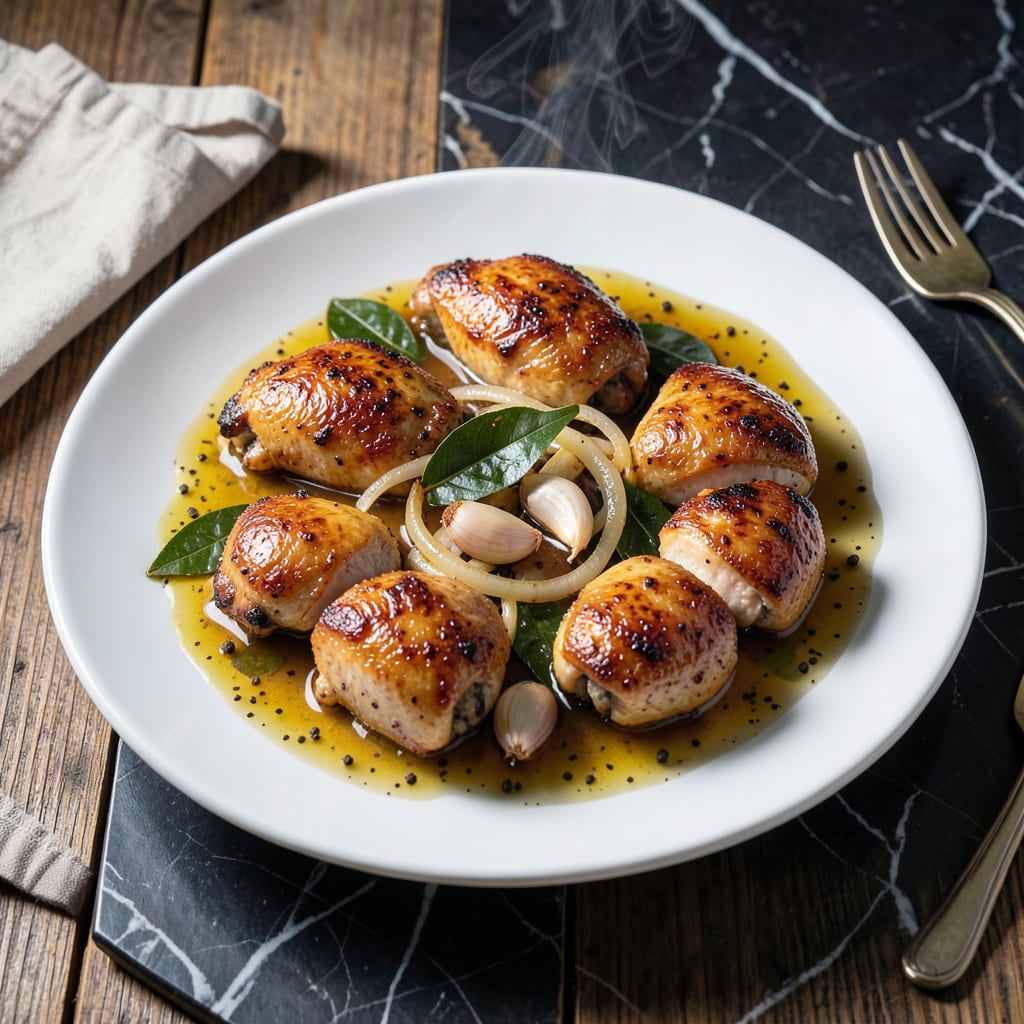
This Filipino adobo delivers a perfect balance of tangy vinegar, savory soy, and aromatic garlic. The simple braising method transforms chicken into tender, flavorful pieces coated in a glossy sauce.
What makes this dish special is its foolproof technique that develops complex flavors with minimal effort. The vinegar mellows during cooking, creating a bright, well-rounded sauce that pairs beautifully with steamed rice.
Ingredients for Chicken in Vinegar Sauce
Tangy vinegar, savory soy, and aromatic garlic create this Filipino classic with minimal effort.
| Ingredient | Amount | Notes |
|---|---|---|
| Chicken Thighs 🍗 | 2 lb | Boneless, skin-on preferred |
| White Vinegar 💧 | 1 cup | Cane vinegar for authenticity |
| Soy Sauce 🫒 | ½ cup | Use low-sodium if preferred |
| Garlic Cloves 🧄 | 10 cloves | Peeled, smashed slightly |
| Bay Leaves 🍃 | 3 pieces | Dried, whole leaves |
| Black Peppercorns 🌶️ | 1 tbsp | Whole, lightly crushed |
| Brown Sugar 🍚 | 2 tbsp | Optional, balances acidity |
| Olive Oil 🫒 | 2 tbsp | For searing chicken |
| Onion 🧅 | 1 whole | Medium, sliced thin |
| Water 💧 | ½ cup | Adjust for sauce consistency |
| Salt 🧂 | 1 tsp | Adjust to taste |
[recipeingredientscaler]
The chicken is key here. Thighs (especially skin-on) stay juicy through the long braise—breasts tend to dry out. Asian markets often carry the ideal bone-in, skin-on pieces, but any grocery store will do. Look for thighs with good skin coloration. Bay leaves should be whole and dried—fresh bay leaves are too strong and can overpower the dish.
No cane vinegar? White vinegar or apple cider vinegar work in a pinch (avoid balsamic—too sweet). For soy sauce, Silver Swan or Datu Puti are authentic Filipino brands, but any low-sodium soy sauce prevents oversalting. Skip the brown sugar if you prefer a sharper tang. The peppercorns can be pre-ground black pepper at half the amount, though whole offers better flavor.
This adobo tastes even better the next day as flavors meld. Keeps 4-5 days refrigerated in its sauce, or freeze for up to 3 months. Reheat gently to preserve the glossy texture of the sauce.
Why You’ll Love This Recipe
- One Pan Wonder: I toss everything in a single skillet—chicken, vinegar, garlic—and let it simmer while I set the table.
- Tangy Perfection: The vinegar and soy sauce create this bright, savory balance that makes the chicken irresistibly juicy.
- Weeknight Hero: Between us, it’s my go-to for busy evenings when I need something hearty and fast.
- Budget Stretcher: Chicken thighs stay cheap, and a splash of vinegar turns them into a meal that tastes way more expensive.
Step-by-Step Instructions for Chicken in Vinegar Sauce
Master this classic Filipino technique for perfectly balanced sweet, tangy, and savory results.
Step 1: Sear the Chicken Thighs
Heat 2 tbsp olive oil in a large skillet over medium-high heat until shimmering. Pat the 2 lb chicken thighs dry with paper towels, season with 1 tsp salt, then arrange them in the pan skin-side down.
Sear undisturbed for 6-8 minutes until the skin develops a deep golden brown crust and releases easily from the pan. Flip and sear the other side for 4-5 minutes. Remove the chicken and set aside.
Step 2: Sauté Aromatics and Toast Spices
In the same skillet, add the sliced 1 whole onion and cook for 3-4 minutes until softened and translucent. Add the 10 cloves garlic cloves, 3 pieces bay leaves, and 1 tbsp black peppercorns, stirring constantly for 1 minute.
This toasts the spices, releasing their essential oils and building the flavor base for the sauce. The garlic should become fragrant but not browned—reduce heat if necessary to prevent burning.
Step 3: Deglaze and Simmer the Sauce
Pour in 1 cup white vinegar and 0.5 cup soy sauce, using a wooden spoon to scrape up any browned bits from the bottom of the pan. Add 2 tbsp brown sugar and 0.5 cup water, stirring until the sugar dissolves completely.
Return the chicken to the skillet, skin-side up, along with any accumulated juices. Bring the mixture to a gentle simmer, then reduce heat to medium-low and cook uncovered for 25-30 minutes, occasionally spooning the sauce over the chicken.
Step 4: Reduce and Concentrate Flavors
After the chicken is fully cooked (internal temperature should reach 165°F), remove it from the skillet and set aside. Increase heat to medium-high and let the sauce reduce for 5-7 minutes until it thickens slightly and coats the back of a spoon.
Taste and adjust seasoning if needed, though the balance of tangy vinegar, salty soy sauce, and sweet brown sugar should be harmonious. The sauce should have a glossy consistency with visible bits of onion and garlic.
Step 5: Serve and Enjoy
Return the chicken to the skillet and turn to coat evenly in the reduced sauce. Serve immediately over steamed rice, ensuring each piece is generously napped with the vinegar sauce.
The dish should deliver a bright, tangy punch upfront, followed by the deep umami of soy sauce and the warmth of black peppercorns. The chicken should be fall-off-the-bone tender with a rich, glossy finish.
Pro Tips For Making Chicken In Vinegar Sauce
- Brown the Thighs: Sear the chicken thighs skin-side down for 6-8 minutes on medium-high until deep golden—this builds flavor that the vinegar sauce can’t create on its own.
- Balance the Acid: I learned this the hard way—if the sauce tastes too sharp, add a teaspoon of sugar or honey to mellow the white vinegar without losing its tang.
- Don’t Crowd the Pan: Cook the chicken in batches if needed; too many thighs at once steams them instead of browning, and you’ll end up with pale, soggy skin.
- Crush the Garlic: Smash the garlic cloves with the flat of your knife before adding them—it releases more aroma into the sauce and prevents bitter, undercooked chunks.
Essential Equipment for This Dish
Essential Cookware
I always reach for my 12-inch stainless steel skillet—All-Clad D3 is my brand of choice—for even heat distribution. A heavy-bottomed pot works too, but the wide surface area of a skillet helps the sauce reduce faster. 🔥
Wooden Spoon
A wooden spoon is non-negotiable here. It won’t scratch your pan and is perfect for scraping up those flavorful browned bits when deglazing. I keep a bamboo spoon dedicated to my adobo cooking.
Meat Thermometer
For perfect doneness every time, use an instant-read thermometer. I trust my ThermoWorks ThermoPop—it gives accurate readings in 3-4 seconds. Aim for 165°F in the thickest part of the chicken.
Tongs for Handling
Long stainless steel tongs (I use OXO Good Grips 12-inch) make flipping the chicken easy without piercing the meat. They also help coat the chicken evenly in the sauce during the final steps.
Sauce Consistency Tool
To check sauce thickness, I use the back of my wooden spoon—the sauce should coat it lightly. If it’s too thin, simmer 2-3 minutes longer. If too thick, add 1-2 tbsp water to loosen.
Nutrition Facts
Frequently Asked Questions
Can I use chicken breasts instead of thighs?
Thighs work best because they stay juicy during the 25-30 minutes of braising. Breasts tend to dry out, but if you must, reduce cooking time to 15-20 minutes and check for 165°F internal temperature.
Why does the vinegar taste too strong at first?
The vinegar mellows as it cooks. Simmering for 25-30 minutes allows the acidity to balance with the soy sauce and sugar. Taste the sauce after reducing—it should be tangy, not harsh.
How do I thicken the sauce if it’s too thin?
Simmer uncovered on medium-high heat for an extra 5-7 minutes. If it’s still loose, mix 1 tsp cornstarch with water and stir in during the last 2 minutes of cooking.
Can I make this ahead of time?
The flavors deepen overnight. Store in an airtight container in the fridge for up to 5 days, or freeze for up to 3 months. Reheat gently to preserve texture.

- Jollof Rice Sauce Recipe: West African Tomato and Spice Infusion - September 25, 2026
- Japanese Rice Soup Recipe: Umami-Rich Comfort in a Bowl - September 25, 2026
- Homemade Cream Of Rice Recipe: Silk-Smooth Breakfast in Minutes - September 25, 2026