
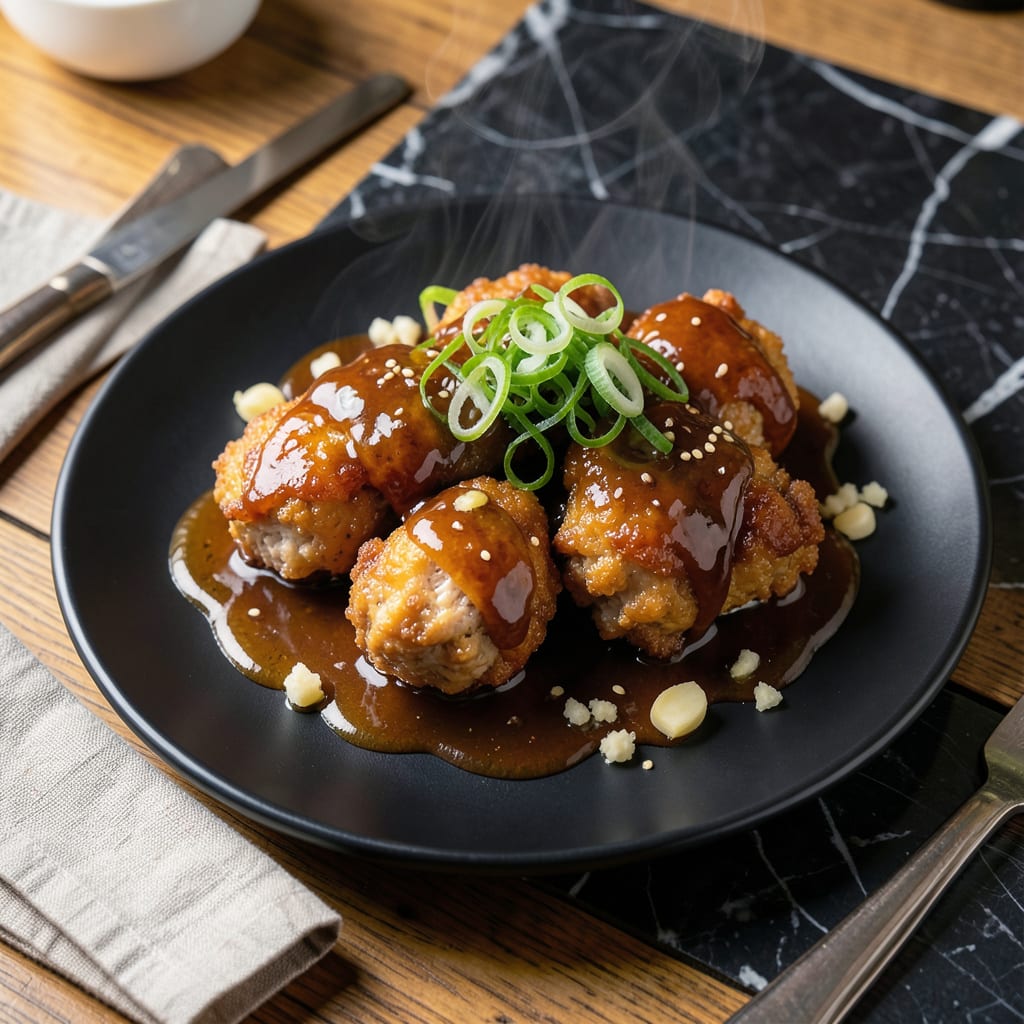
This sauce transforms chicken karaage into an unforgettable experience with its umami-rich depth and balanced sweetness.
With just a few pantry staples, you’ll create a perfect dipping companion that enhances every crispy bite without overpowering it.
Ingredients for Chicken Karaage Sauce
Pantry staples come together for a sauce that’s bold yet balanced. Perfect for dipping.
| Ingredient | Amount | Notes |
|---|---|---|
| Soy Sauce 🥢 | ½ cup | Low-sodium preferred for balance |
| Mirin 🍶 | ¼ cup | Sweet rice wine essential |
| Rice Vinegar 🍚 | 2 tbsp | Unseasoned for clean acidity |
| Brown Sugar 🍚 | 2 tbsp | Packed for depth of sweetness |
| Fresh Ginger 🌿 | 1 tbsp | Finely grated for zing |
| Garlic Cloves 🧄 | 3 cloves | Minced for aromatic punch |
| Sesame Oil 🫒 | 1 tsp | Toasted for nutty finish |
| Cornstarch 🌾 | 1 tsp | Mixed with water for thickening |
| Water 💧 | 1 tbsp | For cornstarch slurry |
| Toasted Sesame Seeds 🌰 | 1 tsp | For garnish and texture |
[recipeingredientscaler]
The soy sauce is non-negotiable here—Kikkoman is my go-to for consistency. Mirin can be found at Asian markets or the international aisle at Whole Foods. If you’re buying rice vinegar, make sure it’s labeled unseasoned (seasoned has added sugar and salt). Brown sugar should be the soft, moist kind, not the rock-hard stuff hiding in the back of your cabinet (we’ve all been there).
No mirin? Dry sherry plus a pinch of sugar in a 1:1 ratio gets you close. Swap rice vinegar for apple cider vinegar if needed, but it’ll shift the flavor slightly. Fresh ginger is best, but ground ginger at half the amount works in a pinch. The sesame oil must be toasted—light sesame oil lacks that deep, nutty aroma that makes the sauce sing.
This keeps beautifully in the fridge for up to 10 days in a sealed jar. The flavors actually deepen after a day. Freezing isn’t ideal (it can separate), but if you must, it’ll last 3 months. Give it a good stir before using after storage.
Why You’ll Love This Recipe
- One Bowl Wonder: I just dump the soy sauce, mirin, vinegar, sugar, and ginger in a bowl, whisk, and it’s ready—no chopping, no fuss.
- Sweet-Savory Magic: That first brush of the glossy sauce over crispy chicken? The brown sugar caramelizes while the ginger zings.
- Freezer Friendly: I double the batch, freeze half, and pull it out for impromptu karaage nights—no takeout needed.
- Pantry Staples Only: Between us, I always have these ingredients on hand, so dinner’s saved even when the fridge is bare.
Step-by-Step Instructions for Chicken Karaage Sauce
This method delivers a glossy, umami-packed dipping sauce with perfect balance every time.
Step 1: Bloom the Aromatics in Soy Base
In a small saucepan over medium heat, combine the 0.5 cup Soy Sauce, 0.25 cup Mirin, 2 tbsp Rice Vinegar, and 2 tbsp Brown Sugar. Stir until the sugar begins to dissolve and the mixture just starts to simmer at the edges.
Add the 1 tbsp Fresh Ginger and 3 cloves Garlic Cloves to the warming liquid. The ginger should be finely grated and the garlic minced to release their full aromatic potential. Let them bloom in the sauce for 2-3 minutes until the raw edge mellows and the kitchen fills with their warm, pungent scent.
Step 2: Infuse with Toasted Sesame Depth
Remove the pan from heat and stir in the 1 tsp Sesame Oil. Its toasted, nutty notes will layer beautifully with the soy and mirin. This step off heat prevents the sesame oil from becoming bitter, preserving its delicate flavor.
Let the mixture sit for 1 minute to allow the sesame oil to fully incorporate. You’ll notice the sauce taking on a richer, more complex aroma as the ingredients meld together. The color should deepen slightly to a warm mahogany hue.
Step 3: Create and Incorporate the Slurry
In a small bowl, whisk together the 1 tsp Cornstarch and 1 tbsp Water until completely smooth with no lumps. This slurry will thicken the sauce to the perfect consistency for coating karaage pieces.
Return the saucepan to medium-low heat and slowly drizzle in the cornstarch mixture while stirring constantly. Continue stirring for 1-2 minutes until the sauce thickens enough to coat the back of a spoon with a glossy sheen.
Step 4: Finish and Garnish for Service
Once the sauce reaches your desired consistency, immediately remove it from heat. The texture should be silky and pourable, not gelatinous. Taste and adjust seasoning if needed—though the balance should already be spot-on.
Transfer to a serving bowl and let cool to room temperature. Just before serving, sprinkle the 1 tsp Toasted Sesame Seeds over the surface for visual appeal and a subtle crunch. The sauce will continue to thicken slightly as it cools, achieving the ideal dipping viscosity.
Pro Tips For Making Chicken Karaage Sauce
- Simmer Don’t Boil: Keep the sauce at a gentle simmer—if it boils, the brown sugar can burn and the mirin loses its sweetness before it thickens properly.
- Grate the Ginger: Fresh ginger releases more flavor when finely grated, and it blends into the sauce better than minced or sliced.
- Skip the Salt: Soy sauce already adds enough salt, so resist the urge to season the sauce further until you’ve tasted it.
- Bloom the Sugar: Let the brown sugar melt and bubble for 30 seconds before adding liquids—this builds a deeper caramel base for the sauce.
Regional Styles of This Dish
Tokyo-Style Classic
This is the version you’ll find in most izakayas across Japan, with a perfect balance of soy sauce, mirin, and rice vinegar. I always use Kikkoman soy sauce for consistency, and the result is a glossy, umami-packed dip that clings beautifully to each piece of karaage. 💛
Osaka Sweet Glaze
In Osaka, they often add a touch more sweetness to their karaage sauce. I like to increase the brown sugar to 3 tbsp and add 1 tbsp honey for a deeper, caramel-like finish. This version pairs wonderfully with the city’s signature crispy, double-fried karaage.
Kyoto Refined Version
Kyoto’s approach leans more delicate, with less emphasis on bold flavors. I reduce the soy sauce to ⅓ cup and add 1 tbsp sake for a lighter, more aromatic profile. The result is a subtle, elegant sauce that lets the chicken’s flavor shine through.
Hokkaido Spicy Kick
Up north in Hokkaido, they love a spicy twist. I mix in 1 tsp chili oil or ½ tsp red pepper flakes along with the sesame oil at the end. This adds warmth without overwhelming the sauce’s natural harmony. Perfect for cold winter nights. 🌶️
Okinawa Citrus Brightness
Okinawa’s tropical influence brings citrus into the mix. I add 1 tbsp yuzu juice or zest of 1 lime to brighten the sauce. This version cuts through the richness of the fried chicken with a refreshing, zesty finish.
Nutrition Facts
Frequently Asked Questions
Can I make this sauce ahead of time?
The flavors actually deepen after 24 hours in the fridge. Store in an airtight container and it will keep for up to 10 days. Stir well before using.
What can I substitute for mirin?
Use dry sherry plus ½ tsp sugar per 1 tbsp mirin. For a non-alcoholic option, mix rice vinegar with ¼ tsp sugar. The sweetness is key for balance.
Why did my sauce turn out too thin?
Likely the cornstarch slurry didn’t cook long enough. Return it to medium-low heat and stir for an additional 1-2 minutes until glossy and thickened.
Can I use this for other dishes?
Yes! It’s fantastic with grilled meats, dumplings, or as a salad dressing. Thin with 1-2 tbsp water for drizzling over veggies.

- Jollof Rice Sauce Recipe: West African Tomato and Spice Infusion - September 25, 2026
- Japanese Rice Soup Recipe: Umami-Rich Comfort in a Bowl - September 25, 2026
- Homemade Cream Of Rice Recipe: Silk-Smooth Breakfast in Minutes - September 25, 2026