
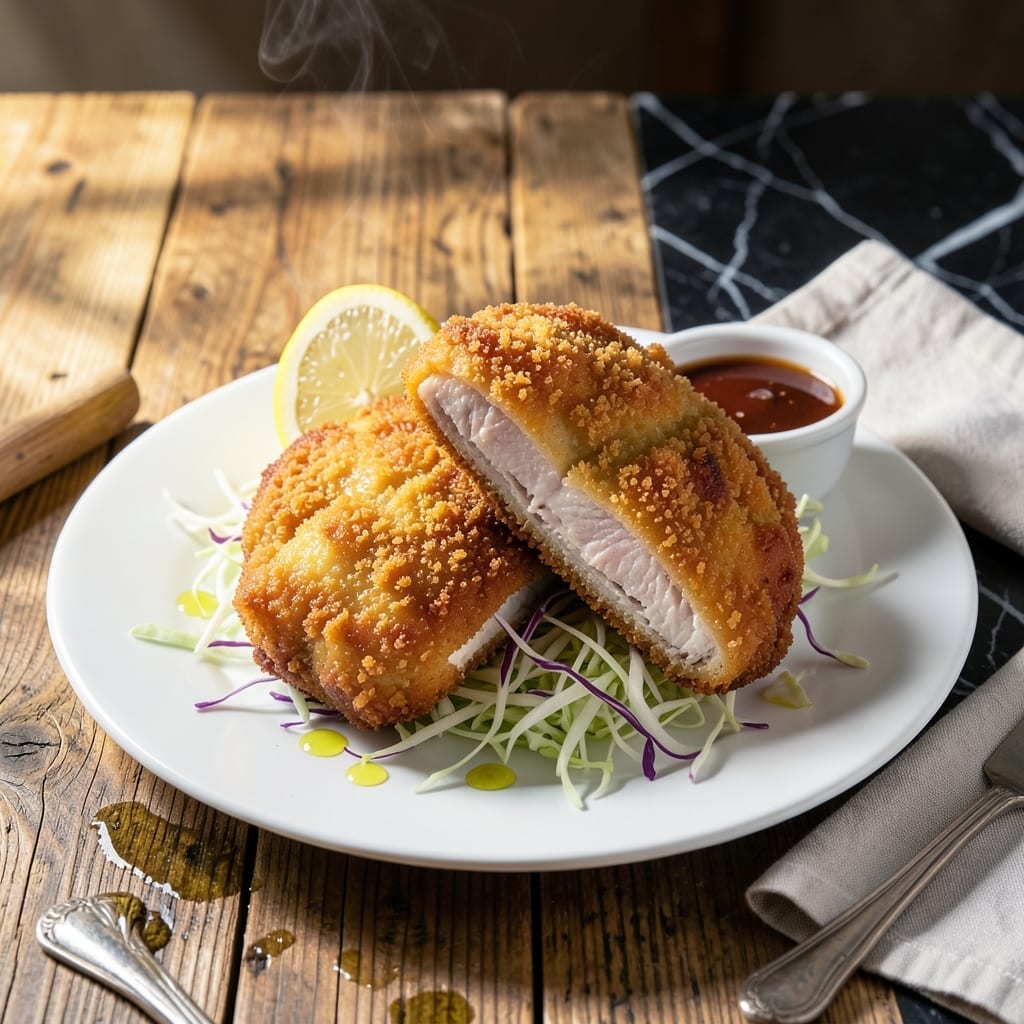
This chicken katsu delivers ultra crispy results every time with a simple panko breading technique perfected through years of testing.
The secret lies in the double-dredging method, using flour, egg, and panko for maximum crunch. I fry at exactly 350°F to ensure even cooking without burning.
You’ll get golden cutlets with a shatteringly crisp exterior and juicy, tender meat inside. The panko creates air pockets that stay crunchy long after frying.
Serve immediately with tonkatsu sauce and steamed rice for the authentic experience. This method guarantees restaurant-quality texture at home.
Ingredients for Chicken Katsu
Panko, eggs, and perfectly pounded cutlets create restaurant-quality crispy chicken at home.
| Ingredient | Amount | Notes |
|---|---|---|
| Boneless Chicken Breast Cutlets 🍗 | 1 ½ lb | Pounded to 1/4-inch thickness |
| All-Purpose Flour 🌾 | ½ cup | For initial dredging |
| Kosher Salt 🧂 | 1 tsp | Diamond Crystal preferred |
| Ground Black Pepper 🌶️ | ½ tsp | Freshly ground for best flavor |
| Large Eggs 🥚 | 2 whole | Beaten for egg wash |
| Panko Breadcrumbs 🍞 | 2 cups | Japanese-style for maximum crunch |
| Neutral Oil 🫒 | 2 cups | For deep frying, 350°F |
| Tonkatsu Sauce 🍯 | ½ cup | Store-bought or homemade |
| Garlic Powder 🧄 | ½ tsp | Optional for breading |
| Onion Powder 🧅 | ½ tsp | Optional for breading |
| Paprika 🌶️ | ¼ tsp | For color in breading |
| Steamed Rice 🍚 | 2 cups | Cooked, for serving |
The chicken cutlets must be uniformly thin—pound to exactly 1/4-inch thickness for even cooking. Costco or Whole Foods carry pre-cut chicken breast cutlets, saving prep time. For panko, Kikkoman or Progresso brands deliver authentic texture. The neutral oil should have a high smoke point—peanut or vegetable oil works best for maintaining that consistent 350°F.
No panko? Crush cornflakes with a pinch of salt as a last resort—texture won’t match but it’ll crisp. Short on eggs? Buttermilk at half the quantity can work for dredging, though binding won’t be as strong. The tonkatsu sauce is non-negotiable for authenticity—Bull-Dog or Otafuku are standard brands. Skip the garlic and onion powder if you prefer a purist approach, but they add subtle depth.
Fry in batches to avoid crowding—this drops oil temp and causes greasy results. Drain on a rack (not paper towels) to keep the crust shatteringly crisp. Best served immediately, but leftovers reheat decently in a 400°F oven for 8-10 minutes.
Why You’ll Love This Recipe
- Weeknight Hero: I can bread and pan-fry these cutlets faster than the kids finish their homework.
- Crispy Perfection: That golden panko crust with juicy chicken inside? Honestly, I make extra just to snack on.
- Crowd Pleaser: From school lunches to date night, these cutlets work for picky eaters and foodies alike.
- Budget Stretcher: Between us, chicken breasts on sale plus pantry staples mean I serve four for less than takeout.
Step-by-Step Instructions for Chicken Katsu
This method ensures maximum crunch and perfect doneness every time.
Step 1: Prepare and Season the Chicken
Pat the 1.5 lb boneless chicken breast cutlets dry with paper towels to remove excess moisture. This critical step prevents the breading from slipping off during frying. Season both sides evenly with the 1 tsp kosher salt and 0.5 tsp ground black pepper.
Place each cutlet between sheets of plastic wrap and pound to a uniform 1/4-inch thickness using a meat mallet. Uniform thickness guarantees even cooking and prevents dry, overcooked edges. The cutlets should look consistently thin across their entire surface.
Step 2: Create the Breading Station
Set up three shallow dishes for breading. In the first, place the 0.5 cup all-purpose flour. In the second, beat the 2 whole large eggs until frothy. In the third, combine the 2 cups panko breadcrumbs, 0.5 tsp garlic powder, 0.5 tsp onion powder, and 0.25 tsp paprika.
The paprika adds subtle color to the final dish while the garlic and onion powders infuse the breading with savory depth. This three-step breading process creates layers that adhere better and crisp more dramatically than single-step methods.
Step 3: Bread the Chicken with Precision
Dredge each cutlet in the flour, shaking off excess, then dip into the beaten eggs, allowing any excess to drip off. Press firmly into the panko mixture, ensuring complete coverage on both sides. The pressure helps the crumbs adhere tenaciously during frying.
Place the breaded cutlets on a wire rack set over a baking sheet. This elevation prevents the breading from becoming soggy from trapped steam. Let them rest for 10 minutes to allow the coating to set before frying.
Step 4: Deep Fry to Golden Perfection
Heat the 2 cups neutral oil in a deep, heavy-bottomed pot to 350°F. Use a thermometer for accuracy—oil temperature is critical for achieving that signature crispiness without overcooking the meat. The ideal temperature creates a vigorous bubble around each cutlet.
Fry the cutlets 2 at a time to avoid crowding the pan, which would lower the oil temperature. Cook for 4-5 minutes per side until the breading is deep golden brown and the internal temperature reaches 165°F. The cutlets should float freely when properly cooked.
Step 5: Rest and Serve Immediately
Transfer the fried cutlets to the wire rack to drain excess oil. The rack allows air circulation on all sides, maintaining crispness. Let them rest for 2-3 minutes before slicing—this brief pause allows the juices to redistribute.
Slice the chicken katsu into 1/2-inch strips and serve immediately over 2 cups steamed rice with 0.5 cup tonkatsu sauce for dipping. The contrast of hot, crispy cutlets with cool, creamy sauce defines this dish.
Pro Tips For Making Chicken Katsu
- Pound the Chicken: Use a meat mallet to pound the cutlets to an even 1/2-inch thickness—this guarantees even cooking and prevents dry, chewy spots.
- Double Dredge: Dip each piece in flour, then egg, then back in flour before frying. I learned this the hard way—it makes the crust extra crispy and helps it stick.
- Hot Oil Only: Don’t add the chicken until the oil is shimmering at 350°F. After burning three batches, I finally figured out that lukewarm oil just soaks in and makes the coating greasy.
- Rest Before Slicing: Give the fried cutlets 5 minutes on a wire rack before cutting—this keeps the juices from leaking out and turning your crispy crust soggy.
Creative Variations of These Flavors
Spicy Thai Twist
Add 1 tbsp red curry paste and 1 tsp sriracha to the egg wash for a Thai-inspired kick. Serve with a peanut dipping sauce made from ¼ cup peanut butter, 2 tbsp soy sauce, and 1 tbsp lime juice. I love the heat this brings to the classic crispiness. 🌶️
Honey Mustard Glaze
Mix 3 tbsp honey and 2 tbsp Dijon mustard to brush on the cutlets during the last 30 seconds of frying. This creates a sticky, sweet-spicy glaze that pairs perfectly with the crunch. The contrast of flavors is incredible.
Parmesan Crust
Add ½ cup grated Parmesan to the panko mixture for an Italian-inspired variation. The cheese melts slightly during frying, creating an extra crispy, savory crust. I use Parmigiano-Reggiano for the best flavor.
Lemon Pepper Zing
Stir 1 tbsp lemon zest and 1 tsp cracked black pepper into the panko breading. This adds a bright, citrusy kick that cuts through the richness. Serve with extra lemon wedges for squeezing.
Bacon-Wrapped Delight
Wrap each cutlet with 1 slice of bacon before breading for an extra layer of flavor. The bacon crisps up alongside the panko, adding a smoky depth. Secure with toothpicks and remove before serving.
Herb-Infused Crust
Mix 2 tbsp chopped fresh parsley and 1 tbsp thyme leaves into the panko. The herbs add a fresh, aromatic element that complements the chicken beautifully. I prefer flat-leaf parsley for its clean flavor. ✨
Nutrition Facts
Frequently Asked Questions
What oil works best for frying?
Use a neutral oil with a high smoke point like peanut or vegetable oil. These maintain 350°F perfectly without burning. Avoid olive oil as it can impart flavor and has a lower smoke point.
How do I keep the breading crispy?
Drain on a wire rack, not paper towels, to allow air circulation. Serve immediately for maximum crunch. Reheat leftovers in a 400°F oven for 8-10 minutes to revive crispness.
Can I use regular breadcrumbs instead of panko?
Not recommended—panko’s coarse texture creates the signature crunch. In a pinch, pulse regular breadcrumbs in a food processor for a coarser texture, but results won’t be as crispy.
Why did my breading fall off during frying?
This usually happens if the chicken wasn’t dry before breading or if the oil temperature was too low. Ensure cutlets are patted dry and oil is at 350°F before frying.

- Jollof Rice Sauce Recipe: West African Tomato and Spice Infusion - September 25, 2026
- Japanese Rice Soup Recipe: Umami-Rich Comfort in a Bowl - September 25, 2026
- Homemade Cream Of Rice Recipe: Silk-Smooth Breakfast in Minutes - September 25, 2026