
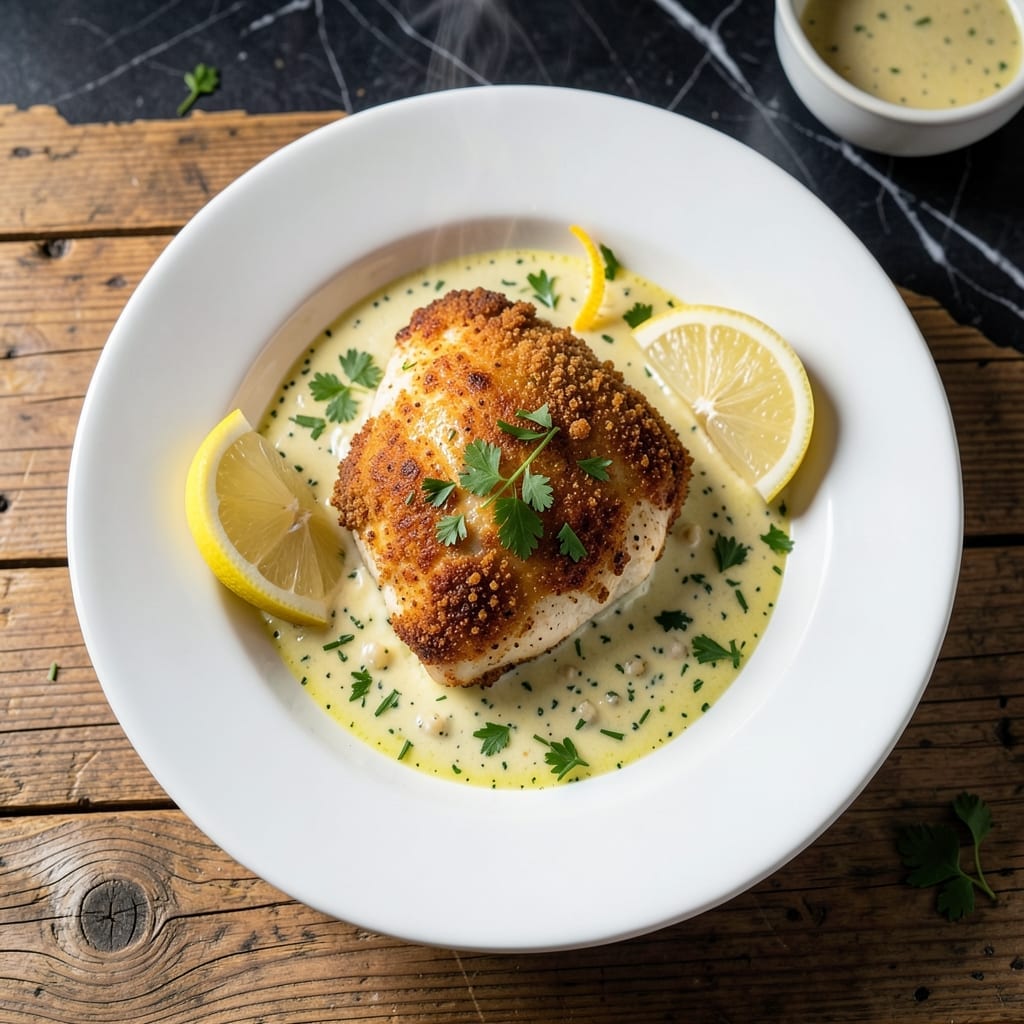
Chicken Kiev represents the pinnacle of classic European comfort food. This dish transforms simple ingredients into an elegant centerpiece with its signature garlic-herb butter center.
The original preparation involves carefully stuffing chicken breasts with seasoned butter, then breading and cooking to golden perfection. The result is a crisp exterior giving way to a melt-in-your-mouth buttery surprise.
Mastering this recipe requires attention to detail, particularly in keeping the butter cold during preparation. The contrast between the crisp coating and the rich, garlic-infused center makes every bite unforgettable.
Serve this immediately for the best texture, as the butter center remains hot and flowing. The presentation alone will impress any dinner guest.
Ingredients for Chicken Kiev Original
Elegant yet approachable ingredients transform into a European classic with buttery garlic surprise inside.
| Ingredient | Amount | Notes |
|---|---|---|
| Chicken Breasts 🍗 | 4 whole | Boneless, skinless, pounded to 1/4-inch thickness |
| Unsalted Butter 🧈 | ½ cup | Divided, kept ice cold |
| Garlic Cloves 🧄 | 4 cloves | Minced very fine |
| Fresh Parsley 🌿 | ¼ cup | Finely chopped, flat-leaf variety |
| Fresh Chives 🌿 | 2 tbsp | Finely snipped |
| Lemon Juice 🍋 | 1 tsp | Freshly squeezed |
| All-Purpose Flour 🌾 | ½ cup | For initial dredging |
| Large Eggs 🥚 | 2 whole | Beaten for egg wash |
| Panko Breadcrumbs 🍞 | 1 ½ cups | Japanese-style for extra crunch |
| Dijon Mustard 🟡 | 2 tbsp | For sealing butter pocket |
| Kosher Salt 🧂 | 1 ½ tsp | Diamond Crystal preferred |
| Freshly Ground Black Pepper 🌶️ | ½ tsp | Coarse grind recommended |
| Vegetable Oil 🫒 | 1 cup | For frying, high smoke point |
| Lemon Wedges 🍋 | 4 pieces | For serving |
The butter is non-negotiable. European-style unsalted butter (like Plugrá or Kerrygold) has the fat content to stay solid longer during cooking. Chicken breasts should be uniform in thickness—pound them between parchment paper for even cooking. Whole Foods or ButcherBox carry high-quality, air-chilled chicken that holds up better to stuffing.
No fresh herbs? Dried at one-third the amount, but fresh is ideal for that vibrant pop. Out of panko? Regular breadcrumbs work, though the texture won’t be as crisp. The Dijon can be swapped for whole-grain mustard—just avoid sweet varieties. For a richer butter center, fold in a touch of grated Parmesan (keep it cold).
Assemble just before cooking—butter softens fast. Leftovers reheat poorly (the coating loses crunch), so serve immediately. Best consumed within 2 hours of cooking for optimal texture. Freezing unbreaded stuffed breasts works for up to 1 month.
Why You’ll Love This Recipe
- Minimal Chopping Required: I just finely mince the garlic, parsley, and chives—no fancy knife skills needed.
- Buttery Garlic Explosion: That first bite of crispy breading giving way to melted garlic butter? Ridiculously good.
- Feeds a Crowd: I stretch one batch to serve six with a simple side salad. Honestly, it’s my go-to for weekend gatherings.
- Leftovers Reheat Well: The next day’s chicken stays juicy in the microwave, and that buttery center? Still spot-on.
Step-by-Step Instructions for Chicken Kiev
Master the classic technique for this buttery, garlic-filled delicacy with perfect golden crunch.
Step 1: Prepare the Garlic Butter Filling
Combine 0.5 cup unsalted butter (kept ice cold) with 4 cloves garlic cloves (minced very fine), 0.25 cup fresh parsley (finely chopped), 2 tbsp fresh chives (finely snipped), and 1 tsp lemon juice in a bowl. Mix until thoroughly incorporated and the herbs are evenly distributed throughout the butter.
The butter should remain firm but pliable—if it softens too much, return it to the refrigerator for 10-15 minutes to rechill. This firm consistency is crucial for creating clean pockets inside the chicken that won’t leak during cooking. Divide the mixture into 4 equal portions and shape each into a narrow log about 2 inches long.
Step 2: Create the Butter Pockets
Lay out the 4 whole chicken breasts (pounded to 1/4-inch thickness) on a work surface. Season each lightly with 1.5 tsp kosher salt and 0.5 tsp freshly ground black pepper. Place 1 garlic butter log in the center of each breast. Fold the sides of the chicken over the butter to enclose it completely.
Secure the edges with 2 tbsp Dijon mustard applied sparingly—this acts as both a flavor enhancer and a sealant. The mustard’s acidity helps break down surface proteins, creating a better bond. Press the edges firmly together to eliminate any gaps where the butter might escape during cooking.
Step 3: Bread the Chicken
Set up a breading station with three shallow dishes. Place 0.5 cup all-purpose flour in the first, 2 whole large eggs (beaten) in the second, and 1.5 cups panko breadcrumbs in the third. Dredge each butter-stuffed chicken breast in the flour, shaking off excess, then dip in the egg wash, allowing any excess to drip off.
Press the chicken into the panko breadcrumbs, turning to coat all sides completely. The breadcrumbs should adhere in an even, dense layer—this creates the signature crispy exterior. For extra crunch, I press the breadcrumbs firmly into the chicken. Place the breaded chicken on a wire rack set over a baking sheet and refrigerate for 30 minutes to set the coating.
Step 4: Fry to Golden Perfection
Heat 1 cup vegetable oil in a large, heavy skillet over medium-high heat until it reaches 350-375°F. The oil is ready when a pinch of breadcrumbs sizzles vigorously when dropped in. Carefully place 2 chicken breasts in the skillet (don’t crowd the pan) and fry for 4-5 minutes per side until golden brown and crispy.
The internal temperature should reach 165°F—use an instant-read thermometer inserted through the thickest part, avoiding the butter pocket. Transfer to a paper towel-lined plate to drain excess oil. Repeat with the remaining chicken. Let rest for 2 minutes before serving to allow the butter to settle slightly.
Step 5: Serve Immediately
Transfer each chicken kiev to a serving plate. The moment you cut into it, the melted garlic butter should flow out in a rich, fragrant stream. Serve immediately with 4 pieces lemon wedges on the side for a bright, acidic contrast to the rich butter.
Each portion should have a perfectly crisp panko crust giving way to tender chicken, with that unmistakable garlic butter surprise at the center. The panko’s Japanese-style texture provides superior crunch compared to traditional breadcrumbs, while the Dijon mustard seal ensures the butter stays contained until the very first cut.
Pro Tips For Making Chicken Kiev Original
- Chill the Butter: Freeze your herb butter for at least 30 minutes before rolling it into the chicken—soft butter leaks out during cooking, and I learned this the hard way after ruining two batches.
- Pound Evenly: Use a rolling pin to flatten the chicken breasts to an even 1/4-inch thickness; uneven pieces cook at different rates, and the thin parts dry out while waiting for the thick parts to finish.
- Seal the Edges: Press the edges of the chicken tightly around the butter before breading, or the filling will ooze out in the pan—yes, even if you think it’s secure.
- Rest Before Frying: Let the breaded cutlets rest in the fridge for 15-20 minutes before frying; it helps the coating stick and keeps the butter from escaping during the first flip.
Serving Suggestions for Leftovers
Plating Presentation
Place each chicken kiev on a warm plate with the seam side down to show off the golden panko crust. The crisp exterior should be the star of the presentation. I always wipe the plate edges for a clean, restaurant-worthy look.
Lemon Garnish
Position 1 lemon wedge alongside each serving. The bright yellow color contrasts beautifully with the golden-brown chicken. Squeeze a few drops over the top just before serving to add freshness. 🍋
Side Dish Pairings
Serve with buttered egg noodles to catch every drop of garlic butter. The noodles soak up the flavor beautifully. Steamed asparagus adds a fresh, crisp element that balances the richness.
Sauce Options
A light white wine sauce with shallots and capers complements the dish without overpowering it. Alternatively, a simple herb butter drizzle enhances the existing flavors. Avoid heavy cream sauces—they compete with the butter center.
Wine Pairing
A crisp Sauvignon Blanc cuts through the richness with its citrus notes. For red lovers, a light Pinot Noir works well. Both wines have enough acidity to handle the butter. 🍷
Final Touch
Garnish with extra fresh parsley for color and freshness. A light dusting of flaky sea salt on top enhances the crust. Serve immediately—the butter center is best when flowing hot.
Nutrition Facts
Frequently Asked Questions
Why does the butter leak out sometimes?
The most common cause is butter that’s too soft during stuffing. Keep it ice cold and work quickly. Sealing with Dijon mustard also helps contain it.
Can I bake instead of fry?
Yes, bake at 400°F for 20-25 minutes on a wire rack. The crust won’t be as crisp, but you’ll still get that buttery center. Brush with oil first for better browning.
How do I keep the coating crisp?
Chill breaded breasts for 30 minutes before cooking. Serve immediately—the coating softens as it sits. Avoid crowding the pan during frying.
What’s the best way to pound the chicken?
Place breasts between plastic wrap and pound to 1/4-inch thickness with a meat mallet. This ensures even cooking and a consistent butter pocket.

- Jollof Rice Sauce Recipe: West African Tomato and Spice Infusion - September 25, 2026
- Japanese Rice Soup Recipe: Umami-Rich Comfort in a Bowl - September 25, 2026
- Homemade Cream Of Rice Recipe: Silk-Smooth Breakfast in Minutes - September 25, 2026