
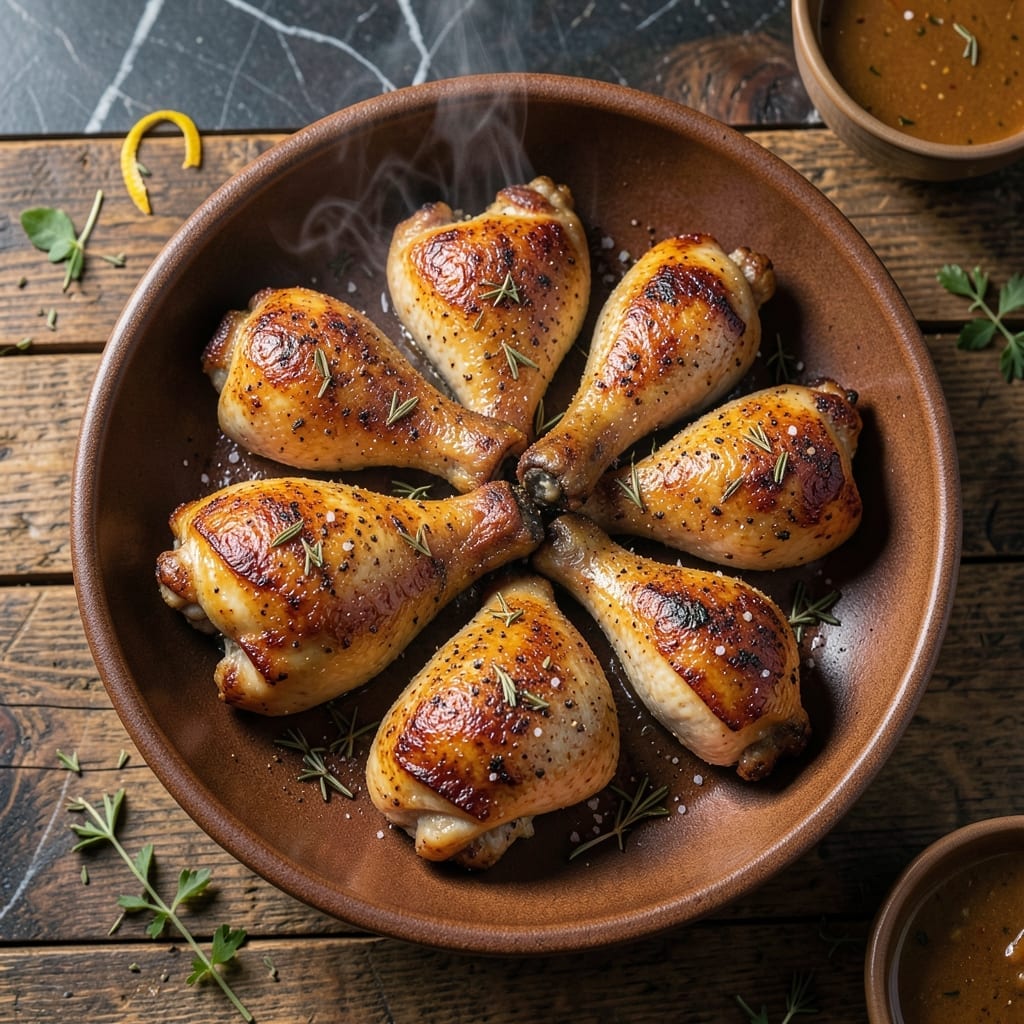
Achieving crispy skin and juicy meat on oven-baked chicken legs is simpler than you think. This method delivers consistent results with minimal effort.
The secret lies in high heat and proper drying of the skin before cooking. A simple seasoning blend enhances the natural flavor without overpowering it.
You’ll get perfectly browned chicken with meat that pulls away from the bone. The skin stays shatteringly crisp while the inside remains tender and moist.
Ready in under an hour, this dish works for weeknight dinners or weekend gatherings. The technique is foolproof and reliable every time.
Ingredients for Chicken Legs
Simple ingredients for maximum flavor and perfect texture every time.
| Ingredient | Amount | Notes |
|---|---|---|
| Chicken Legs 🍗 | 8 pieces | Skin-on, bone-in preferred |
| Kosher Salt 🧂 | 1 ½ tsp | Diamond Crystal preferred |
| Freshly Ground Black Pepper 🌶️ | 1 tsp | Coarse grind for texture |
| Garlic Powder 🧄 | 1 tsp | Not garlic salt |
| Onion Powder 🧅 | 1 tsp | Fine grind works best |
| Smoked Paprika 🌶️ | 1 tsp | Adds depth of flavor |
| Dried Thyme 🍃 | ½ tsp | Crushed between fingers |
| Dried Rosemary 🌿 | ½ tsp | Crushed between fingers |
| Olive Oil 🫒 | 2 tbsp | Extra-virgin for richness |
| Baking Powder 🧂 | ½ tsp | Ensures crispy skin |
| Lemon 🍋 | ½ whole | Zested and juiced |
The chicken legs are the foundation—skin-on, bone-in for optimal crispiness and juiciness. Source from Whole Foods or your local butcher for consistent quality. Pat them dry thoroughly (the key to crispy skin) before seasoning. I prefer air-chilled chicken when available, as it hasn’t absorbed water during processing, which helps achieve that shatteringly crisp result.
No smoked paprika? Regular paprika with a pinch of cayenne works in a pinch. Dried herbs can be swapped for fresh at one-third the amount. The baking powder might seem unusual, but it’s the professional trick for extra-crispy skin—don’t skip it. If you’re out of garlic powder, fresh minced garlic at double the quantity adds a bright note.
Store raw chicken in the coldest part of the fridge—use within 2 days or freeze for up to 9 months. Leftovers keep 3-4 days refrigerated. Reheat in the oven to maintain crispiness; microwaving will soften the skin.
Why You’ll Love This Recipe
- One Pan Wonder: Honestly, it’s just chicken legs, salt, pepper, and a shake of garlic and onion powder—toss it all on a sheet pan and let the oven do the work.
- Crispy & Savory: That skin gets so perfectly browned, and the combo of garlic powder and kosher salt makes every biteridiculously good.
- Feeds Everyone: I make a big batch for Sunday dinner, then pack the leftovers for lunches all week. (Yes, even on a Tuesday night)
- Budget Friendly: Chicken legs are cheap, the spices are pantry staples, and it still feels like a proper meal.
Step-by-Step Instructions for Oven-Baked Chicken Legs
Master this technique to achieve perfectly crispy skin and succulent meat every time.
Step 1: Season and Dry the Chicken Legs
Pat the 8 pieces chicken legs completely dry with paper towels—this is essential for crispy skin. In a small bowl, combine 1.5 tsp kosher salt, 1 tsp freshly ground black pepper, 1 tsp garlic powder, 1 tsp onion powder, 1 tsp smoked paprika, 0.5 tsp dried thyme, 0.5 tsp dried rosemary, and 0.5 tsp baking powder.
Rub this seasoning blend all over the chicken legs, pressing it into the skin so it adheres well. The baking powder is the secret to extra-crispy skin by raising the pH and breaking down proteins more efficiently. Let the seasoned legs sit uncovered on a wire rack for 15-20 minutes to dry the skin further.
Step 2: Prepare the Baking Sheet and Add Aromatics
Preheat your oven to 425°F. Line a rimmed baking sheet with parchment paper or foil for easy cleanup. Arrange the chicken legs on the prepared sheet, spacing them evenly so they don’t touch—this ensures proper air circulation for even browning.
Drizzle the 2 tbsp olive oil over the chicken legs and rub it into the skin. Zest the 0.5 whole lemon directly over the chicken, then cut the zested lemon in half and place the halves cut-side up on the baking sheet. The lemon adds brightness and helps balance the richness of the chicken.
Step 3: Roast Until Golden and Crispy
Place the baking sheet on the middle rack of the preheated oven. Roast the chicken legs for 40-45 minutes, flipping them halfway through the cooking time. You’ll know they’re ready when the skin is deep golden brown and crispy, and the internal temperature reaches 175°F when measured at the thickest part of the meat.
Avoid opening the oven door too often during roasting—this can cause temperature fluctuations and prevent the skin from crisping properly. The baking powder in the seasoning will create tiny bubbles on the skin, which is normal and contributes to the extra-crispy texture.
Step 4: Rest and Serve
Once the chicken legs are fully cooked, remove them from the oven and transfer to a serving platter. Squeeze the roasted lemon halves over the chicken to release their juices, which will add a final burst of flavor. Tent loosely with foil and let them rest for 5-10 minutes before serving.
This resting period allows the juices to redistribute throughout the meat, ensuring every bite is moist and tender. Serve the chicken legs hot, with the pan juices spooned over the top for extra flavor. The skin should be crispy enough to crackle when bitten, while the meat remains juicy and flavorful.
Pro Tips For Making Chicken Legs
- Pat Them Dry: Use paper towels to thoroughly dry the chicken legs before seasoning—this guarantees a crispier skin and helps the salt and spices stick better.
- Season Generously: Don’t be shy with the kosher salt, garlic powder, and onion powder; these legs can handle bold flavor, especially since the skin locks it all in.
- Skip the Overcrowding: If baking or pan-searing, give each leg space so they brown instead of steam—I learned this the hard way with soggy results.
- Rest Before Serving: Let the chicken legs rest for 5-10 minutes after cooking to keep the juices inside where they belong.
Best Sauces and Condiments for This Dish
Classic BBQ Sauce
My go-to pairing is a tangy Kansas City-style BBQ sauce. Brush it on during the last 10 minutes of baking for sticky, caramelized results. I recommend Sweet Baby Ray’s for its balanced sweetness and smoke. 🔥
Spicy Buffalo Glaze
Mix ½ cup Frank’s RedHot with 2 tbsp melted butter and toss the legs in it after baking. The heat cuts through the richness beautifully. Serve with ranch or blue cheese dressing for dipping.
Honey Mustard Twist
Whisk 3 tbsp Dijon mustard with 2 tbsp honey and 1 tbsp apple cider vinegar. Drizzle over the chicken before serving. The acidity brightens the dish perfectly.
Garlic-Lemon Aioli
Combine ½ cup mayo with 1 minced garlic clove, 1 tbsp lemon juice, and a pinch of salt. This creamy dip complements the crispy skin wonderfully. It’s my secret weapon for guests. ✨
Asian-Inspired Glaze
Simmer ¼ cup soy sauce, 2 tbsp honey, 1 tbsp ginger, and 1 tsp sesame oil until thickened. Brush on hot chicken legs for a sweet-savory finish.
Herb Butter Baste
Melt 4 tbsp butter with 1 tbsp fresh rosemary and 1 tbsp thyme. Spoon over the chicken just before serving for an aromatic, rich addition.
Nutrition Facts
Frequently Asked Questions
Do I need to marinate the legs overnight?
No, this recipe uses a dry rub that works perfectly with just 15-20 minutes of resting time. The baking powder in the seasoning helps crisp the skin without long marination.
Why is the internal temperature higher than chicken breast?
Dark meat like legs benefits from cooking to 175°F for optimal tenderness. The extra heat breaks down collagen without drying out the meat.
Can I use chicken thighs instead?
Use the same method but reduce cooking time to 35-40 minutes. Thighs cook faster due to their smaller size.
How do I keep the skin crispy when storing leftovers?
Store in an open container in the fridge for up to 3-4 days. Reheat in a 400°F oven for 10 minutes to restore crispiness.

- Jollof Rice Sauce Recipe: West African Tomato and Spice Infusion - September 25, 2026
- Japanese Rice Soup Recipe: Umami-Rich Comfort in a Bowl - September 25, 2026
- Homemade Cream Of Rice Recipe: Silk-Smooth Breakfast in Minutes - September 25, 2026