
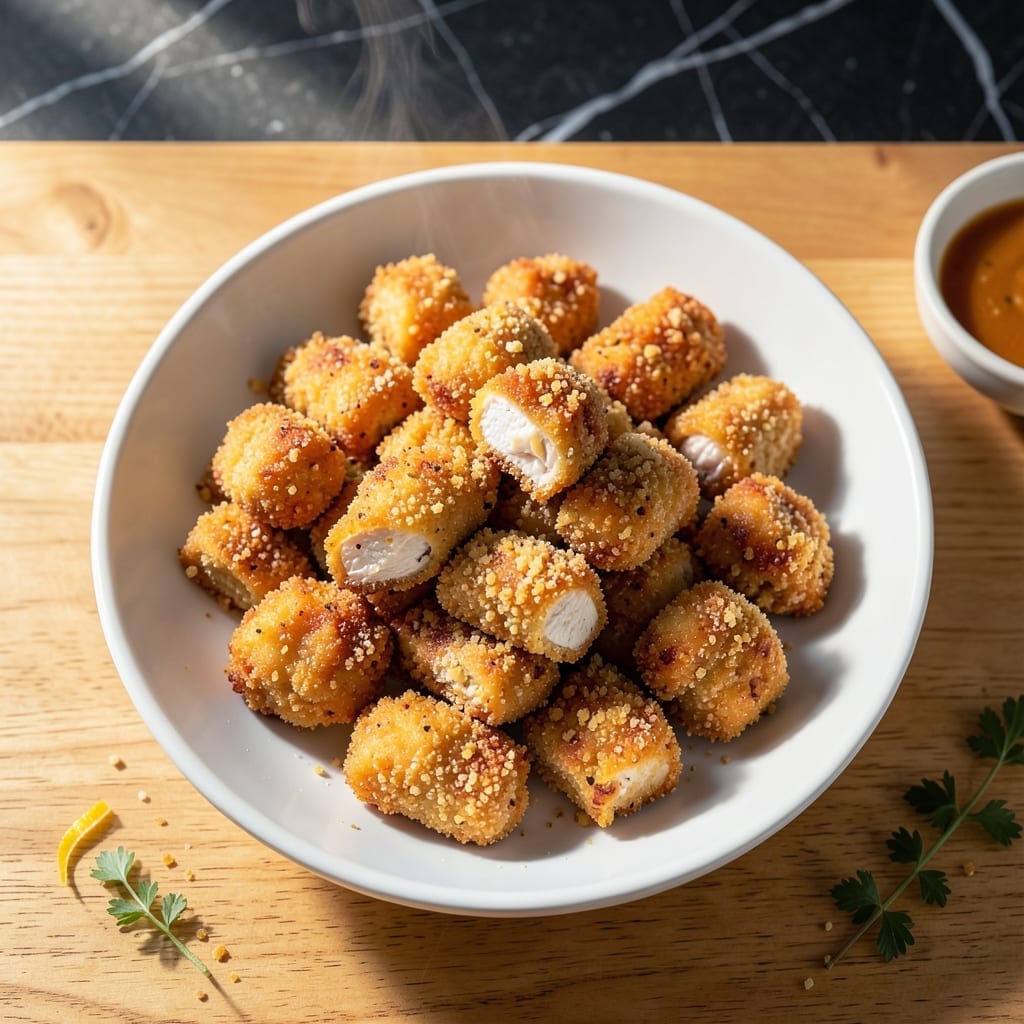
There’s a reason everyone loves crispy chicken nuggets—they’re impossible to resist when done right. This method delivers golden, crunchy perfection every time, with a tender interior that stays juicy.
I’ve refined this technique to ensure even cooking and maximum crunch without deep frying. A simple breading process and the right oil temperature make all the difference.
What you’ll get is uniform nuggets with a shatteringly crispy coating and meat that’s moist and flavorful. No soggy bottoms, no dry centers—just consistent results.
Serve them hot with your favorite dipping sauces for a meal that’s sure to satisfy.
Ingredients for Chicken Nuggets
Pantry staples plus chicken deliver that shatteringly crispy, golden perfection everyone craves.
| Ingredient | Amount | Notes |
|---|---|---|
| Boneless Skinless Chicken Breasts 🍗 | 1 ½ lb | Cut into 1-inch pieces |
| All-Purpose Flour 🌾 | 1 cup | For initial dredging |
| Large Eggs 🥚 | 2 whole | Beaten for egg wash |
| Panko Breadcrumbs 🍞 | 2 cups | For extra-crispy coating |
| Cornstarch 🌾 | ¼ cup | Mixed with flour for crunch |
| Garlic Powder 🧄 | 1 tsp | For breading seasoning |
| Onion Powder 🧅 | 1 tsp | For breading seasoning |
| Paprika 🌶️ | 1 tsp | Sweet or smoked variety |
| Salt 🧂 | 1 tsp | Divided for seasoning |
| Black Pepper 🌶️ | ½ tsp | Freshly ground preferred |
| Vegetable Oil 🫒 | 2 cups | For shallow frying |
| Buttermilk 🥛 | ½ cup | For tenderizing chicken |
The chicken is the star here. Boneless, skinless breasts stay juicy and cook evenly—avoid pre-ground chicken as it can dry out. I grab mine from Costco for bulk savings, but any grocery store works. Cut them into uniform 1-inch pieces (about the size of a golf ball) for consistent cooking. The buttermilk soak is non-negotiable—it tenderizes and helps the coating cling like a dream.
No buttermilk? Whole milk plus a tablespoon of lemon juice or vinegar gets you close. Panko is ideal for crunch, but crushed cornflakes or Ritz crackers work in a pinch (just pulse them in a food processor first). Want more flavor? Add grated Parmesan to the breading. The cornstarch in the flour mix is the secret to that extra-crispy texture—don’t skip it.
Uncooked chicken only keeps 1-2 days in the fridge, so prep this the day you’re cooking. Cooked nuggets reheat best in the air fryer or oven at 375°F for 8-10 minutes. They’ll keep 3-4 days in the fridge, but honestly, they’re best fresh.
Why You’ll Love This Recipe
- Under 30 Minutes: I can go from raw chicken to golden nuggets faster than my oven preheats.
- Crispy Outside, Tender Inside: The panko and cornstarch combo gives that restaurant-style crunch with juicy chicken every time.
- Kid-Approved Classic: Even my picky nephew clears his plate and asks for more.
- Budget Stretcher: One pound of chicken breasts makes enough nuggets for two meals, and leftovers reheat beautifully.
Step-by-Step Instructions for Chicken Nuggets
Here’s the method I use for ultra-crispy results that stay golden even after cooling.
Step 1: Prep and Season the Chicken
Cut the 1.5 lb boneless skinless chicken breasts into 1-inch pieces. I keep them uniform so they cook evenly. Toss the pieces in 0.5 cup buttermilk with ½ tsp salt—this tenderizes the meat and gives the coating something to cling to.
Let it marinate for 15 minutes while you set up your breading station. The buttermilk will turn milky white as it works its magic. Don’t skip this step; it’s what makes the nuggets juicy inside despite the crispy exterior.
Step 2: Create the Breading Station
In a shallow bowl, whisk together the 1 cup all-purpose flour, 0.25 cup cornstarch, 1 tsp garlic powder, 1 tsp onion powder, 1 tsp paprika, remaining ½ tsp salt, and 0.5 tsp black pepper. The cornstarch is key—it creates that extra-crispy texture that sets these apart from regular chicken nuggets.
In another bowl, beat the 2 whole large eggs until smooth. Then place the 2 cups panko breadcrumbs in a third bowl. This three-step station—flour, egg, panko—ensures maximum crunch and adhesion. I like to use wide, shallow bowls for easy dredging.
Step 3: Bread the Chicken Properly
Working with one piece at a time, remove the chicken from the buttermilk (let excess drip off) and dredge it in the flour mixture. Press gently to adhere. Then dip it in the beaten eggs, letting any excess drip off. Finally, roll it in the panko, pressing firmly so the crumbs stick in an even, thick layer.
Place the breaded pieces on a wire rack set over a baking sheet. This setup allows air circulation on all sides, preventing the coating from getting soggy while you finish breading the rest. You should have about 24-30 nuggets total. If your hands get gummy, wet them slightly—it prevents sticking.
Step 4: Fry to Golden Perfection
Heat the 2 cups vegetable oil in a large, deep skillet over medium-high heat until it reaches 350°F. Use a deep-fry thermometer for accuracy—if the oil isn’t hot enough, the nuggets will absorb oil and turn greasy instead of crispy.
Fry the nuggets in batches for 3-4 minutes per side until they’re deep golden brown and the internal temperature hits 165°F. Don’t overcrowd the pan—this lowers the oil temperature and leads to uneven cooking. Transfer to a paper towel-lined plate to drain.
Step 5: Rest and Serve While Hot
Let the nuggets rest for 2-3 minutes after frying. This brief pause allows the crust to set and the juices to redistribute, ensuring they stay crispy. The coating should audible crack when you bite into it—that’s the sound of perfect crunch.
Serve immediately while hot. These nuggets maintain their crispness for about 15 minutes after frying, making them ideal for gatherings. If you need to keep them warm longer, place them on a wire rack in a 200°F oven—never stack them, as the steam will make them soggy.
Pro Tips For Making Chicken Nuggets
- Double Dredge: Dip the chicken in flour, then egg, then panko, and repeat the egg and panko step—I learned this the hard way after my first batch had bald spots.
- Chill Before Frying: Give the breaded nuggets 10 minutes in the fridge so the coating sticks better, especially when working with panko’s coarse texture.
- Cut Evenly: Slice the chicken breasts into uniform 1-inch pieces so they cook at the same rate—after burning a few uneven bits, I finally wised up.
- Add Cornstarch: Mix 1 tablespoon of cornstarch into the flour for extra crispiness; sounds weird, but it works.
Perfect Pairings for This chicken nuggets
Classic Dipping Sauces
You can’t go wrong with ketchup and mustard—the tangy sweetness of Heinz ketchup balances the crispy saltiness perfectly. I also love honey mustard made with 3 tbsp mayo, 2 tbsp yellow mustard, and 1 tbsp honey. It’s creamy with just the right kick. 💛
Creamy Favorites
Ranch dressing is a must—Hidden Valley is my go-to for that herby, cool contrast. For something richer, try blue cheese dressing with extra crumbles. Both pair especially well with the garlic and onion notes in the breading.
Spicy Options
For heat lovers, sriracha mayo (mix ¼ cup mayo with 1 tbsp sriracha) adds a fiery touch. Buffalo sauce works too—just thin it with a little melted butter for dipping. Both cut through the richness beautifully. 🔥
Fresh Pairings
Balance the crunch with fresh sides like carrot and celery sticks or a simple green salad with lemon vinaigrette. The acidity brightens up the meal. I also love serving these with pickle spears for a tangy crunch.
Kid-Friendly Combos
Make it a fun meal with sweet potato fries or tater tots on the side. For dipping, offer barbecue sauce or cheese sauce—both are always a hit. Serve with apple slices for a sweet, fresh finish.
Nutrition Facts
Frequently Asked Questions
Can I bake these instead of frying?
Bake at 400°F for 15-20 minutes, flipping halfway. Use a wire rack on a baking sheet for even crispiness. Spray with oil for extra crunch.
Why is the buttermilk soak important?
It tenderizes the meat and helps the coating adhere better. The acidity breaks down proteins, ensuring juicy results. Don’t skip this step for best texture!
How do I keep them crispy after cooking?
Place on a wire rack in a 200°F oven. Never stack them—steam causes sogginess. Serve within 15 minutes for peak crispiness.
What’s the best oil for frying?
Use oils with a high smoke point like vegetable, canola, or peanut oil. Avoid olive oil—it can burn at 350°F.

- Jollof Rice Sauce Recipe: West African Tomato and Spice Infusion - September 25, 2026
- Japanese Rice Soup Recipe: Umami-Rich Comfort in a Bowl - September 25, 2026
- Homemade Cream Of Rice Recipe: Silk-Smooth Breakfast in Minutes - September 25, 2026