
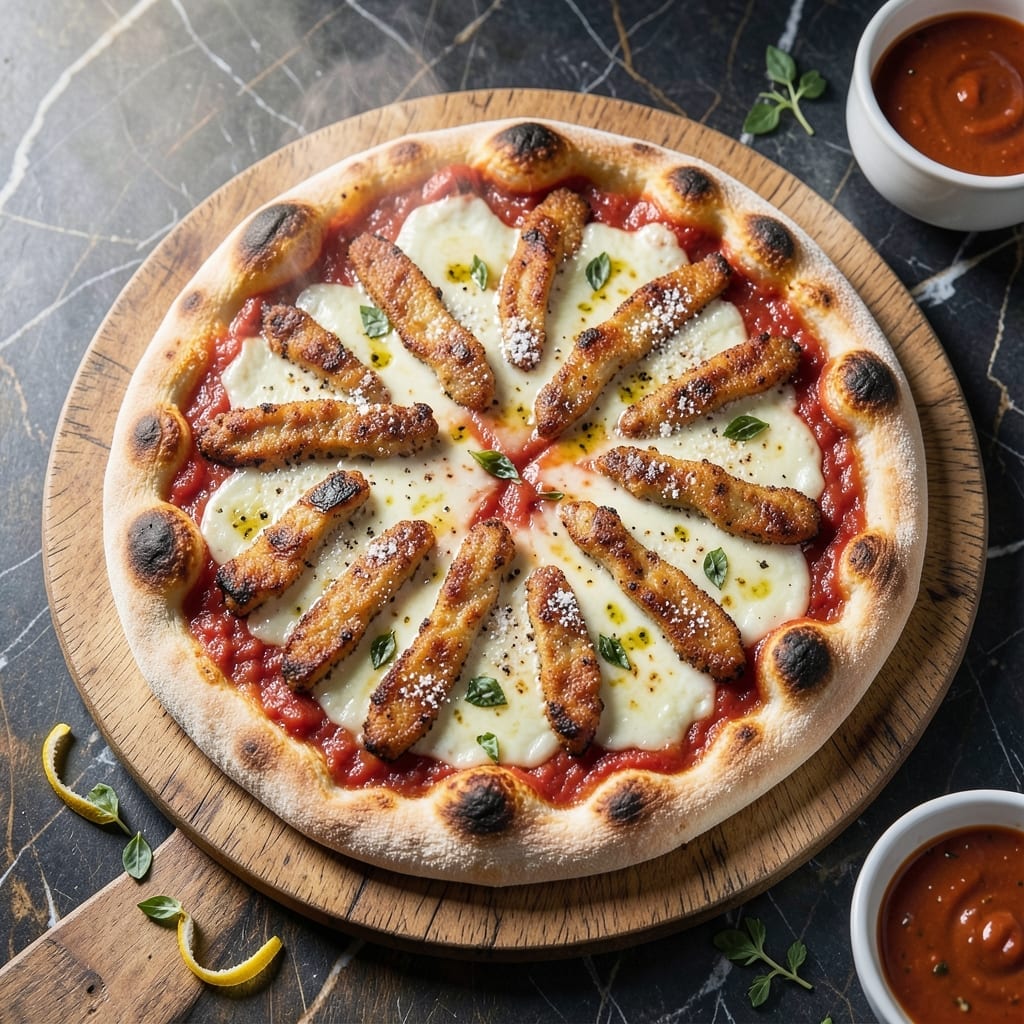
This recipe combines the best of two Italian classics into one crowd-pleasing dish. A crispy pizza crust gets topped with tangy marinara, breaded chicken, and a blanket of melted mozzarella for a meal that’s both comforting and impressive.
I developed this method to streamline the process without sacrificing flavor. The chicken is breaded and pan-fried for that signature crunch, then layered with sauce and cheese before baking. It’s a foolproof way to get restaurant-quality results at home.
The final product is a pizza with a golden, bubbling cheese layer, tender chicken, and a sauce that soaks into every bite. Each slice delivers the familiar flavors of chicken parmesan with the convenience of pizza night.
Perfect for family dinners or casual gatherings, this dish is sure to become a regular in your rotation.
Ingredients for Chicken Parm Pizza
Pantry staples and a few fresh picks make this dish sing.
| Ingredient | Amount | Notes |
|---|---|---|
| Pizza Dough 🍕 | 1 lb | Store-bought or homemade |
| Chicken Breast 🍗 | 1 ½ lb | Boneless, skinless, cut into strips |
| All-Purpose Flour 🌾 | 1 cup | For breading chicken |
| Large Eggs 🥚 | 2 whole | Beaten for breading |
| Italian Breadcrumbs 🍞 | 1 ½ cups | Panko for extra crunch |
| Marinara Sauce 🍅 | 2 cups | Homemade or jarred |
| Mozzarella Cheese 🧀 | 8 oz | Shredded, low-moisture |
| Parmesan Cheese 🧀 | ½ cup | Freshly grated from block |
| Olive Oil 🫒 | ½ cup | For frying and drizzling |
| Garlic Powder 🧄 | 1 tsp | For seasoning breadcrumbs |
| Dried Oregano 🍃 | 1 tsp | For seasoning breadcrumbs |
| Salt 🧂 | 1 tsp | Kosher or sea salt |
| Black Pepper 🌶️ | ½ tsp | Freshly ground preferred |
| Fresh Basil 🌿 | ¼ cup | Chopped, for garnish |
The chicken quality matters. Boneless, skinless breasts work best—thighs stay too moist for breading. Most supermarkets carry pre-cut tenders (worth the time savings). For the mozzarella, low-moisture from a block shreds better than pre-shredded. I grab mine at Whole Foods—their 365 brand melts beautifully. The marinara can be jarred, but Rao’s or Victoria elevate the flavor significantly.
No Italian breadcrumbs? Panko plus a pinch of garlic powder actually gives better crunch. Short on Parmesan? Pecorino Romano has a sharper bite (use half the amount). The olive oil should be something you’d eat raw—California Olive Ranch is a solid grocery store pick. Fresh basil is ideal, but dried basil at one-third the amount works if that’s what’s on hand.
Leftovers keep 3-4 days in the fridge—reheat in a skillet to crisp the crust. Freeze unbaked pizza for up to 1 month. I always make extra breaded chicken strips for quick lunches during the week (they reheat in 5 minutes).
Why You’ll Love This Recipe
- I’ll be real: it tastes even better the next day, and one batch feeds us for two meals.
- No-Fuss Assembly: I just roll out the dough, bread the chicken, and let the oven do the work—no fancy techniques needed.
- Crave-Worthy Bite: The crispy breadcrumb-coated chicken paired with melty cheese on pizza dough is pure comfort.
- Weeknight Hero: Honestly, it’s my go-to for busy evenings when I need dinner fast but still want that restaurant feel.
Step-by-Step Instructions for Chicken Parm Pizza
This layered approach combines crispy breaded chicken with classic pizza elements for perfect results.
Step 1: Prepare and Bread the Chicken
Cut the chicken breast into ½-inch thick strips and pat them completely dry with paper towels. This ensures the breading adheres properly. Season both sides with ½ tsp salt and ¼ tsp black pepper—this builds flavor from the inside out.
Set up a breading station with three shallow dishes. Place the all-purpose flour in one, beat the large eggs in another, and mix the Italian breadcrumbs with garlic powder, dried oregano, and remaining ½ tsp salt and ¼ tsp black pepper in the third. The seasoned breadcrumbs create that signature crispy, flavorful coating.
Dredge each chicken strip in flour, shaking off excess, then dip in egg, letting any excess drip off. Press into the breadcrumb mixture, coating completely. Place breaded chicken on a plate and let rest for 5 minutes to help the coating set before frying.
Step 2: Pan-Fry the Chicken to Golden Perfection
Heat ¼ cup olive oil in a large skillet over medium-high heat until shimmering but not smoking. Working in batches to avoid crowding, add the breaded chicken strips. Crowding lowers the oil temperature and results in soggy breading instead of crispy.
Cook for 3-4 minutes per side until golden brown and the internal temperature reaches 165°F. You’ll know it’s ready to flip when the bottom edge appears crisp and releases easily from the pan. Transfer cooked chicken to a paper towel-lined plate to drain excess oil.
Add more olive oil to the pan as needed between batches, allowing it to heat up again before adding more chicken. This maintains consistent frying temperature for even cooking and browning.
Step 3: Preheat Oven and Prepare Pizza Base
Preheat your oven to 475°F with a pizza stone or inverted baking sheet inside. While the oven heats, stretch the pizza dough on a piece of parchment paper to a 12-inch round. Lightly brush the surface with some of the remaining olive oil to create a barrier that prevents the sauce from making the crust soggy.
Spread 1 cup marinara sauce evenly over the dough, leaving a ½-inch border for the crust. The thin layer of sauce prevents a wet pizza while still delivering that rich tomato flavor. Sprinkle ½ of the mozzarella cheese evenly over the sauce to create a cheesy base layer.
Step 4: Assemble and Bake the Pizza
Arrange the cooked chicken strips evenly over the cheese layer. Top with the remaining mozzarella cheese and all the Parmesan cheese. The combination of cheeses creates that perfect stretchy, melty texture with a slightly sharper flavor from the Parmesan.
Slide the pizza (with parchment) onto the preheated stone or baking sheet. Bake for 12-15 minutes until the crust is golden brown and the cheese is bubbly and starting to brown in spots. The high heat ensures a crispy crust while melting the cheese perfectly.
Remove from the oven and let rest for 2 minutes before slicing. This brief rest allows the cheese to set slightly, making it easier to cut clean slices without all the toppings sliding off.
Step 5: Garnish and Serve
Sprinkle the chopped fresh basil evenly over the hot pizza. The heat from the pizza will release the basil’s aromatic oils, enhancing the overall flavor. Drizzle with the remaining olive oil for a glossy finish and extra richness.
Slice into 8 equal pieces and serve immediately while hot. Each slice should showcase the crispy chicken, melty cheese, and tangy tomato sauce in perfect harmony, with the fresh basil adding a bright, herbal note to every bite.
Pro Tips For Making Chicken Parm Pizza
- Pound the Chicken: Slice the chicken breast horizontally, then pound each piece to an even 1/2-inch thickness—this guarantees even cooking and prevents dry, chewy spots under the breading.
- Rest the Breaded Chicken: Let the breaded chicken rest for 5 minutes before frying so the coating adheres properly; I learned this the hard way after losing half the crust to the pan.
- Skip the Overcrowding: Fry the chicken in batches with at least an inch between pieces, or the oil temperature drops and you’ll end up with soggy, greasy cutlets instead of crispy ones.
- Bake Dough First: Pre-bake the pizza dough for 5-6 minutes at 425°F before adding toppings—this prevents a gummy crust under all that sauce and cheese.
Troubleshooting chicken parm pizza
Soggy Breading Fix
If your breading isn’t crispy, the oil temperature is likely too low. Use a thermometer to maintain 350-375°F in the pan. Also, work in small batches to avoid crowding—overcrowding drops the temperature fast. I always fry in 2-3 batches for best results. 🌡️
Pizza Crust Issues
For a soggy crust, pre-bake the dough for 3-4 minutes before adding toppings. This creates a barrier against moisture. Also, use less sauce—stick to 1 cup max for a 12-inch pizza to prevent a wet center.
Cheese Not Melting
Shred your own cheese from a block—pre-shredded contains anti-caking agents that prevent smooth melting. Also, ensure your oven is fully preheated to 475°F before baking. The high heat is crucial for that perfect cheese pull.
Chicken Overcooking
Pan-fry the chicken just until 165°F internal temperature, then finish cooking in the oven. This prevents dry, overcooked meat. I use a meat thermometer for accuracy and never guess. 💡
Uneven Baking
Rotate your pizza halfway through baking for even browning. If using a home oven, place the rack in the middle position. For extra crispiness, bake directly on a preheated pizza stone or inverted baking sheet.
Blanding Flavor
Boost flavor by seasoning each layer—salt your chicken, sauce, and cheese. A pinch of garlic powder in the breadcrumbs and a sprinkle of dried oregano on the sauce make a big difference. Fresh basil at the end adds brightness.
Nutrition Facts
Frequently Asked Questions
Can I use pre-cooked chicken?
Yes, but pan-fry it briefly to crisp the breading. Use 165°F internal temp as your guide. Skip the initial frying step and add directly to the pizza before baking.
How do I prevent a soggy crust?
Pre-bake the dough for 3-4 minutes before adding toppings. Also, use only 1 cup of sauce for a 12-inch pizza to avoid excess moisture.
What’s the best cheese for melting?
Low-moisture mozzarella shredded from a block melts best. Avoid pre-shredded as it contains anti-caking agents that affect texture.
Can I make this ahead of time?
Assemble the pizza without baking, then refrigerate for up to 4 hours. Bake as directed, adding 2-3 minutes if needed.

- Jollof Rice Sauce Recipe: West African Tomato and Spice Infusion - September 25, 2026
- Japanese Rice Soup Recipe: Umami-Rich Comfort in a Bowl - September 25, 2026
- Homemade Cream Of Rice Recipe: Silk-Smooth Breakfast in Minutes - September 25, 2026