
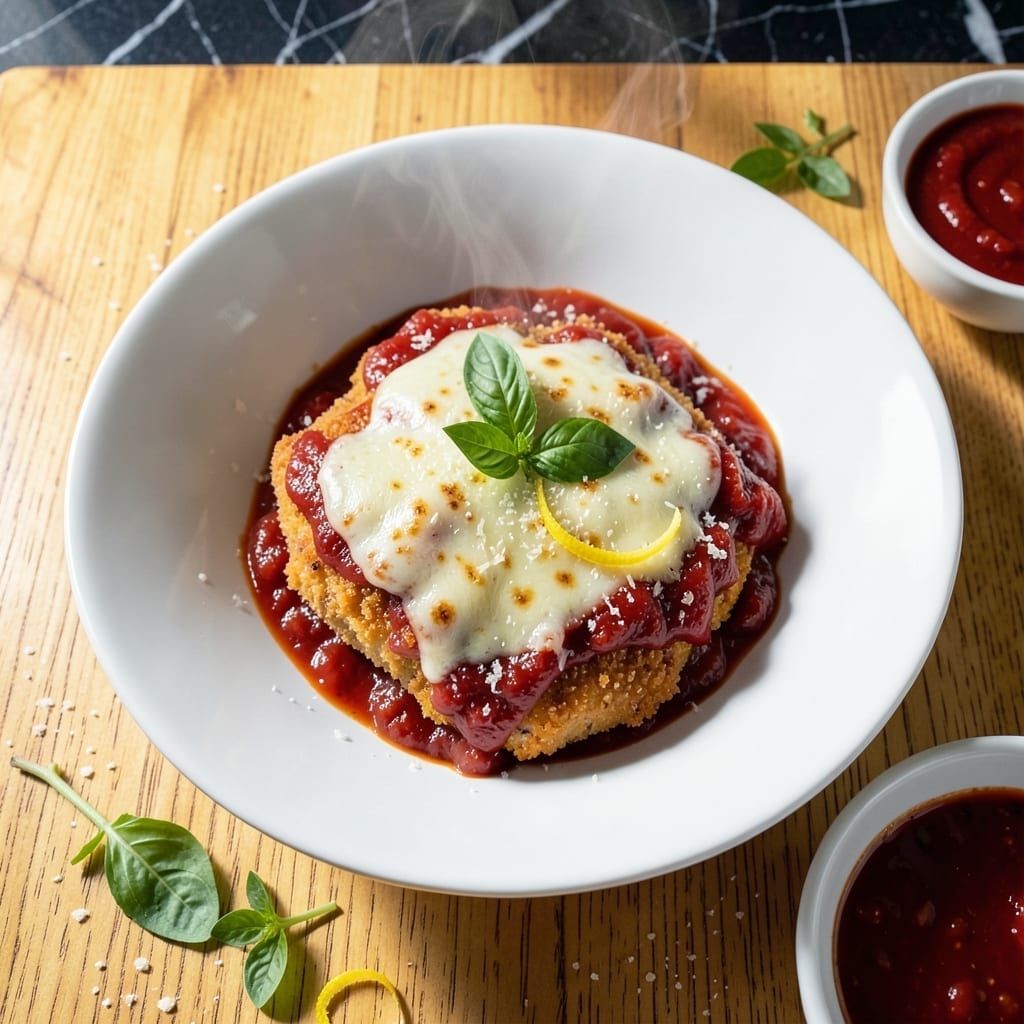
This classic Italian dish brings together crispy breaded chicken, tangy tomato sauce, and melty cheese in perfect harmony. I’ve refined this method to stay true to tradition while ensuring every bite delivers that authentic comfort we all crave.
The key lies in the layering—golden-fried cutlets topped with rich marinara and a blend of mozzarella and parmesan, then baked until bubbling. Each element is simple, but together they create something extraordinary.
You’ll achieve a crisp exterior that gives way to tender chicken, all smothered in sauce so flavorful it tastes like it simmered for hours. The cheese forms that irresistible golden crust on top.
Serve it hot with pasta or a fresh salad for a meal that feels like a hug on a plate. This is how chicken parmigiana was meant to be made.
Ingredients for Chicken Parmigiana Original
Pantry staples meet deli counter finds for this Italian classic. Nothing fancy here.
| Ingredient | Amount | Notes |
|---|---|---|
| Chicken Breasts 🍗 | 1 ½ lb | Boneless, skinless, pounded thin |
| All-Purpose Flour 🌾 | 1 cup | For dredging chicken |
| Large Eggs 🥚 | 2 whole | Beaten for egg wash |
| Italian Breadcrumbs 🍞 | 1 ½ cups | Panko works too |
| Parmesan Cheese 🧀 | 1 cup | Freshly grated from block |
| Marinara Sauce 🍅 | 2 cups | Homemade or quality jarred |
| Mozzarella Cheese 🧀 | 8 oz | Fresh mozzarella, sliced |
| Fresh Basil 🌿 | ¼ cup | Chopped, for garnish |
| Garlic Cloves 🧄 | 4 cloves | Minced for sauce |
| Olive Oil 🫒 | ½ cup | For frying chicken |
| Salt 🧂 | 1 tsp | Kosher or sea salt |
| Black Pepper 🌶️ | ½ tsp | Freshly ground preferred |
| Dried Oregano 🍃 | 1 tsp | For marinara flavor |
| Red Pepper Flakes 🌶️ | ½ tsp | Optional for heat |
The cheese makes or breaks this. Grab a wedge of Parmigiano-Reggiano from the deli—pre-grated doesn’t melt right and tastes like sawdust. For mozzarella, fresh is ideal (that milky, soft kind), but low-moisture from a block works too. Just shred it yourself. The chicken should be similar-sized breasts for even cooking—pound the thick end if needed. Most grocery stores carry everything you need.
No Italian breadcrumbs? Panko plus Italian seasoning gives you a crispier crust. Fresh out of basil? Dried oregano at half the amount works in a pinch. The marinara can be jarred (I won’t tell)—Rao’s or Victoria are my go-tos. Making your own? San Marzano tomatoes, garlic, olive oil—done in 20 minutes. Skip the pre-minced garlic in jars though. Fresh takes seconds to chop.
This reheats beautifully—honestly tastes better the next day once everything melds. Keeps 4-5 days in the fridge, freezes for up to 3 months. I portion leftovers into containers so lunches are sorted for the week.
Why You’ll Love This Recipe
- One Pan Magic: I bread and bake everything on a single sheet pan—no messy splatter, just golden chicken with melty cheese.
- That Crunch Factor: The Italian breadcrumbs and parmesan create a crust so crispy it shatters, with juicy chicken underneath. Honestly, it’s why I make this weekly.
- Feeds the Crew: One batch satisfies my whole family, with leftovers that reheat beautifully for lunch the next day.
- Budget Hero: Chicken breasts and pantry staples keep the cost down, but it tastes like a restaurant meal. I’ll be real: it’s my go-to for impressing guests without overspending.
Step-by-Step Instructions for Chicken Parmigiana
Here’s the method. Straightforward, tested, works every time.
Step 1: Bread and Fry the Chicken to Golden Perfection
Start by pounding the 1.5 lb chicken breasts to an even ½-inch thickness between plastic wrap. Season both sides with 1 tsp salt and 0.5 tsp black pepper. Set up a breading station: one bowl with 1 cup all-purpose flour, another with 2 whole beaten large eggs, and a third with 1.5 cups Italian breadcrumbs mixed with ½ cup of the Parmesan cheese.
Dredge each piece in flour, shaking off excess, then dip in egg, letting excess drip off, and finally press into the breadcrumb mixture. Heat 0.5 cup olive oil in a large skillet over medium-high heat. Fry the chicken for 3-4 minutes per side until golden brown and crispy. Transfer to a paper towel-lined plate to drain.
Step 2: Enhance the Marinara with Garlic and Herbs
In a separate saucepan, warm the 2 cups marinara sauce over medium heat. Stir in minced 4 cloves garlic cloves, 1 tsp dried oregano, and 0.5 tsp red pepper flakes. Let it simmer for 5-7 minutes until the flavors meld and the sauce thickens slightly.
This step adds depth to the sauce that perfectly complements the crispy chicken. Keep the heat gentle to avoid burning the garlic. The sauce should be bubbling softly and smell incredibly fragrant when it’s ready.
Step 3: Layer and Bake Until Bubbly and Melty
Preheat your oven to 375°F. Spread ½ cup of the enhanced marinara sauce in the bottom of a baking dish. Place the fried chicken pieces in a single layer. Spoon the remaining sauce over each piece, then top with sliced 8 oz mozzarella cheese and the remaining ½ cup Parmesan cheese.
Bake for 15-20 minutes until the cheese is fully melted and bubbly with golden brown spots. The edges of the sauce should be gently caramelized around the pan. This melting step marries all the flavors together.
Step 4: Rest and Garnish for the Perfect Finish
Remove from the oven and let rest for 5 minutes. This allows the cheese to set slightly so it doesn’t all slide off when serving. Sprinkle with chopped 0.25 cup fresh basil just before serving—the heat from the dish will release its aroma beautifully.
Serve hot with extra sauce and cheese if desired. Each portion should have crispy breaded chicken, melty cheese that stretches for miles, and rich tomato sauce in every bite.
Pro Tips For Making Chicken Parmigiana Original
- Pound the Chicken: Use a meat mallet to pound the chicken breasts to an even 1/2-inch thickness—I learned this the hard way after ending up with dry, overcooked edges and underdone centers more times than I care to admit.
- Mix Cheese In: Combine the Parmesan cheese directly into the Italian breadcrumbs before dredging. Sounds simple, but it actually changes the outcome by giving the crust a richer, more uniform flavor.
- Skip the Overcrowding: Fry the breaded chicken in batches with about 2 tablespoons of oil per piece—any less and they’ll steam instead of crisp. Resist the urge to rush this part.
- Rest Before Sauce: Let the fried chicken rest on a wire rack for 5 minutes before adding sauce and cheese—this keeps the coating from turning soggy. My grandmother swore by this, and she was right.
Wine and Beer Pairings for These Flavors
Italian Wine Pairings
For a classic pairing, I love a medium-bodied Chianti Classico from Tuscany. Its bright acidity and cherry notes cut through the richness of the cheese and tomato sauce. Look for bottles from Ruffino or Castello di Volpaia for reliable quality at $15-25. 🍷
Lighter White Options
A crisp Pinot Grigio from Friuli works beautifully, especially if you prefer white wine. The citrus and mineral notes complement the dish without overpowering it. Santa Margherita makes a widely available version that’s consistently good.
Beer Lovers’ Choices
For beer, a light Italian lager like Peroni or Birra Moretti cleanses your palate between bites. The effervescence cuts through the richness while the mild flavor doesn’t compete. Serve it ice cold in a tall glass. 🍺
Bold Red Alternative
If you prefer fuller reds, try a Sangiovese from Umbria. Its earthy notes and moderate tannins stand up to the fried chicken and tomato sauce. I particularly enjoy Falesco‘s version, which offers great value.
Sparkling Option
For a celebratory touch, Prosecco works surprisingly well. The bubbles refresh your palate, and the slight sweetness balances the dish’s acidity. La Marca is a reliable, widely available choice.
Nutrition Facts
Frequently Asked Questions
What’s the best way to keep the breading crispy?
Fry until golden brown first, then bake at 375°F for 15-20 minutes. Place the dish on a wire rack to allow air circulation underneath.
Can I use chicken thighs instead of breasts?
Yes! Bone-in, skinless thighs work well and stay juicier. Pound them to ½-inch thickness and adjust frying time to 4-5 minutes per side.
Why did my cheese slide off when serving?
Let it rest for 5 minutes after baking. This gives the cheese time to set slightly. Also, slice the mozzarella thicker for better adhesion.
How do I make this gluten-free?
Swap the flour and breadcrumbs for gluten-free versions. Use 1:1 gluten-free flour and gluten-free panko for the same crispy texture.

- Jollof Rice Sauce Recipe: West African Tomato and Spice Infusion - September 25, 2026
- Japanese Rice Soup Recipe: Umami-Rich Comfort in a Bowl - September 25, 2026
- Homemade Cream Of Rice Recipe: Silk-Smooth Breakfast in Minutes - September 25, 2026